These are the instructions for a Minecraft pig farm. This is a very simple build for a pig farm. This makes this an ideal early build to get food in Minecraft especially when you are still trying to find resources like iron. The player will have to completely control this farm with feeding, breeding and killing.
Pigs can be used for the following things:
Food source – pork is an ideal food source.
Breeding – pork can be used to breed and heal wolves.
Growth – pork can be used to speed up wolf puppy growth.
Trading – can be traded with butchers.
Pork is mainly gained from pigs in Minecraft. However it can sometimes found in either a generic chest or a hoglin stable chest in a Bastian Remnant in the Nether.
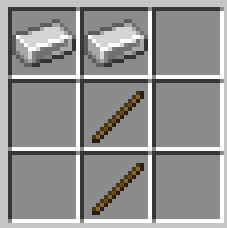
Ingredients
These are the ingredients and recipes that you will need to make this Minecraft pig farm. Please ensure that you have all of the ingredients before you start your build.
Item
Picture
Amount
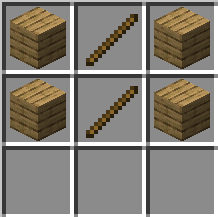
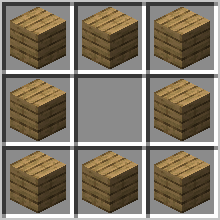
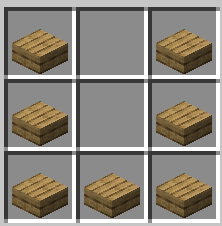
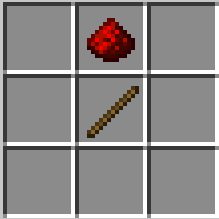
Fence
23
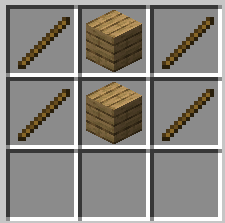
Gate
1
Carrot
Stack
Build Plans
Here we will explain in detail how to build a Minecraft pig farm. Please follow the instructions carefully.
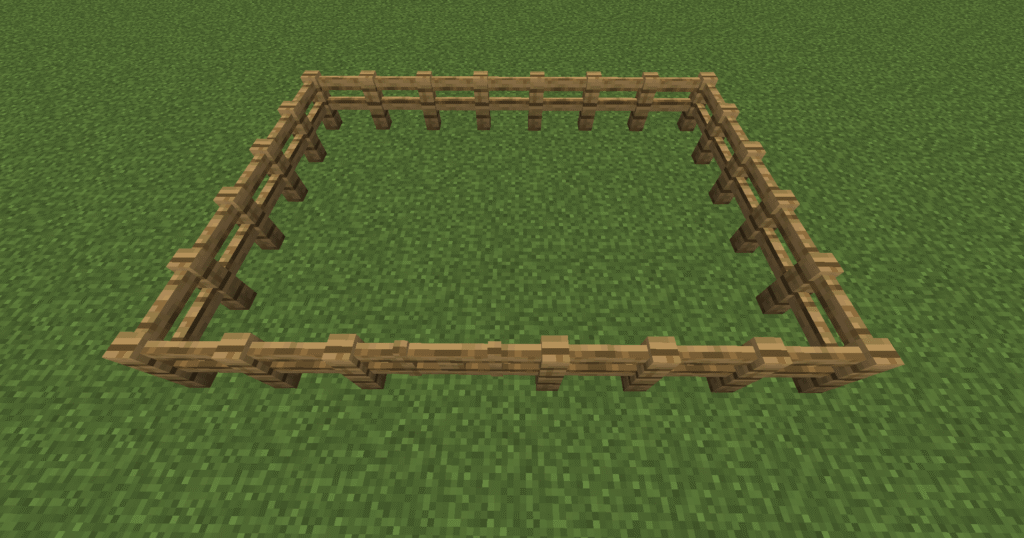
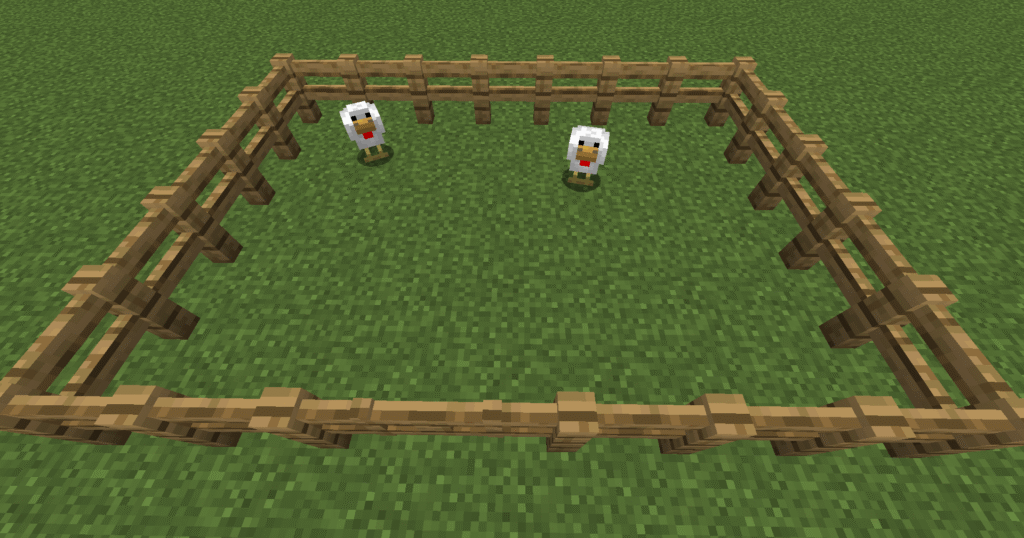
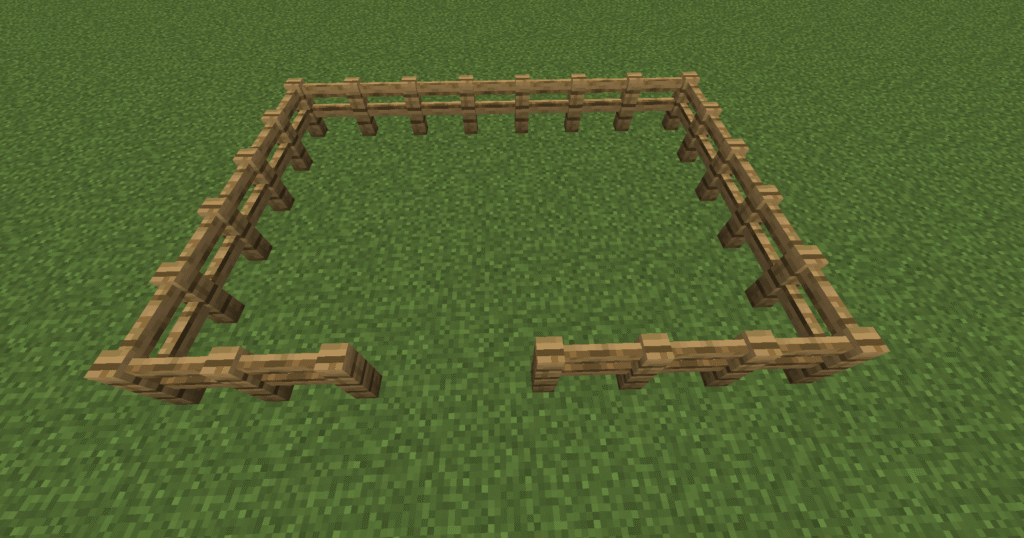
First lets build an enclosure using the fences. Please ensure that you leave a gap for the gate. This enclosure can be as big or as small as you like depending on how many pigs you would like to keep or breed.
Next you will need to add the gate so you can get into and out of the enclosure.
Now lets get some pigs into the enclosure.
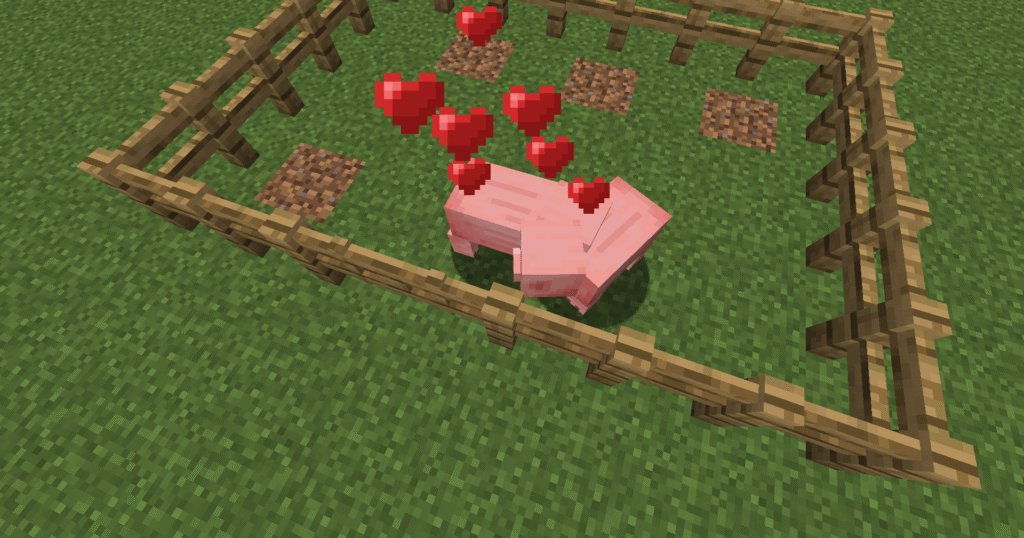
You will need to use the carrots to lure the pigs into your enclosure. If you hold the carrot in your hand the pigs will follow you.
After feeding the pigs carrots (potatoes and beetroot will also work) they will start to breed. The hearts above the pigs mean that they are breeding and then a baby pig will appear.
Where next
Additions to the build –
A nice addition to this build is to place a carpet tile on top of a fence post. This will enable you to jump in and out of the pen without opening the gate. This can stop the pigs getting out and mobs getting in.
These are the instructions for a Minecraft chicken farm. This chicken farm produces chickens and eggs. The chickens automatically drop the eggs but you will need to kill them to get raw chicken. This farm is a basic pen for the chickens and relies on the player for feeding, breeding and killing.
The main product of this build is chicken and can be used for the following:
Food -chickens are a great source of food.
Spawning – chickens appear naturally in grassy biomes with sufficient space and light.
Hatching – chickens can hatch when players throw eggs.
Drops – chickens lay eggs every 5 – 10 mins.
Behaviour -peaceful and wander around aimlessly.
Breeding – chickens are bred using any seed i.e. wheat seeds or pumpkin seeds.
Eggs are the another product of this build and can be used for the following things:
Hatching – eggs can be thrown and there’s a chance that they will hatch baby chickens.
Crafting – can be used to make cakes.
Crafting – can be used to make pumpkin pie.
Attacking – eggs can be thrown as a projectile, they deal no damage but push entities back slightly.
Trading – eggs can be traded in some villager trades.
Feathers are the another product of this build and can be used for the following things:
Crafting – feathers can be used to craft arrows, firework stars and brushes.
Book and quill – can be made by combining a book, ink sac and a feather.
Trading – with fletcher villages
Drops – chickens will drop between 0-2 feathers upon death.
Chickens can be found in any grassy biomes usually in groups of up to four. They will lay eggs randomly in the wild. There are two new chicken variants now, warm chickens which will spawn in jungles, badlands and savannahs and cold chickens which will spawn in windswept hills or taigas.
Ingredients
These are the ingredients and recipes that you will need to make this Minecraft chicken farm. Please ensure that you have all of the ingredients before you start your build.
Item
Picture
Amount
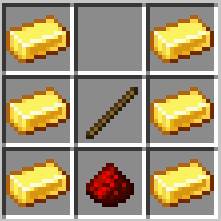
Fence
23
Gate
1
Wheat seeds
Stack
Chickens
2 minimum
Build Plans
Here we will explain in detail how to build a Minecraft chicken farm. Please follow the instructions carefully.
First lets build an enclosure using the fences. Ensure that you leave a gap for the gate.
This pen can be as big or as small as you wish depending on how many chickens you intend to keep.
Next add the gate so you can get into and out of the enclosure.
Now lets get some chickens into the enclosure.
Lure the chickens through the gate by holding seeds in your hand.
Remember to shut the gate behind you once the chickens are in.
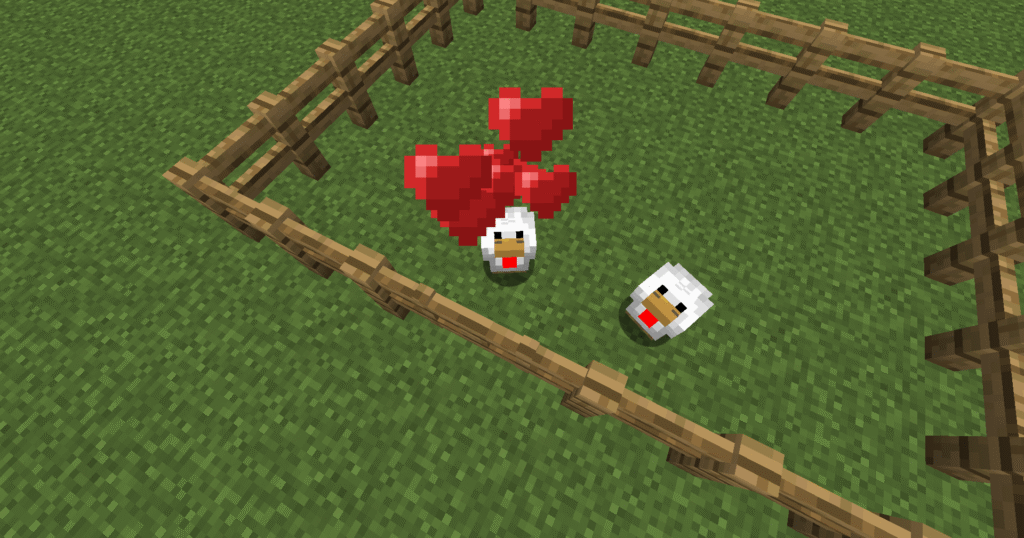
After feeding the chickens seeds they will start to breed.
The hearts coming out of the chickens mean that they are breeding and you can expect to find a baby chick.
The chickens will also lay eggs which can be collected and either thrown to see if they hatch more chickens or used as described above.
Hints and tips
What can go wrong – chickens can escape:
Ensure that your gates are shut when you enter or leave the pen.
Where next
Additions to the build
One of the additions for this build is to put a carpet tile on top of one of the fences. This will enable you to enter the pen more easily without opening the gate and risk the chickens escaping. The player would have to jump over the fence by jumping on the carpet tile.
These are the instructions for a Minecraft cow farm. Cows are produced either in the wild or are bred by feeding them wheat. This is a cow farm early build as it gives the player a ready supply of raw beef/steak and leather.
This farm is a simple pen housing the cows and relies on the player feeding, breeding and killing the cows.
The product of this build is cows.
Food – cows produce raw beef/steak which once cooked is a great source of food.
Leather – cows drop leather when killed. This can be used for making books, armour, item frames and trading with villagers.
Milk – cows can be milked the milk can be used for removing status effects, baking cakes, Countering the whither effect.
Breeding – cows can be bred very easily by the player producing an endless supply.
Here’s where you can find cows and leather and other uses for them:
Cows – can be found in most places on the map where there are grass blocks.
Milk – can be gained by placing an iron bucket on a cow. The milk can be drunk when you have been poisoned.
Bartering – piglins in the nether may give leather if given a gold ingot.
Killing – mooshrooms, horses, donkeys, mules, llamas and hoglins may all drop leather when killed.
Loot chests – leather is sometimes found in village chests or bastian remnants in the nether.
Crafting – combining 4 rabbit hides will make leather.
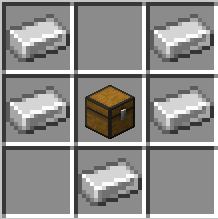
Ingredients
These are the ingredients and recipes that you will need to make this Minecraft cow farm. Please ensure that you have all of the ingredients before you start your build.
Item
Picture
Amount
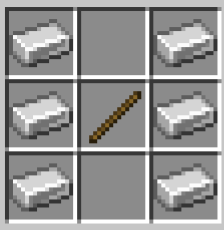
Fence
23
Gate
1
Wheat
Stack
Build Plans
Here we will explain in detail how to build a Minecraft cow farm. Please follow the instructions carefully.
First lets build an enclosure using the fences. Ensure that you leave a gap for the gate.
This can be as large or small as you need.
Next add the gate so you can get into the enclosure.
Ensure that you keep this closed so that you don’t get mobs in your pen.
Next lets get some cows into the enclosure.
Use the wheat to lure the cows through the gate by holding it in your hand.
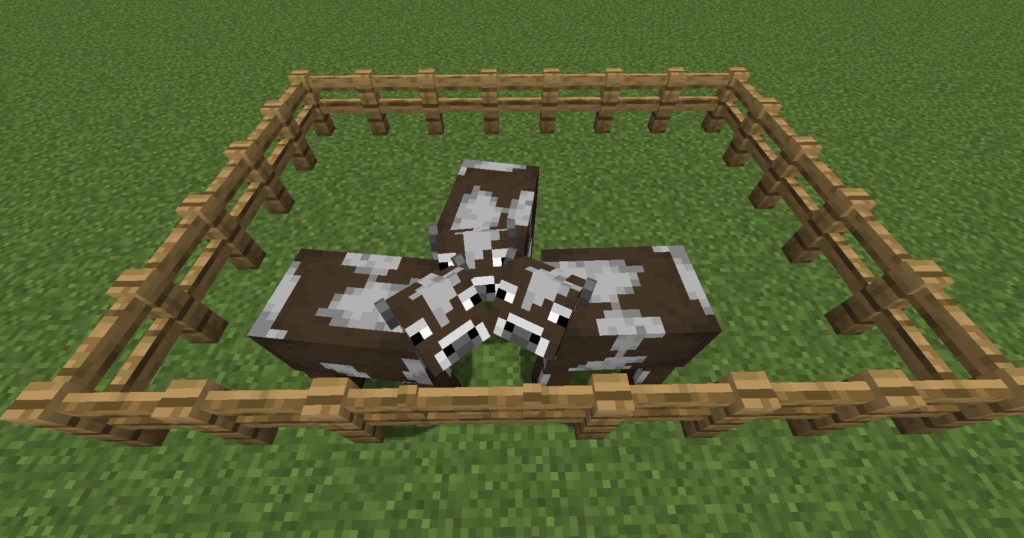
After feeding the cows with wheat they will start to breed.
The hearts coming out of the cows mean that they are breeding and a baby cow will appear.
Hints and tips
What can go wrong – cows escaping
Ensure that you close the gate whenever you enter or leave the pen, this stops the cows escaping and also from mobs getting in.
Where next
Additions to the build – carpet tiles
The only addition to this build is a carpet tile can be placed on top of the fences to make it easy to get in and out of the pen. The player uses the carpet tile by jumping on it to get over the fence. This means that you don’t have to open the gate at all unless you are putting more cows in to it.
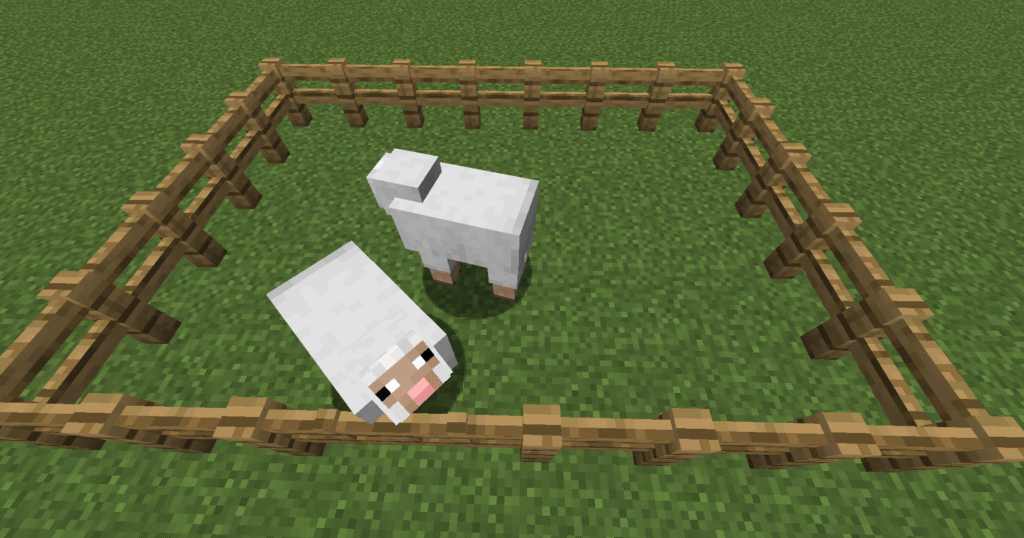
This is a very simple Minecraft sheep farm. This sheep farm needs the player to run it completely. It is basically a pen that will hold the sheep, and the player will need to interact with the sheep to feed, breed and kill.
Unique trait – name a sheep “jeb_” with a name tag. See what happens.
This sheep farm produces sheep, once killed the sheep will drop raw mutton and wool. Here is a break down detailing what cooked mutton can be used for:
Breeding – can be used for breeding and healing tamed wolves and will speed up growth of baby wolves.
A by product of this build is wool as it also gets dropped when the sheep is killed. Wool is a very useful item in Minecraft and here are some of its uses:
Beds – probably the first thing you will use wool for.
Paintings – can be used to create paintings to decorate your buildings.
Banners – can be crafting into a banner.
Carpets – Can be used to craft carpets to decorate your house although carpets are also useful in farm and redstone builds.
Blocking vibrations – Ideal material for blocking vibrations if you’re brave enough to try and face the Warden.
Here’s where you can find sheep and wool:
Grassy biomes – sheep generally spawn in small groups in savannahs, meadows, forests and plains.
Villages – sheep will sometimes spawn in animal pens that already contain sheep. Wool can sometimes be found in the houses of shepherds and fletchers and blocks will be found at meeting places.
Shearing sheep – shearing sheep will provide you with an endless supply of sheep as the wool grows back as long as the sheep can eat and can then be sheared again.
Trading – shepherd villagers will often trade wool for emeralds.
Pillager outposts – wool is often used in tent structures.
Woodland mansions – there are sometimes large wool structures in some rooms.
Ancient cities – wool is used to block vibrations from skulk sensors.
Crafting – wool can also be crafted from 4 strings.
Ingredients
These are the ingredients and recipes that you will need to make this Minecraft sheep farm. Please ensure that you have all of the ingredients before you start your build.
Item
Picture
Amount
Fence
23
Gate
1
Wheat
1 Stack
Sheep
2 minimum
Build Plans
Here we will explain in detail how to build this Minecraft sheep farm. Please follow the instructions carefully.
First lets build an enclosure using fences. Ensure that you leave a gap for the gate.
This enclosure can be as small or large as you like depending on how many sheep you intend on keeping.
Next place the gate in to the gap we left so you can get into the enclosure.
Be sure to always keep the gate shut to stop your sheep escaping.
Now lets add some sheep into the enclosure.
You can lure sheep in to your pen by holding wheat in your hand and the sheep will follow you into the pen.
Be quick to shut the gate after so that the sheep don’t escape.
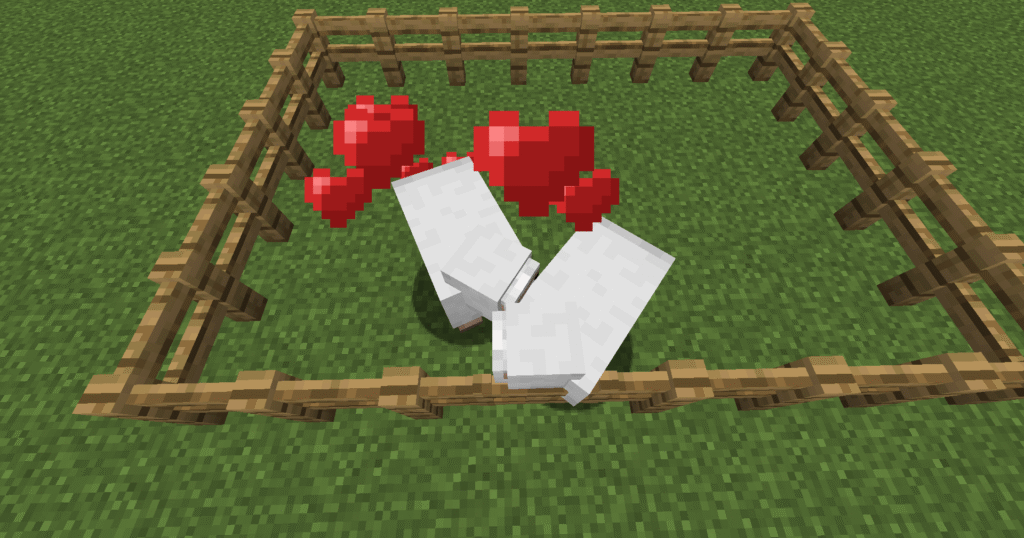
After feeding the sheep wheat they will start to breed.
The hearts above the sheep mean that they are breeding and a baby sheep should appear soon.
Once you have as many sheep as you require you can use them as in the description above.
Where next
Additions to the build –
Carpet tile – a nice addition to this build is to place a carpet tile on top of a fence post. This will enable you to go in and out of the pen without opening the gate as you can jump over a fence if it has a carpet tile on. This means your sheep can’t sneak out of the gate while you’re trying to get in.
These are the instructions for a Minecraft villager bread farm. To get the wheat grow it is essential that you place a water source and a light source which will enable the wheat to grow quicker. There is little to no interaction required from the player as the villagers carry out all of the tasks. The only thing that the player will need to do is to get seeds which are collected by breaking grass. This works in the way that villagers mechanics mean that they can only pass food stuffs between each other. This means that the villagers cannot pass wheat and seeds to each other, so they pass bread.
Bread is the main product of this build and can be used for the following:
Food – bread is a great source for food and restores 5 hunger.
Breeding – villagers require 3 bread to start breeding.
Compost – placing bread into a composter has an 85% chance of raising the compost level by 1.
Trading – bread can be traded with farmer villagers
Bread can also be found in the following places:
Crafted – craft 3 wheat in to a loaf of bread.
Trading – farmer villagers will sometimes trade bread for emeralds.
Chests – bread can sometimes be found in dungeon chests, mineshaft chests, stronghold chests and various village chests.
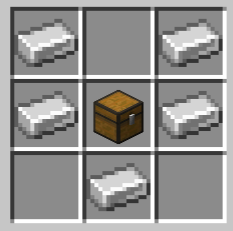
Ingredients
These are the ingredients and recipes that you will need to make a Minecraft villager bread farm. Please ensure that you have all of the ingredients before you start your build.
Item
Picture
Amount
Hoe
1
Wheat seeds
80
Composter
2
Stone
1
Torch
4
Glass
88
Water bucket
1
Hopper
2
Villager
2
Chest
2
Trapdoor
1
Fence
1
Hopper – in this build you will need to craft a chest in order to make the hopper.
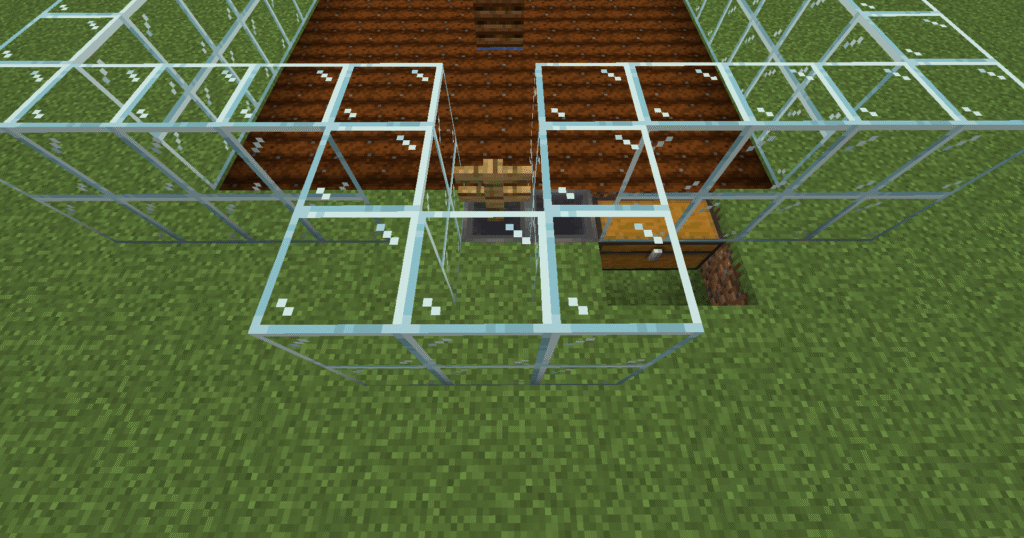
Build Plans
Here we will explain in detail how to build this build a Minecraft villager bread farm. Please follow the instructions carefully.
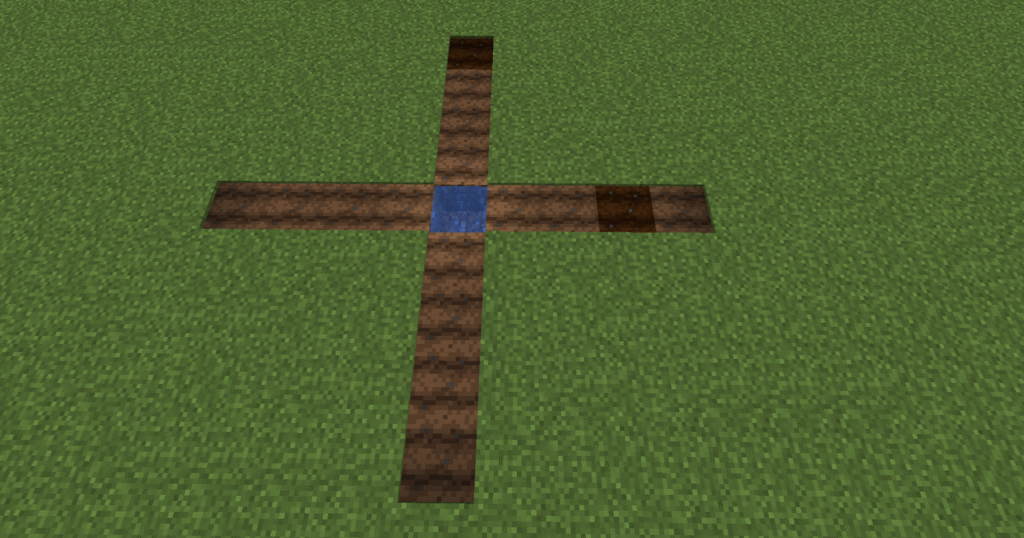
In the first stage of this build we need to dig a hole 1 block deep and place a bucket of water into it.
This will be the centre of the planting area.
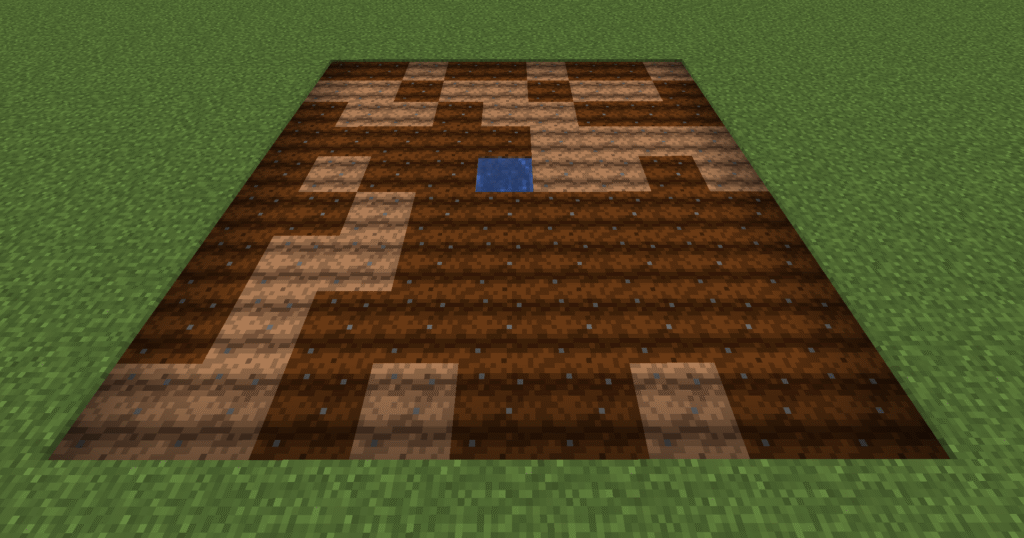
The next step is to hoe 4 blocks out from each of the flat sides of the block.
The next step is to hoe out the area between these lines.
This should make a 9×9 block square for you to plant your crops.
As you can see from the screenshot the ground is already becoming watered from the water block.
You can see this from the darker blocks of tilled soil.
In this section we will build a glass wall 2 blocks high all around the crop growing area.
Leave an opening on one side in the middle.
Next place a composter over the water block and then place a stone block 1 space above this, leaving a 1 block gap between the composter and the stone block.
Place torches on all sides of the stone block.
The composter is used so that when your villager has spare seeds they will place these into the composter and then this will turn into bonemeal and the villager can use this to grow the crops.
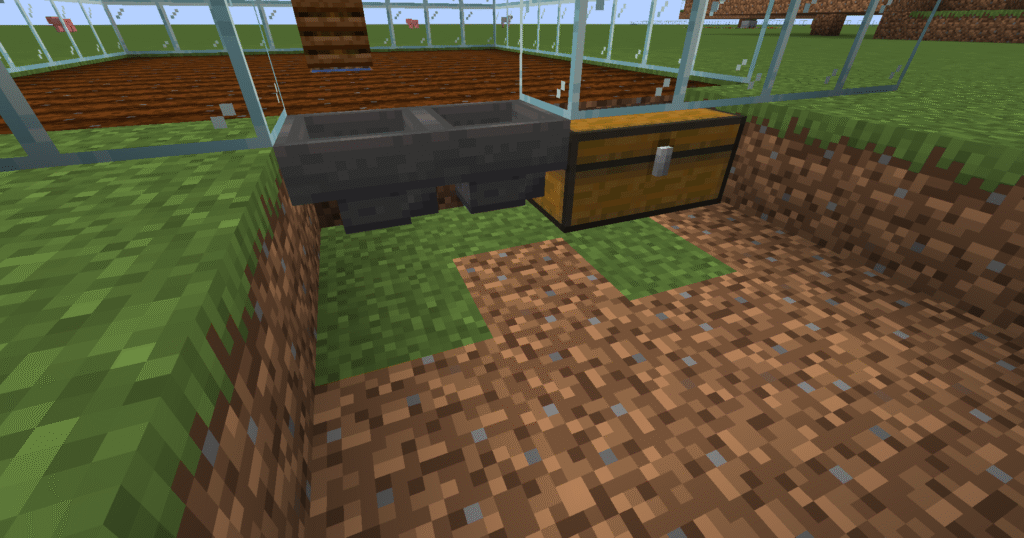
Here we will hollow out a 4 block trough that goes underneath the glass blocks with your gap on the left.
So working from the right, place your chests down next to each other to make a large chest.
Next place two hoppers leading into the chest. This is your collection system to collect your crops.
Next you need to fill in the holes that we made but leave 2 holes in front of the chest so that it can be accessed.
Now build the glass walls out from the other wall, this should mean that you have a solid grass block behind the hopper that we placed before.
On top of this hopper we need to place a fence, you will need to crouch down when placing the fence.
Ok, lets place a trapdoor above the fence and at the top of the glass block.
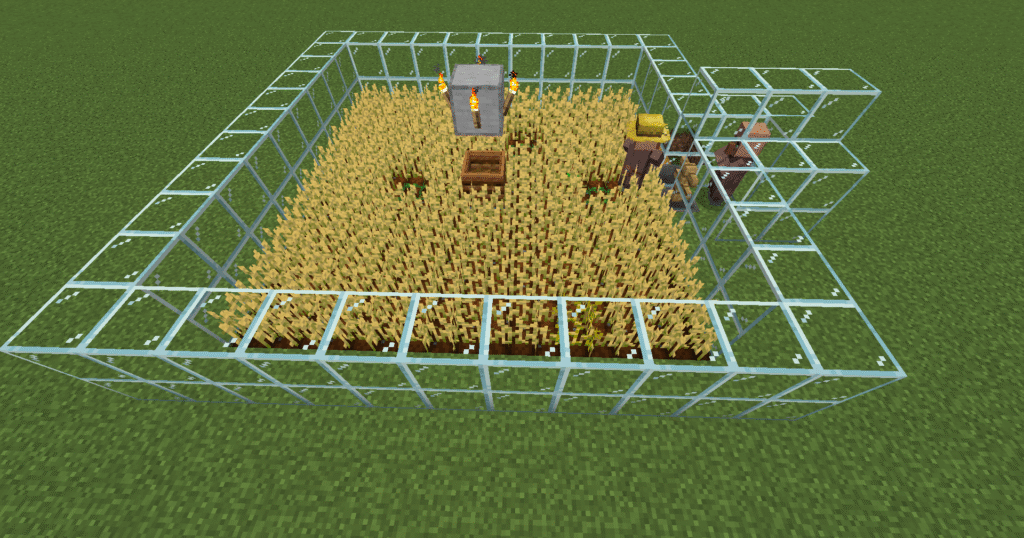
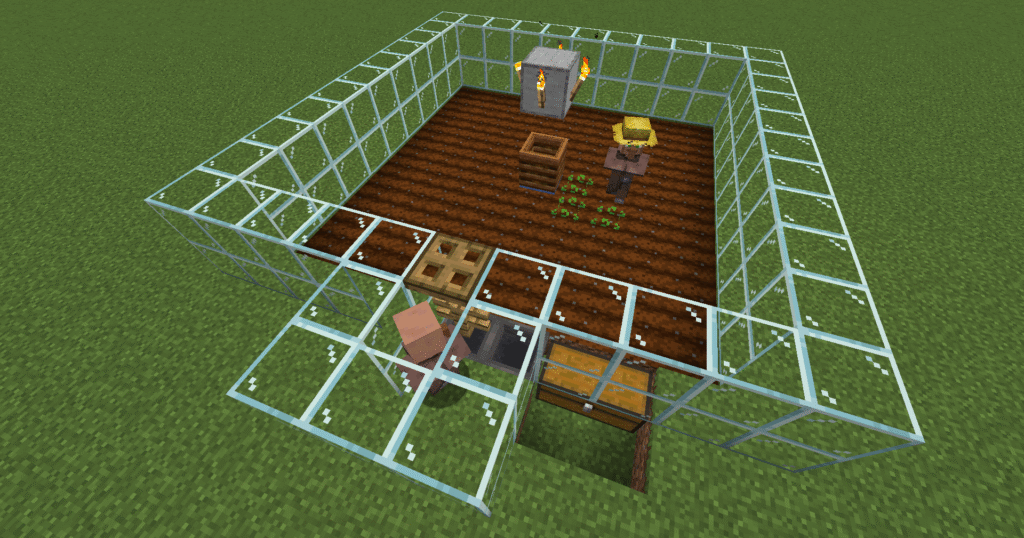
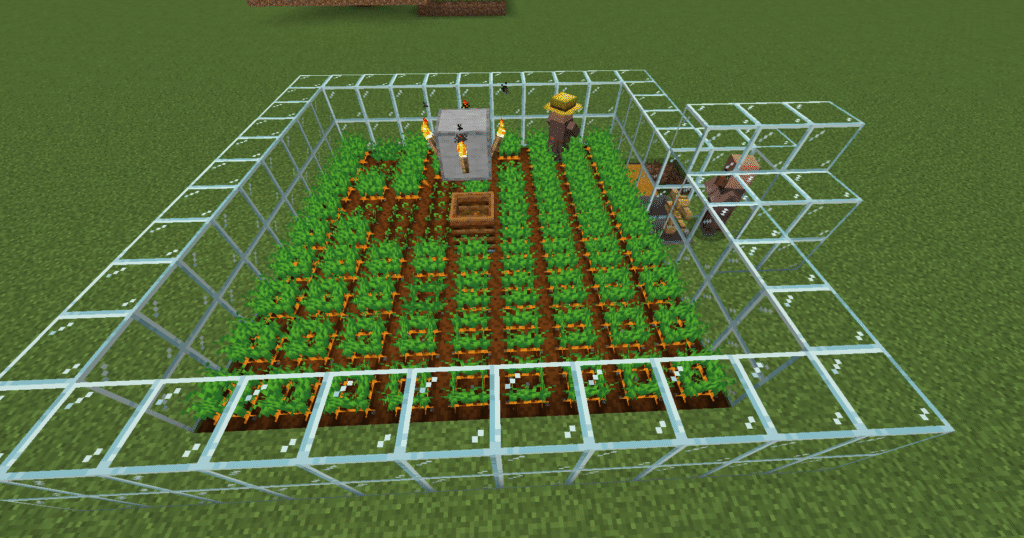
The next step is to add the villagers.
We will first place the villager in the centre of the crop area. He will change into a farmer, you can see this from the hat he is wearing. Ensure that the farmer has seeds to plant. As soon as he receives seeds he will start to plant them.
Next we will place the villager behind the fence.
This setup will then produce your bread with no input from yourself.
Here is the finished build.
Hints and tips
What can go wrong – Villager not picking up crops
This is normally because your villagers inventory is full.
This will mean that your villager can no longer pick up the crops to pass them to the other villager.
To resolve this you will need to create another villager to collect crops.
Also ensure that there is a clear path to the collector villager.
What can go wrong – Villager not breaking the crops
The most common reason for this is that mobGriefing is switched off.
If mobGriefing is off the villager cannot break crops use /gamerule mobGriefing = true in commands to rectify this.
What can go wrong – Villager not planting or harvesting crops
This will be because the job blocks are not positioned properly.
Make sure that the the villager can access the job block and that their profession changes to a farmer, he should have a yellow straw hat to show that they are a farmer.
How to make this build easier – I would recommend that you build a transport system from a villager breeder straight in to the correct section of this build.
Where next
Additional builds –
You can add a transport system to take the bread away.
Also we could add a temporary transport system to get the villagers in to the correct places.
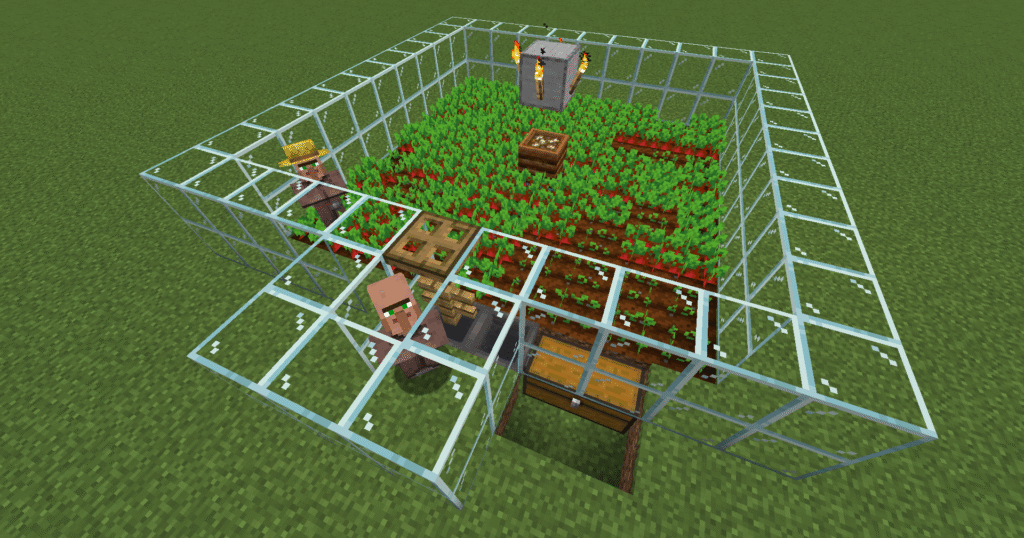
These are the instructions for a Minecraft villager beetroot farm. This is a villager beetroot farm. The villager beetroot farm is an excellent build and is fully automated. Villagers will deal with everything in the farm. They will plant, grow and harvest the crops.
For this build we will be building an enclosure so that a villager will plant the beetroot seeds and then harvest the beetroot. There will be 2 villagers placed in this build one will be a farmer and one will be a fletcher. The farmer villager will throw the beetroot at the fletcher villager which will be collected by a minecart and hopper and put into a chest for you to collect.
Beetroot can be used for the following:
Food – food can be eaten by the player to restore the hunger bar
Crafting – by using the crafting table 6 beetroots can be crafted into beetroot soup
Breeding – beetroot can be used for breeding pigs
Dye – can be crafted into a dye in the crafting table using 1 beetroot
Composting – beetroot can be placed into a composter to make compost and eventually bonemeal
To be able to grow beetroots you will need to get beetroot seeds. Here are the ways you can get the beetroot seeds.
Beetroot seeds can be got by harvesting from a village.
Dungeon chest
Mineshaft chest
End city chest
Trail ruins chest
Woodland mansion chest
Can be got from a wandering trader for one emerald
Ingredients
These are the ingredients and recipes that you will need to make this Minecraft villager beetroot farm. Please ensure that you have all of the ingredients before you start your build.
Item
Picture
Amount
Hoe
1
Beetroot seeds
80
Composter
2
Stone block
1
Torch
4
Glass block
88
Bucket of water
1
Hopper
2
Villager
2
Chest
2
Trapdoor
1
Fence
1
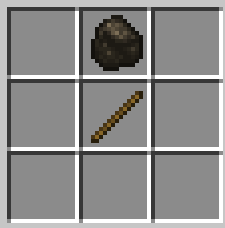
Hopper – to craft a hopper you will first need to craft a chest.
Build Plans
Here we will explain in detail how to build this build a Minecraft villager beetroot farm. Please follow the instructions carefully.
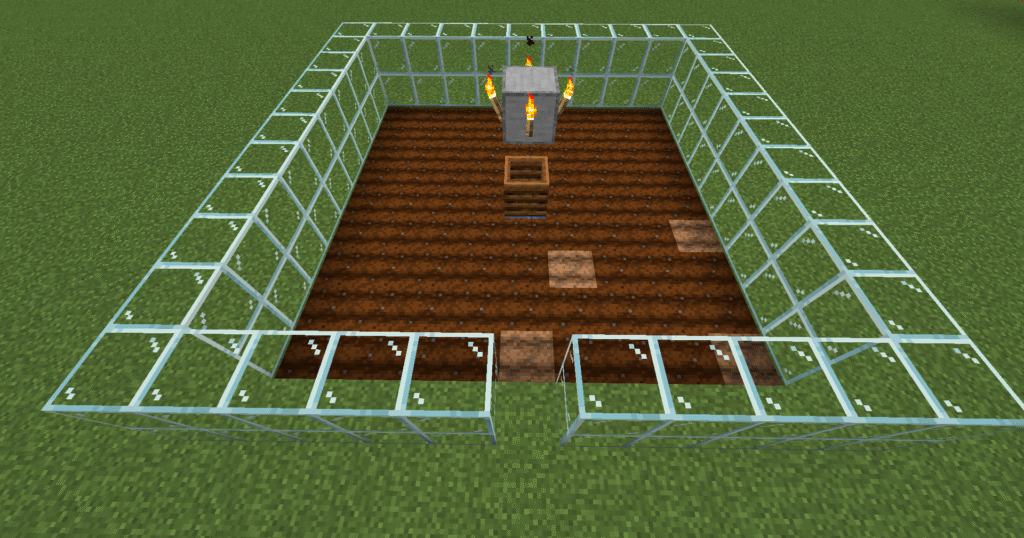
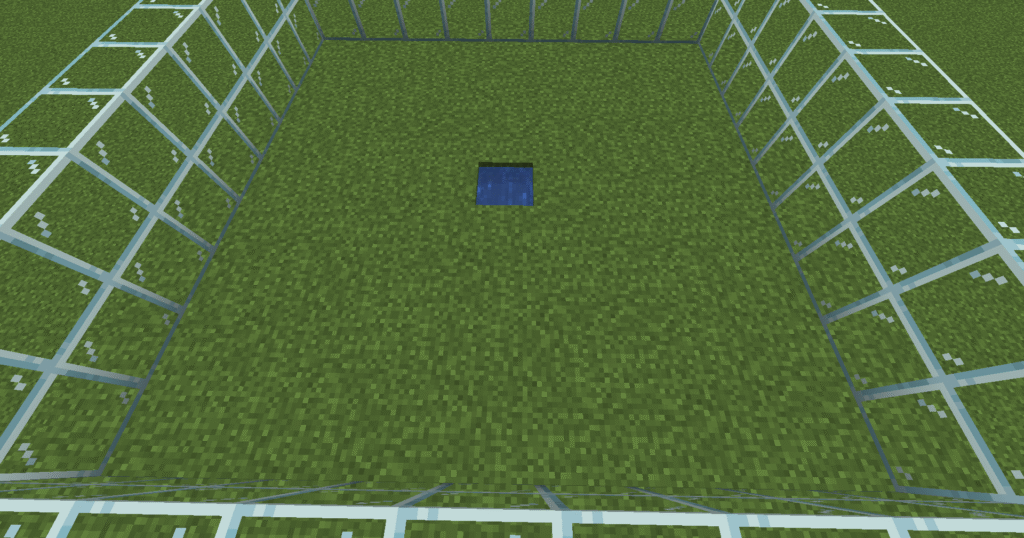
In the first stage of this build we will need to place the bucket of water into a 1 block hole..
This will be the centre of the planting area.
The next step is to hoe 4 blocks out from each of the flat sides of the block.
The next step is to hoe out between these lines. This should make a 9×9 block square to plant your crops with the water block in the centre.
As you can see from the picture the ground is already becoming watered from the water block.
You can see this from the darker blocks of tilled soil.
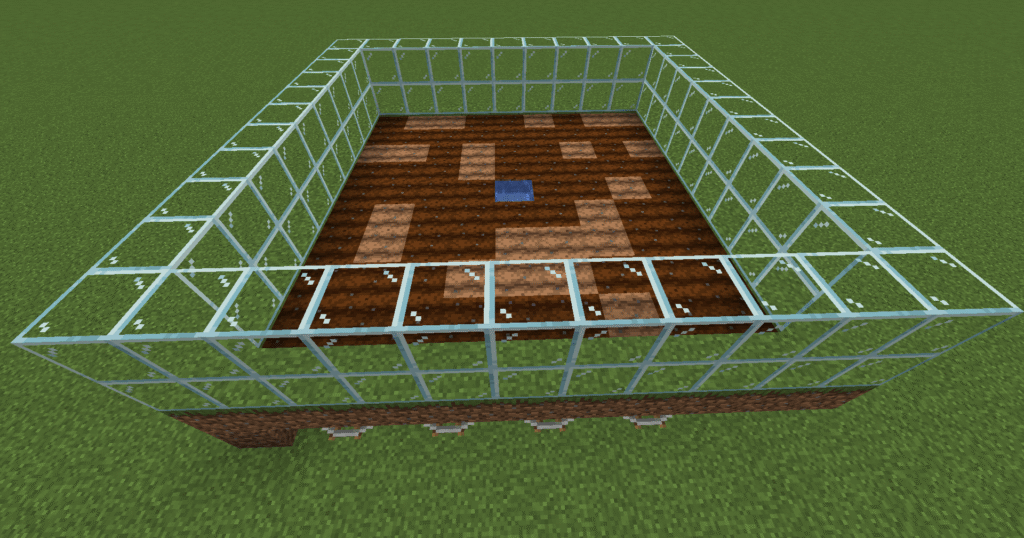
In this section we will build a glass wall 2 blocks high all around the crop growing area.
Leave an opening on one side in the middle.
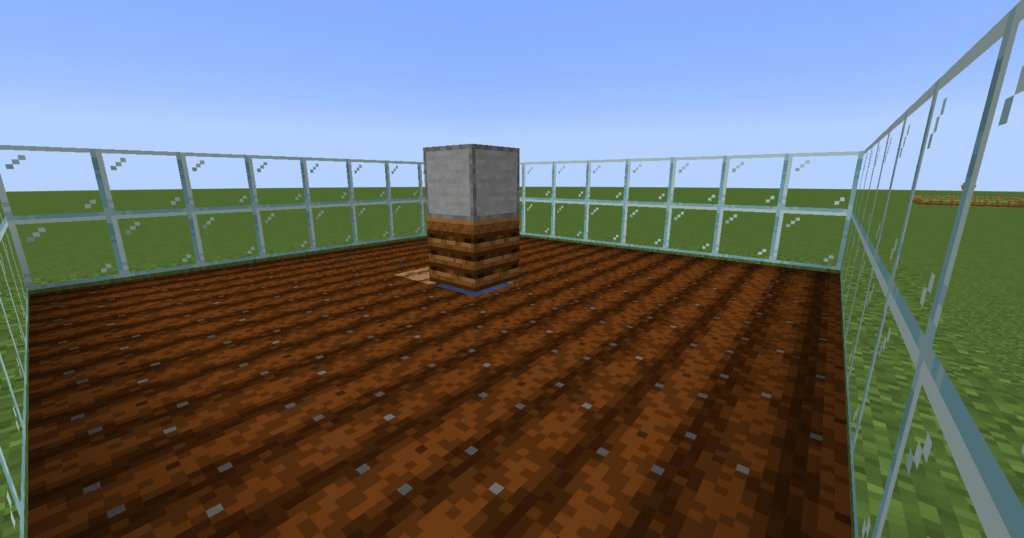
Next place a composter over the water block and then place a stone block above this with a 1 block gap in between so that the composter can be used.
Place torches on all of the 4 sides of the stone block.
The composter is used so that when your villager has spare seeds they will place these into the composter and then this will turn into bonemeal and the villager will use this to help grow the crops.
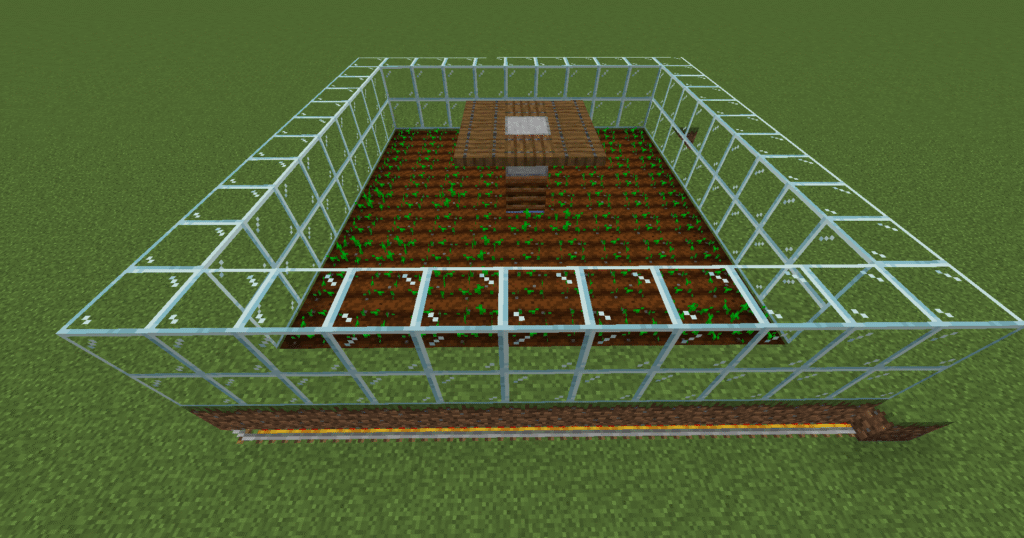
Here we will hollow out a 4 block trough that goes underneath the glass blocks.
So working from the right place your chests down next to each other to make a 1 large chest.
Next place two hoppers that lead into the chest. This is your collection system that will collect your crops. You will need to crouch in order to place the hoppers.
Next you need to fill in the holes that we made but leave two holes in front of the chest so that it can be accessed.
Next build the glass walls out from the other wall by 2 blocks, this should mean that you have a solid grass block behind the hopper that we placed before surrounded by glass blocks 2 high.
On top of this hopper we need to place a fence post, you will need to crouch down when placing the fence post.
Ok, lets place a trapdoor above the fence post and at the top of the glass block , make sure it is closed.
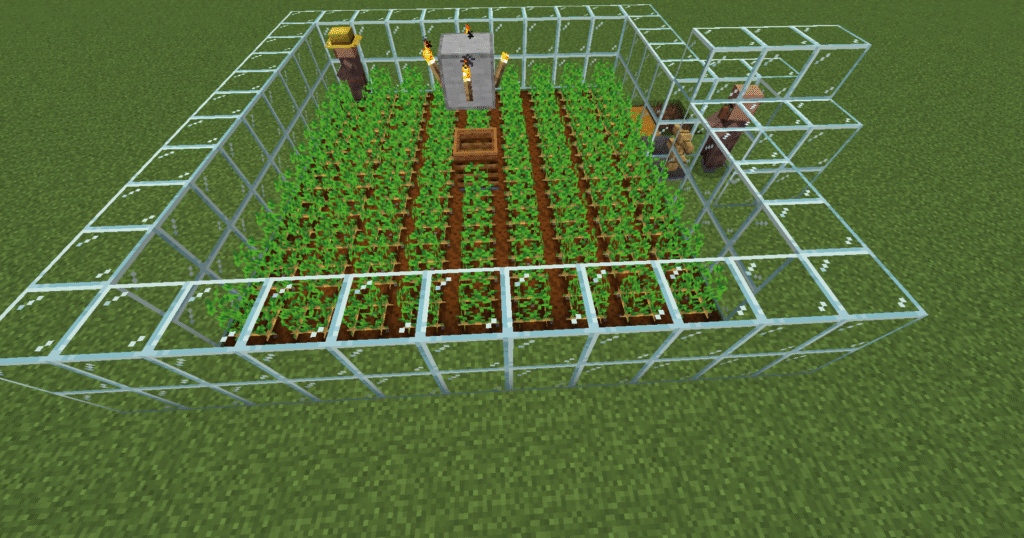
The next step is to add the villagers. We will first place the villager in the centre of the crop area. He will change into a farmer, you can see this from the yellow hat he is wearing. Ensure that the farmer has seeds to plant.
As soon as he receives seeds he will start to plant them.
Next we will place another villager behind fence post.
This setup will then produce your beetroots with no input from yourself.
Here is the finished build. If you check your chest you will find the beets that have been harvested and can be used as above in the description.
Hints and tips
What can go wrong – villager not breaking crops.
This is normally because your villagers inventory is full. This will mean that your villager can no longer pick up the crops to pass them to the other villager. To resolve this you will need to create another villager collect crops. Also ensure that there is a clear path to the collector villager.
The most common reason for this is that mobGriefing is switched off. If mobGriefing is off the villager cannot break crops use /gamerule mobGriefing = true in commands to rectify this.
What can go wrong – villager not planting or harvesting the crops.
This will be because the job block is not positioned properly. Please make sure that the the villager can access the job block and that their profession changes to a farmer who should have a yellow straw hat to show that they are a farmer.
Where next
Additional builds –
Transport– you can build a transport system so that beetroot can be carried where you want it to go.
Sorter – implement a sorter so that beetroot and seeds can be sorted.
Other suggestions –
To improve on this build you can use the same principal and link 4 farms together using just 1 villager in the middle of the build to collect the crops from the farmer.
These are the instructions for Minecraft villager potato farm. In this build we will be building a villager potato farm. This villager potato farm is perfect when you don’t want to spend your time planting, growing and harvesting crops. This farm is completely automated with the help of two villagers. Although quite a simple build because of the use of villagers you will need to find a village that is reasonably close to your build.
This build works by having villagers plant, grow and harvest the potatoes for you. This farm requires two villagers to work. One of the villagers will be placed in the middle of the build and will become a farmer and will plant, grow and harvest the crops. The farmer villager will pass food to the other villager if they can see each other. When the farmer villager passes the potatoes to the villager, the potato will hit the fence post and drop down into the hopper and eventually into the chest for the player to collect. The player does not need to have any interaction except potentially at the start when the player may plant the first lot of crops to get the farm started.
Potatoes are used in a few ways in Minecraft these include –
Food source – you can eat raw potatoes though they only restore a little health. Baking them in a furnace or smoker turns them into baked potatoes which restore more hunger points.
farming – potatoes can be farmed.
Trading – potatoes can be traded for emeralds.
Breeding – if you have pigs feeding them potatoes will make them breed and grow.
Composting – potatoes can be placed into a composter to make bonemeal.
Before being able to farm potatoes you will first need find some potatoes to plant.
Villages – potatoes can be found in village farms.
Zombie drops – zombies will sometimes drop potatoes.
Shipwrecks and chests – you may find potatoes in chests in shipwrecks or inside village houses.
Trading – Farmer villagers sometimes trade potatoes for emeralds.
Ingredients
These are the ingredients and recipes that you will need to make this Minecraft villager potato farm. Please ensure that you have all of the ingredients before you start your build.
Item
Picture
Amount
Hoe
1
Potatoes
80
Composter
2
Stone block
1
Torch
4
Glass block
88
Bucket of water
1
Hopper
2
Villager
2
Chest
2
Trapdoor
1
Fence
1
Hopper – to make a hopper you will first need to make a chest.
Build Plans
Here we will explain in detail how to build a Minecraft villager potato farm. Please follow the instructions carefully.
In the first stage of this build we need to dig a hole and place the bucket of water into it. This will be the centre of the planting area.
The next step is to hoe 4 blocks out from each of the flat sides of the block as shown in the picture.
The next step is to hoe out between these lines. This should make a 9×9 block square for you to plant your crops.
As you can see from the screenshot the ground is already becoming watered from the water block.
You can see this from the darker blocks of tilled soil.
In this section we will build a glass wall two blocks high all around the crop growing area. Leave an opening on one side in the middle.
Next place a composter over the water block an then place a stone block 1 space above this. There should be a 1 block gap between the composter and the block so that the composter can be accessed.
Place torches on all four sides of the stone block.
The composter is used so that when your villager has spare seeds they will place these into the composter and this will turn into bonemeal which the villager can use to help grow the crops.
Next we will hollow out a 4 block x 4 block trough that goes underneath the glass blocks and the gap you left.
So working from the right, place your chests down next to each other to make a large chest.
Next place 2 hoppers that lead into the chest. This is the collection system for your crops.
Next you need to fill in the trough that we made but leave 2 blocks in front of the chest so that it can be accessed.
Next build the glass walls out from the wall in a 3 block by 3 block square as shown, this should mean that you have a solid grass block behind one hopper and a glass block on the other hopper that we placed before.
On top of this hopper we need to place a fence, you will need to crouch down when placing the fence.
Ok, lets place a trapdoor above the the fence at the top of the glass block and make sure it is closed.
The next step is to add the villagers.
We will first place the villager in the centre of the crop area. He will change into a farmer, you can see this from the yellow hat he is wearing. Ensure that the farmer has seeds to plant.
As soon as he receives seeds he will start to plant them.
Next we will place the villager behind the fence post on the grass block. This setup will then produce your potatoes with no input from yourself.
Here is the finished build. If you check your chest after a while you will fine the potatoes that have been harvested.
Hints and tips
What can go wrong – villager not picking up crops.
This is normally because your villagers inventory is full. This will mean that your villager can no longer pick up the crops to pass them to the other villager. To resolve this you will need to create another villager to collect crops. Also ensure that there is a clear path to the collector villager.
What can go wrong – villager not breaking crops.
The most common reason for this is that mobGriefing is switched off. If mobGriefing is off the villager cannot break crops, use /gamerule mobGriefing = true in commands to rectify this.
What can go wrong – villager not planting or harvesting crops.
This will be because the job blocks are not positioned properly. Please make sure that the the villager can access the job block and that their profession changes, a farmer should have a yellow straw hat to show that they are a farmer.
How to make the build easier.
One way to make the build easier is to place minecart track from a villager breeder to this build so that you can get the villagers easier.
Where next
Additional builds –
Transport– you can add a transport system so that the potatoes can be taken where you want them to go.
Baked potatoes – you can add a hopper to the bottom of the chest leading into a furnace, this will then bake the potatoes.
Other suggestions for the build – to further improve this build you can actually link 4 farms together so that a single villager in the middle of the build can take the crops for all of the four farms.
These are the instructions for a Minecraft villager carrot farm. This villager carrot farm is perfect when you don’t want to spend your time planting, growing and harvesting crops. This farm is completely automated with the help of two villagers. Although quite a simple build because of the use of villagers you will need to find a village that is reasonably close to your build.
This build works by having a farmer villager plant, grow and harvest the carrots for you. This farm requires two villagers to work. One of the villagers will be placed in the middle of the build that will become a farmer and will plant, grow and harvest the crops. The farmer villager will then pass food to the other villager if they can see each other. When the farmer villager passes the carrots to the other villager, the carrots will hit the fence post and drop down into the hopper and eventually into the chest for the player to collect. The player does not need to have any interaction except potentially at the start when the player may plant the first lot of crops to get the farm started and to collect the carrots from the chest when they are needed.
What can carrots be used for
Food source – carrots are a good food source for the player.
Breeding – carrots can be used for breeding pigs, rabbits and villagers.
Farming – carrots can be planted to grow more carrots. Each carrot drops between 2 and 4 carrots when harvested.
Crafting – carrots can be crafted with gold nuggets to create golden carrots, which are used to brew potions of Night Vision. Golden carrots also provide one of the highest saturation levels when eaten.
Crafting – carrots are an ingredient in crafting a carrot on a stick, which is used to control pigs when riding them.
To grow carrots you will first need to obtain carrots. These can be found at the following places:
Village farms – Carrots can be found at village farms.
Zombies – have a chance to drop carrots.
Shipwrecks and chests – Carrots can sometimes be found in shipwreck supply chests.
Dungeon chests – Carrots can also be found in dungeon chests.
Ingredients
These are the ingredients and recipes that you will need to make this Minecraft villager carrot farm. Please ensure that you have all of the ingredients before you start your build.
Item
Picture
Amount
Hoe
1
Carrots
80
Composter
2
Stone block
1
Torch
4
Glass block
88
Bucket of water
1
Hopper
2
Villager
2
Chest
2
Trapdoor
1
Fence
1
Hopper – you will need to craft a chest in order to make a hopper.
Build Plans
Here we will explain in detail how to build this Minecraft villager carrot farm. Please follow the instructions carefully.
In the first stage of this build we need to dig a hole and place a bucket of water in to it.
This will be the centre of the planting area.
The next step is to hoe 4 blocks out from each side of the water block as shown in the picture.
The next step is to hoe between these lines.
This should make a 9×9 square for you to plant your crops. As you can see from the screenshot the ground is already becoming watered from the water block.
You can see this from the darker blocks of tilled soil.
In this section we will build a glass wall 2 blocks high all around the crop growing area.
Leave a 1 block opening on one side in the middle. Next place a composter over the water block and then place a stone block above this leaving a 1 block gap between the two so that the composter can be accessed.
Place torches on all sides of the stone block.
The composter is used so that when your villager has spare seeds they will place these into the composter to make bonemeal and the villager will use this to help grow the crops.
Here we will hollow out a 4 block trench that goes underneath the glass blocks.
So working from the right place your chests down next to each other to make a large chest.
Next place 2 hoppers that lead into the chest. You will need to crouch to place the hoppers
This is your collection system.
Next you need to fill in the trench but leave 2 holes in front of the chest so that it can be accessed.
Next build the glass walls out around the gap that you left, this should mean that you have a solid grass block behind the hoppers that we placed before as shown in the picture.
On top of this hopper we need to place a fence (between the glass blocks), you will need to crouch down when placing the fence.
Ok, lets place a trapdoor above the fence at the top of the glass block and make sure it is left shut.
The next step is to add the villagers. We will first place the villager in the centre of the crop area. He will change into a farmer, you can see this from the yellow hat he is wearing.
As soon as he receives seeds he will start to plant them. Next we will place the villager behind the fence post.
This setup will then produce your carrots with no input from yourself.
Here is the finished build. If you check your chest you will find the carrots that have been harvested and can be used as above in the description.
Hints and tips
What can go wrong – Villager not picking up crops
This is normally because your villagers inventory is full.
This will mean that your villager can no longer pick up the crops to pass them to the other villager.
To resolve this you will need to create another villager to collect crops.
Also ensure that there is a clear path to the collector villager.
What can go wrong – Villager not breaking the crops
The most common reason for this is that mobGriefing is switched off.
If mobGriefing is off the villager cannot break crops use /gamerule mobGriefing = true in commands to rectify this.
What can go wrong – Villager not planting or harvesting crops
This will be because the job blocks are not positioned properly.
Make sure that the the villager can access the job block and that their profession changes to a farmer, he should have a yellow straw hat to show that they are a farmer.
How to make this build easier – I would recommend that you build a transport system from a villager breeder straight in to the correct section of this build.
Where next
Additional builds –
You can add a transport system to take the carrots away.
Also we could add a temporary transport system to get the villagers in to the correct places.
These are the instructions for a Minecraft villager wheat farm. To get wheat to grow in this villager wheat farm it is essential to plant it near to a water source and a light source. This build will have to be placed over powered rails. This farm is different to the other villager farms in the sense that the farmer villager will not pass wheat to another villager. In this farm, the farmer villager will not pass anything to another villager and will simply drop the wheat on the floor. This happens when the villager is full and cannot carry anything else. This is the reason why it may take a while for this farm to work as you have to wait for the villager to be full. Once the farmer drops the wheat the minecart on powered rails will pass underneath and pull the wheat through the grass blocks and into the chest. You will need to block off access to the composter that you placed in the middle of the farm. This is so that the farmer villager will not convert seeds to compost and empty their inventory.
What is wheat used for –
Food – wheat can be crafted in to loaves of bread, cookies and cakes and used as a food source.
Food – wheat is used for cows, sheep, goats and mooshrooms. When holding wheat all of these animals will follow you and you can place them in to a pen.
Breeding – wheat can be fed to cows, sheep, goats and mooshrooms to encourage breeding.
Healing – wheat can heal a horse 1 health or lower its temper by 3% when attempting to tame it. It can also decrease the time it takes for a foal to grow by 20 seconds.
Where can wheat be found –
Farming – you can grow wheat by planting wheat seeds on tilled soil and waiting.
Villages – you can find wheat growing in villages.
Chests – wheat can be found in loot chests in structures like dungeons, shipwrecks, igloos and woodland mansions.
Trading – villagers especially farmers may trade wheat for emeralds.
Biomes – wheat naturally generates in certain biomes like plains, savannas and mushroom islands.
Where can you get wheat seeds –
Breaking grass – the best way to get wheat seeds is to break grass.
Harvesting wheat – when you harvest wheat it will drop wheat seeds along with the wheat.
Loot chests – structures like villages and mineshafts may contain seeds in their chests.
Trading – wandering traders sometimes sell wheat seeds.
Ingredients
These are the ingredients and recipes that you will need to make this Minecraft villager wheat farm. Please ensure that you have all of the ingredients before you start your build.
Item
Picture
Amount
Redstone torch
11
Powered rails
104
Rails
21
Dirt
121
Glass
50
Stone slab
1
Bucket of water
1
Stone
4
Composter
1
Trap door
8
Villager
1
Hopper
1
Chest
2
Comparator
1
Repeater
1
Hoe
1
Minecart with hopper
1
Minecart with hopper – you will need to make a hopper and minecart and then combine the two.
Hopper – in this build you will need to make a chest first.
Repeater and Comparator – you will need to craft a redstone torch first.
Build Plans
Here we will explain in detail how to build this Minecraft villager wheat farm. Please follow the instructions carefully.
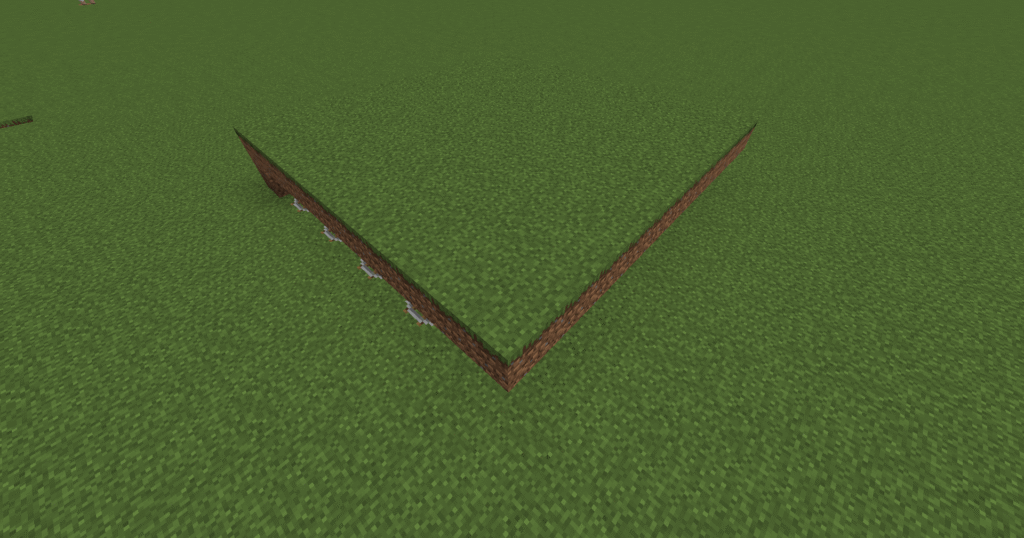
In the first section of this build we need to dig down 2 blocks and 11 x 1 wide.
Next ensure that we can get out by digging 1 block out and get out of the trench.
Next place ten redstone torches in the trench starting from the opposite end to the step.
Next place dirt blocks over the ten redstone torches making a flat area to build your farm.
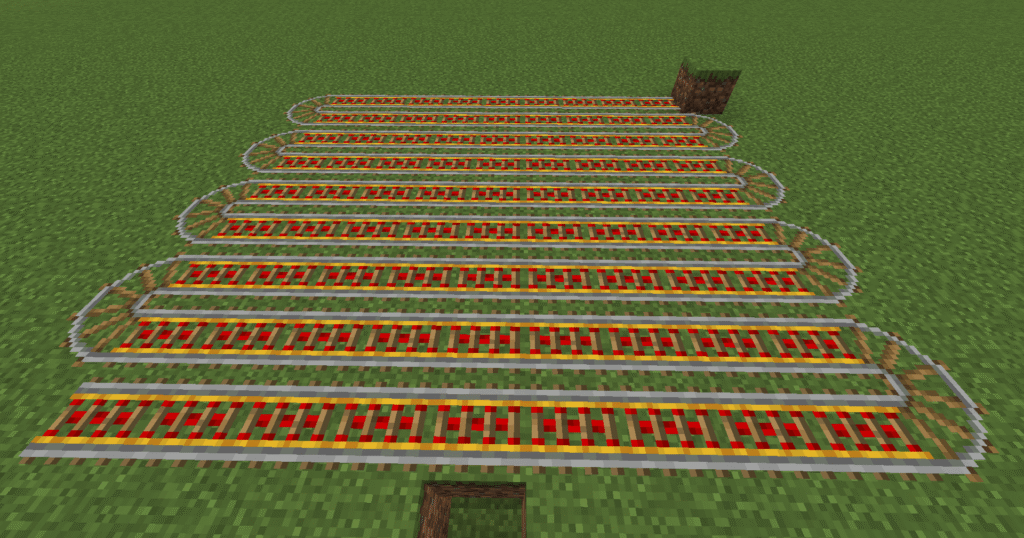
We will then start to place our powered rails, make a grid layout 9 x 9 blocks as shown in the picture.
Ensure that the fifth rail along is over the redstone torches that we placed in the ground.
The final step in the section is to round the corners with standard rails leaving the closest and nearest open.
Place a block on one of these ends.
Next build a 11×11 square of dirt blocks above the rails that we built earlier.
This should cover the rails completely including the non powered rails.
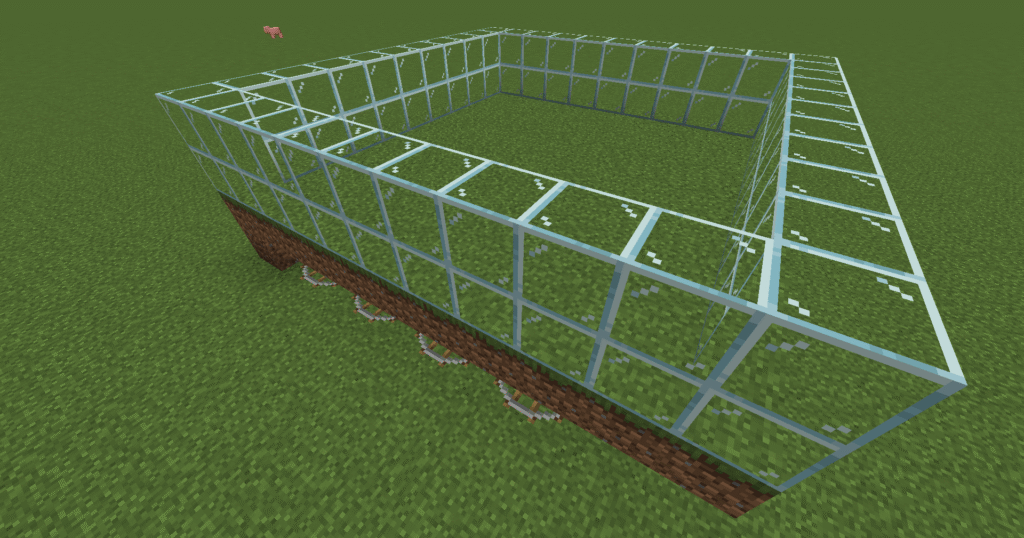
Here we will build an enclosure for the villager.
Simply place a 2 block high wall of glass around the whole enclosure.
This will enable you to check on what the villager is doing.
Ok, lets dig 1 block out exactly in the middle of the grass square.
Place a slab down in this hole at the bottom and place the bucket of water on top of the slab.
Lets now hoe the area. This will ensure that the area is ready to grow wheat.
Lets now place a composter over the water block and place a stone block over the composter.
This ensures that the villager won’t be able to empty their inventory.
In this step we will place the eight trapdoors around the top of the stone block and leave them open so that they don’t impede the villager.
This will ensure that the villager cannot fill the composter and will continue to hold all the items collected.
Ok, lets plant the wheat seeds.
This is the quickest way to get this farm started.
The other options is to give the villager the wheat seeds and allow him to plant them.
Here is the farm section working as planned.
When the villager gets full of items they will then start to drop the wheat on the ground to be collected by the minecart.
Place your villager in to the pen and make sure he changes to a farmer villager. He will have a yellow straw hat to show this.
In this last section we build the collection system. This is the final build of the minecart unloader system.
This is when the minecart will be added to collect the wheat.
Hints and tips
What can go wrong – wheat not being collected from all or part of a section of the crops.
Ensure that the powered rails are under the entirety of where the crops are growing.
Ensure that the powered rails are powered,
Ensure that there is no block gap between the minecart and the dirt blocks that are growing the crops.
What can go wrong – farmer villager taking a long time to drop the wheat.
Although it can take a while for this farm to get working, if the village farmer is not dropping wheat after a long time ensure that they have no access to the composter. If unsure throw seeds to the farmer to fill up their inventory and see if it works then.
How to make the build easier –
Place a block over the composter on this build so that it cannot be used.
Place a minecart track from a villager breeder into the farming area to transport the villager easier.
Where next
Additions to the build –
A second villager can be added making the farm more efficient.
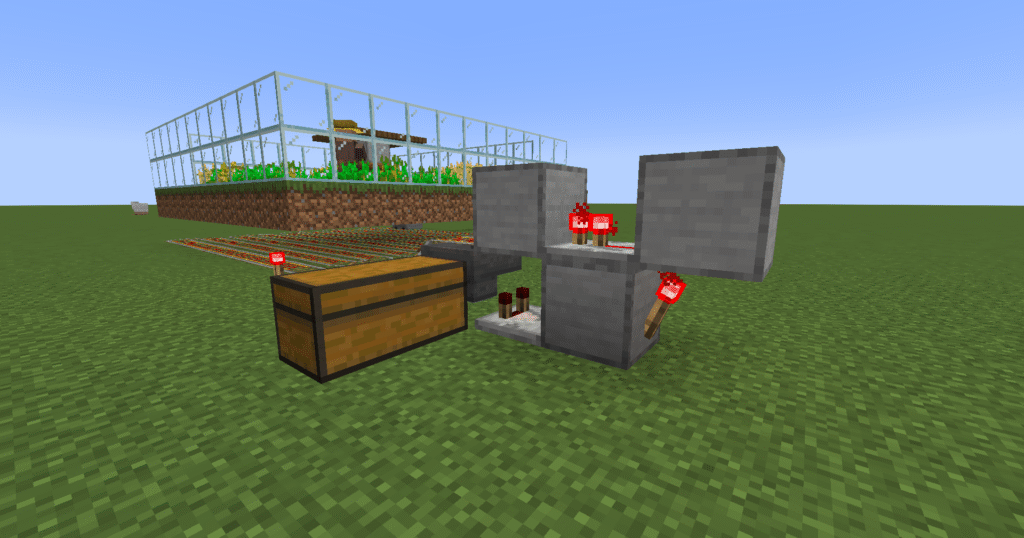
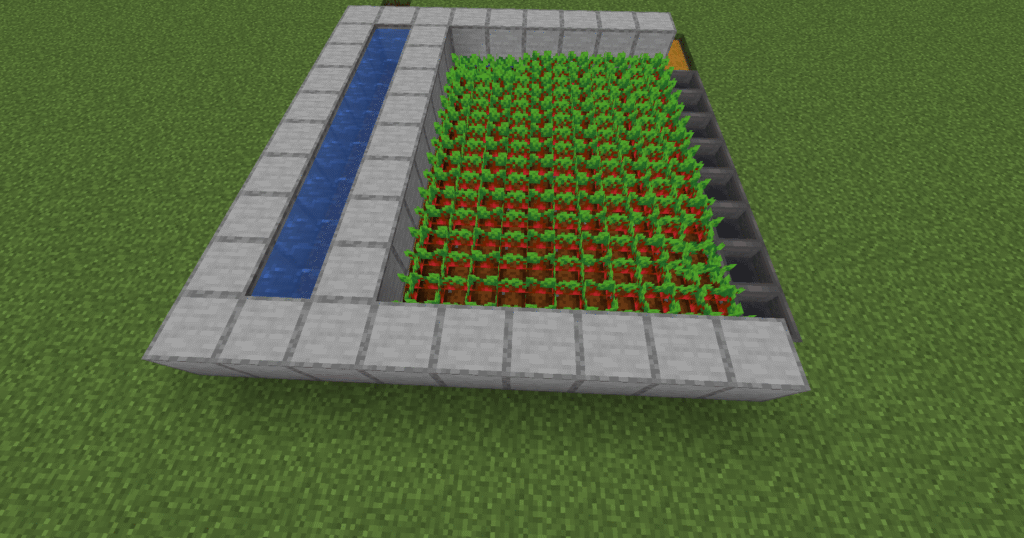
These are the instructions for building a Minecraft redstone beetroot farm. This is produced by the crop growing naturally after the player has planted them and then being harvested automatically into a chest. This redstone beetroot farm works in the way that when the player switches a lever this will release water that will wash the beetroot into a row of hoppers and eventually into a chest. This is done by sticky pistons that will raise and retract back down. When the sticky pistons are lowered the water will flow down and wash the beetroot into the hoppers and finally into the chest. The player will have to plant the crops for this build to work. They will also have to release the lever to wash the beetroot into the hoppers and eventually into the chest.
The produce of this farm is beetroot and it can be used for the following:
Food – food can be eaten by the player to restore the hunger bar.
Crafting – by using the crafting table 6 beetroots can be crafted into beetroot soup.
Breeding – beetroot can be used for breeding and growing pigs.
Dye – can be crafted into a dye in the crafting table using 1 beetroot.
Composting – beetroot can be placed into a composter to make compost and eventually bonemeal.
To be able to grow beetroots you will need to get beetroot seeds. Here are the ways you can get the beetroot seeds.
Beetroot seeds can be found in a village farm.
Dungeon chest.
Mineshaft chest.
End city chest
Trail ruins chest.
Woodland mansion chest.
Can be got from a wandering trader for one emerald.
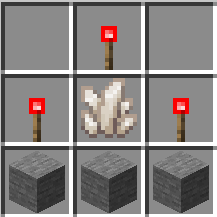
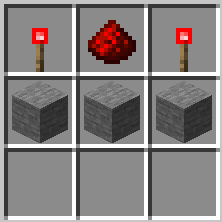
Ingredients
These are the ingredients and recipes that you will need to make this Minecraft redstone beetroot farm. Please ensure that you have all of the ingredients before you start your build.
Item
Picture
Amount
Stone
34
Bucket of water
8
Repeater
8
Redstone dust
10
Chest
2
Hoe
1
Lever
1
Hopper
8
Sticky pistons
8
Beetroot seeds
48
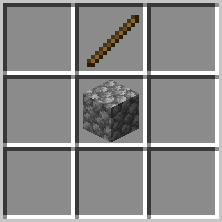
Hopper – to craft a hopper you will first need to craft a chest.
Repeater – to make a repeater you will have to craft redstone torches first.
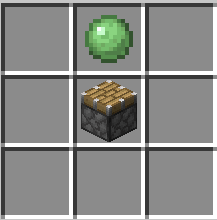
Sticky Piston – to craft a sticky piston you will first need to craft a piston.
Build Plans
Here we will explain in detail how to build this Minecraft redstone beetroot farm Minecraft. Please follow the instructions carefully.
The first stage is to prepare for the redstone section of the build.
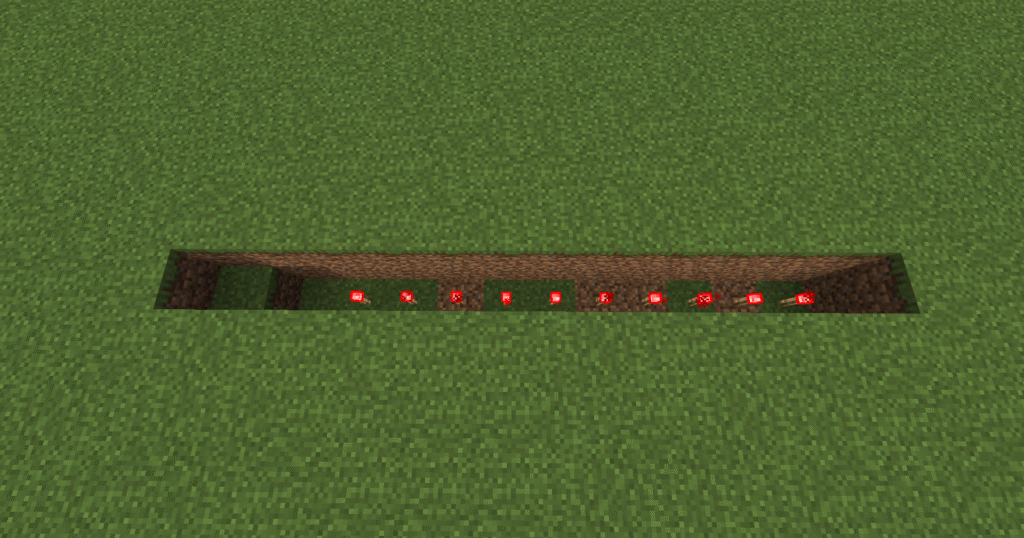
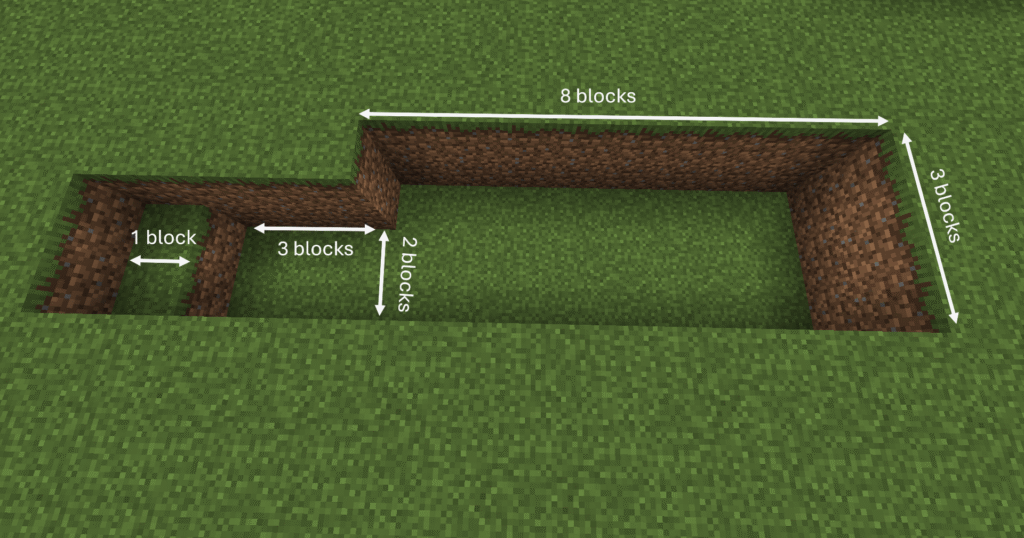
This entails digging 2 blocks down in a 8 blocks by 3 blocks section. Then on the left hand side dig 3 blocks by 2 blocks.
Finally a 1 block down and a 1 block by 2 blocks to enable you to get out of the hole. Dig this on the end of the 3 block by 2 block hole. It should look something like the picture.
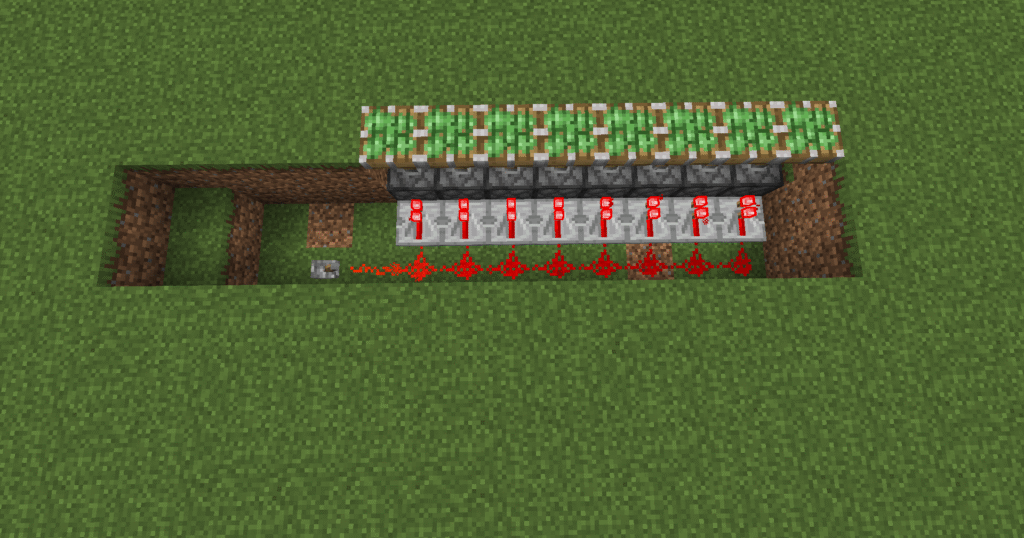
Lets now place down the sticky pistons. Place the sticky pistons in the back section ensuring that they are green side up.
Next run repeaters pointing towards the sticky pistons along the whole length of the sticky pistons.
Then place redstone dust behind the repeaters extending by one block at the end and place down a lever in the next block.
When switching the lever the sticky pistons should come level with the ground.
Lets now switch the lever and ensure that the sticky pistons extend and retract normally.
Ensure that the pistons are extended to move on to the next section. They should be level with the ground.
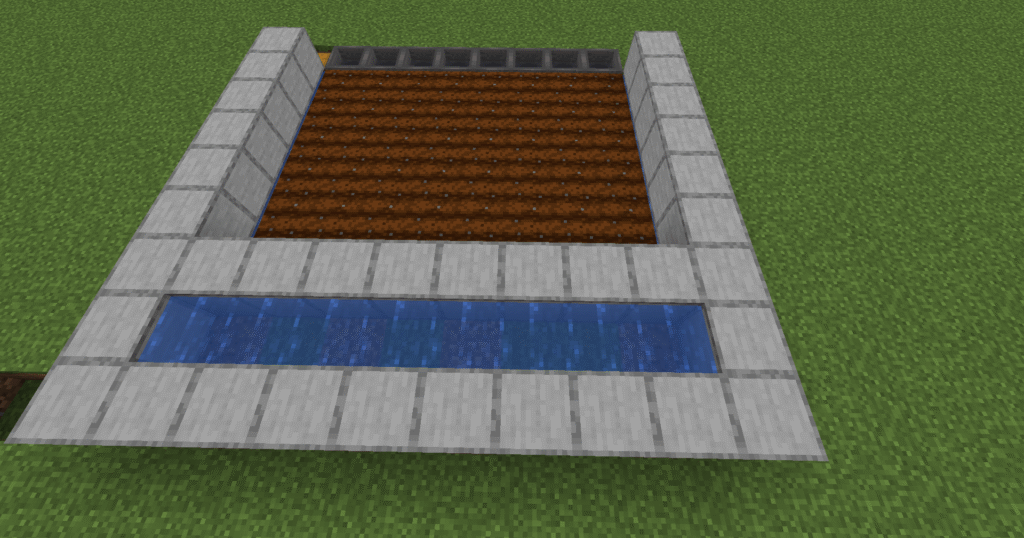
Ok, first up lets hoe a rectangle, from the sticky pistons, hoe 6 blocks down all the way along to make a 8 block by 6 block rectangle.
Dig a 1 block hole down each side of the tilled area.
Next dig a 1 block deep hole along the opposite end to the sticky pistons for 10 blocks (2 blocks longer than the tilled area on one end).
Place your two chests down as shown in the screenshot. Next you need to place your hoppers leading into the chest.
Fill the hole by the side of the tilled area with water ensuring it reaches both ends.
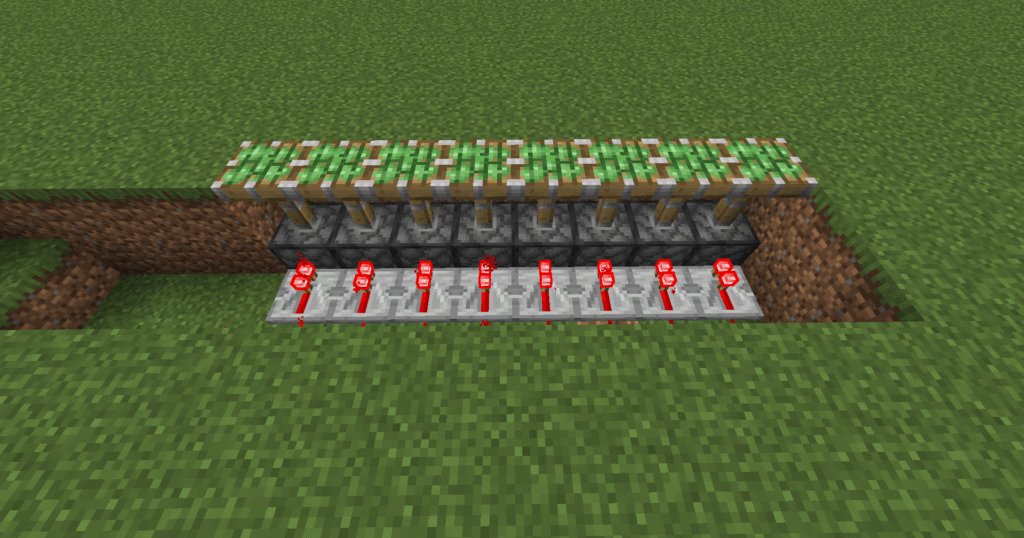
In this section we need to build the stone walls around the build.
From the hoppers place stone blocks over the water and go up 9 blocks.
Next place stone blocks on top of the pistons.
Then place a second row of stone blocks to join the two rows in step 2.
Place a row of stone blocks above the repeaters making a trough.
Now lets place buckets of water into that gap.
You should now have something that looks like this picture.
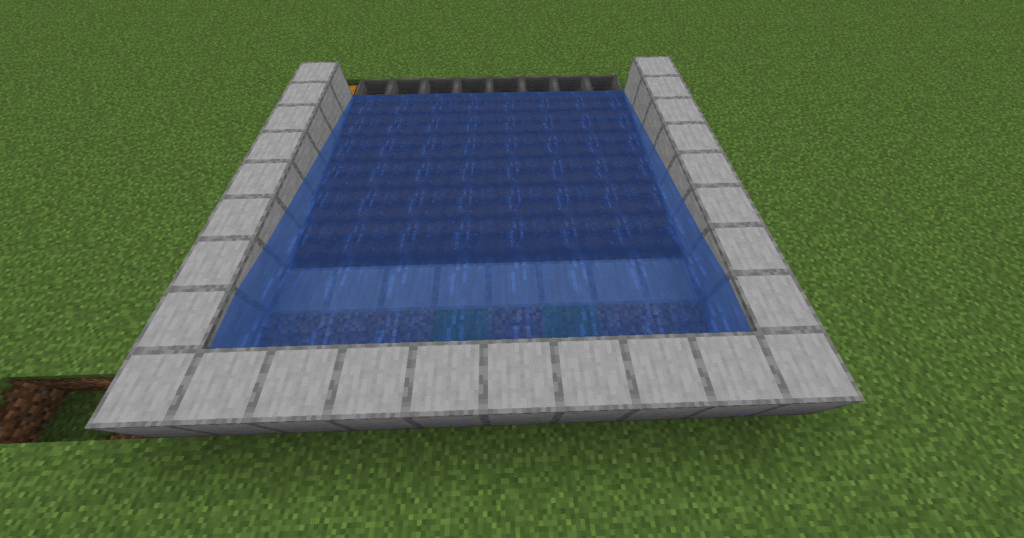
Lets now make sure that this works.
If you select the lever that you placed earlier, the front row of blocks should drop down and the water should flow down to the edge of the hoppers.
This is final section, now we plant the crops and wait for them grow.
Select the lever and watch the crops flow down into the hoppers and then into the chest.
Hints and tips
What can go wrong – water not reaching the hoppers.
Ensure that there are only 6 blocks of beetroot planted. The water will then reach the hoppers.
What can go wrong – mobs trampling crops.
Place fences and a gate around the build.
Where next
Additions to the build –
Increase crops – This build can be made wider by adding more pistons and hoppers, it cannot be made longer as the water will only reach this far.