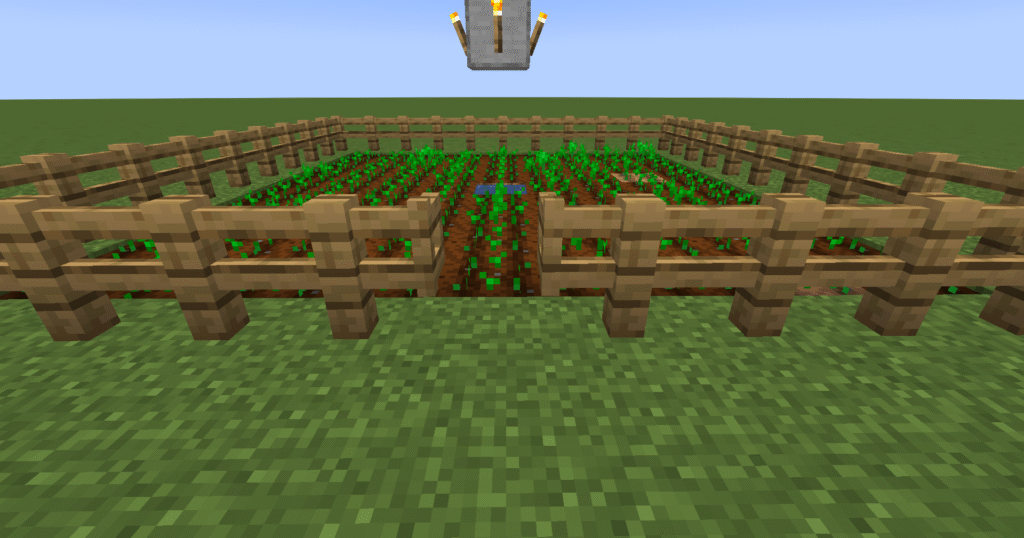
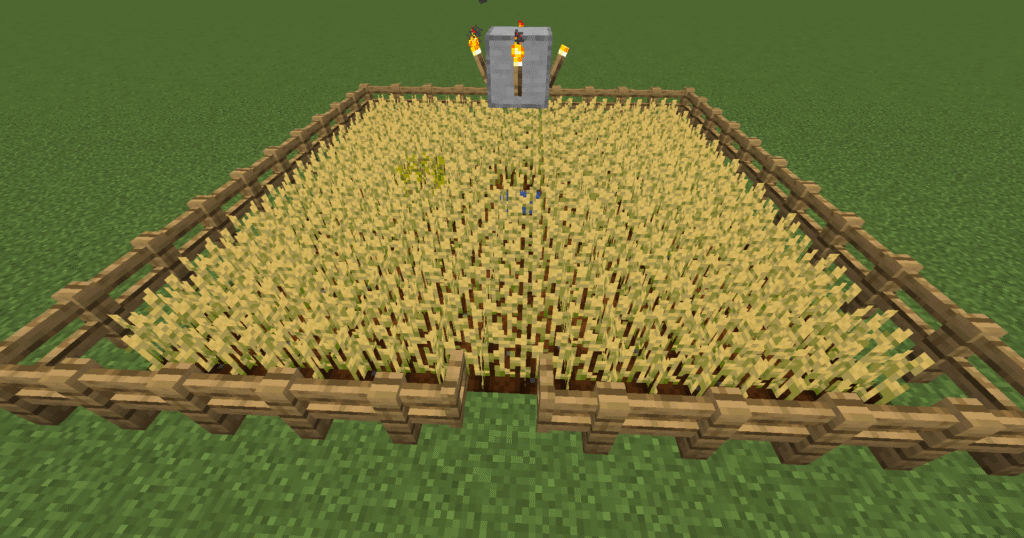
Category: Blog

Your blog category

  • Minecraft villager beetroot farm

    These are the instructions for a Minecraft villager beetroot farm. This is a villager beetroot farm. The villager beetroot farm is an excellent build and is fully automated. Villagers will deal with everything in the farm. They will plant, grow and harvest the crops.

    For this build we will be building an enclosure so that a villager will plant the beetroot seeds and then harvest the beetroot. There will be 2 villagers placed in this build one will be a farmer and one will be a fletcher. The farmer villager will throw the beetroot at the fletcher villager which will be collected by a minecart and hopper and put into a chest for you to collect.

    Beetroot can be used for the following:

    • Food – food can be eaten by the player to restore the hunger bar
    • Crafting – by using the crafting table 6 beetroots can be crafted into beetroot soup
    • Breeding – beetroot can be used for breeding pigs
    • Dye – can be crafted into a dye in the crafting table using 1 beetroot
    • Composting – beetroot can be placed into a composter to make compost and eventually bonemeal

    To be able to grow beetroots you will need to get beetroot seeds. Here are the ways you can get the beetroot seeds.

    • Beetroot seeds can be got by harvesting from a village.
    • Dungeon chest
    • Mineshaft chest
    • End city chest
    • Trail ruins chest
    • Woodland mansion chest
    • Can be got from a wandering trader for one emerald

    These are the ingredients and recipes that you will need to make this Minecraft villager beetroot farm. Please ensure that you have all of the ingredients before you start your build.

    ItemPictureAmount
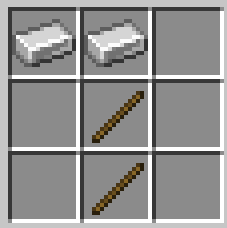
    HoeHow to craft a hoe1
    Beetroot seedsBeetroot seeds80
    ComposterHow to craft a composter2
    Stone blockStone block1
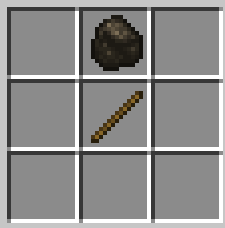
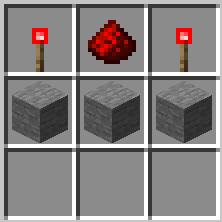
    TorchHow to craft a torch4
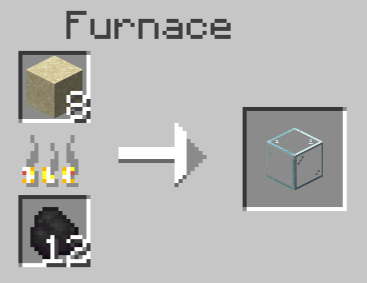
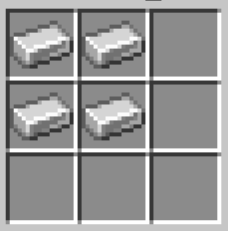
    Glass blockHow to craft a glass block88
    Bucket of waterWater bucket1
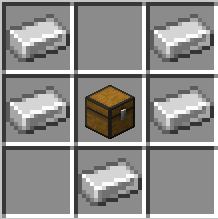
    HopperHow to craft a hopper2
    VillagerVillager2
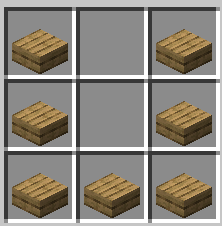
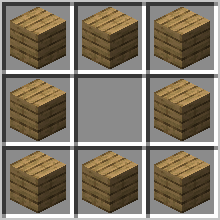
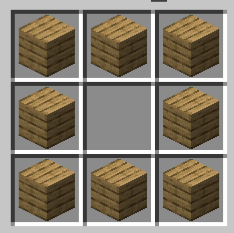
    ChestHow to craft a chest2
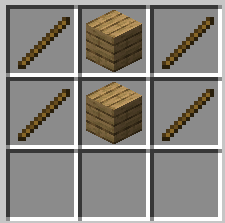
    TrapdoorHow to craft a trapdoor1
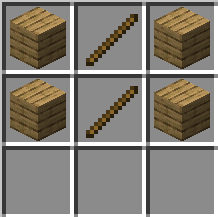
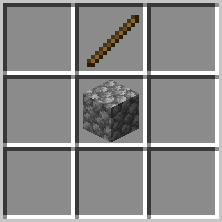
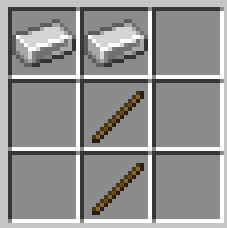
    FenceHow to craft a fence1

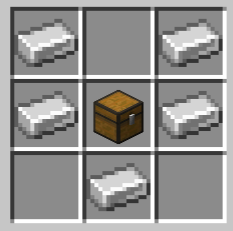
    Hopper – to craft a hopper you will first need to craft a chest.


    Here we will explain in detail how to build this build a Minecraft villager beetroot farm. Please follow the instructions carefully.
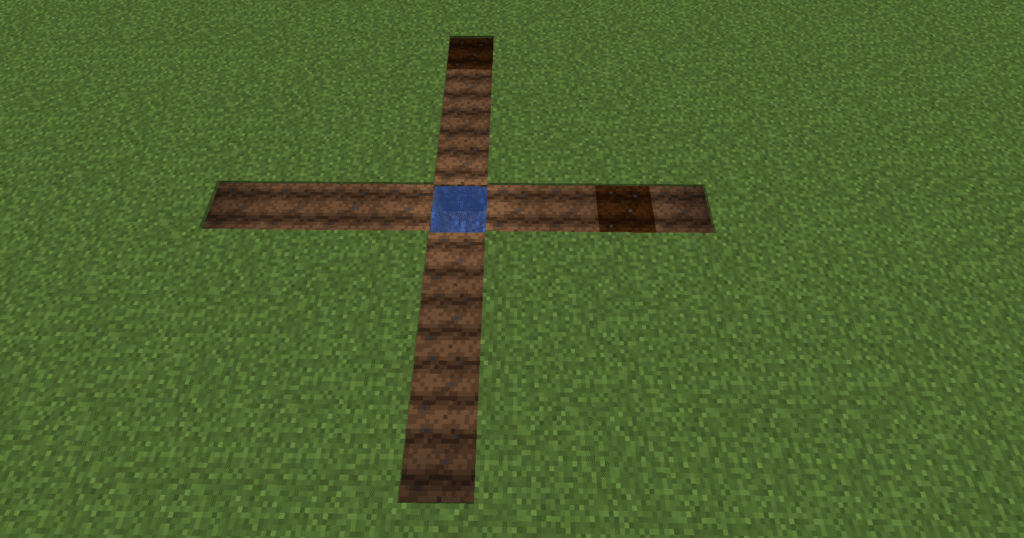
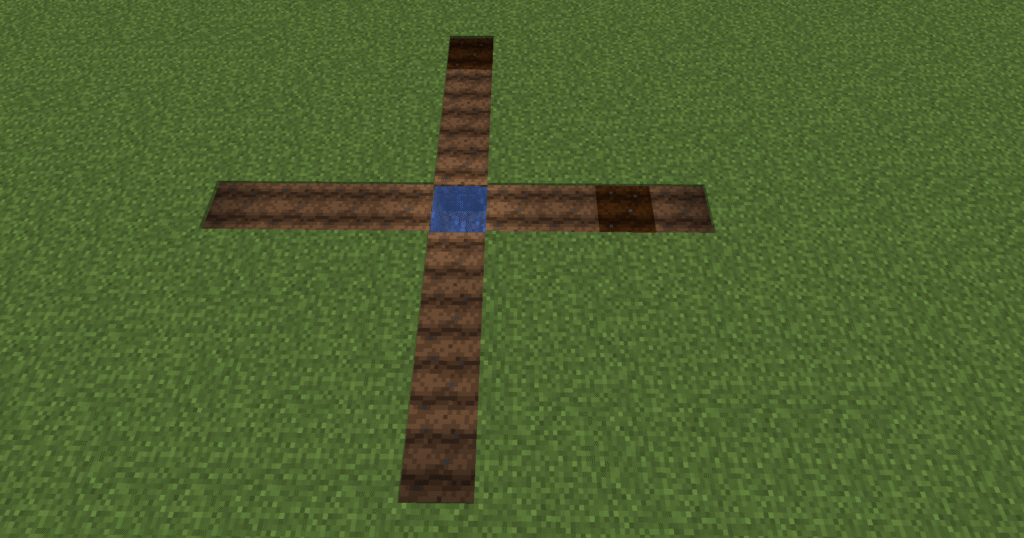
    1. In the first stage of this build we will need to place the bucket of water into a 1 block hole..
    2. This will be the centre of the planting area.
    3. The next step is to hoe 4 blocks out from each of the flat sides of the block.
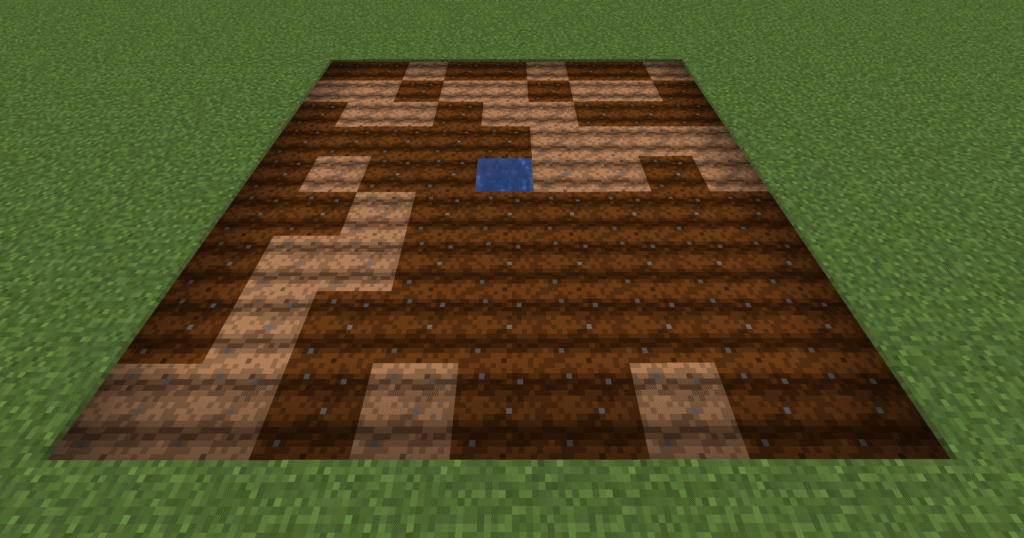
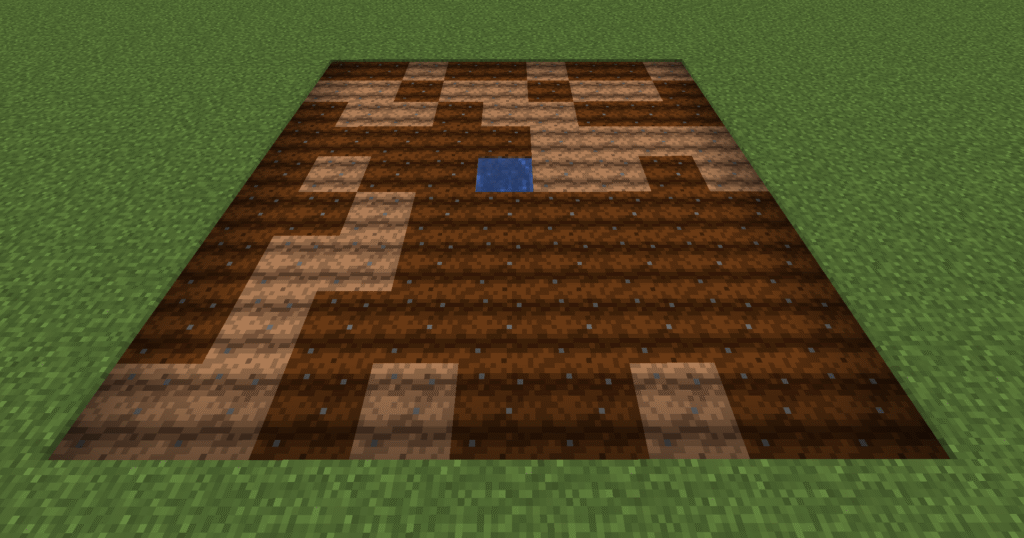
    1. The next step is to hoe out between these lines. This should make a 9×9 block square to plant your crops with the water block in the centre.
    2. As you can see from the picture the ground is already becoming watered from the water block.
    3. You can see this from the darker blocks of tilled soil.
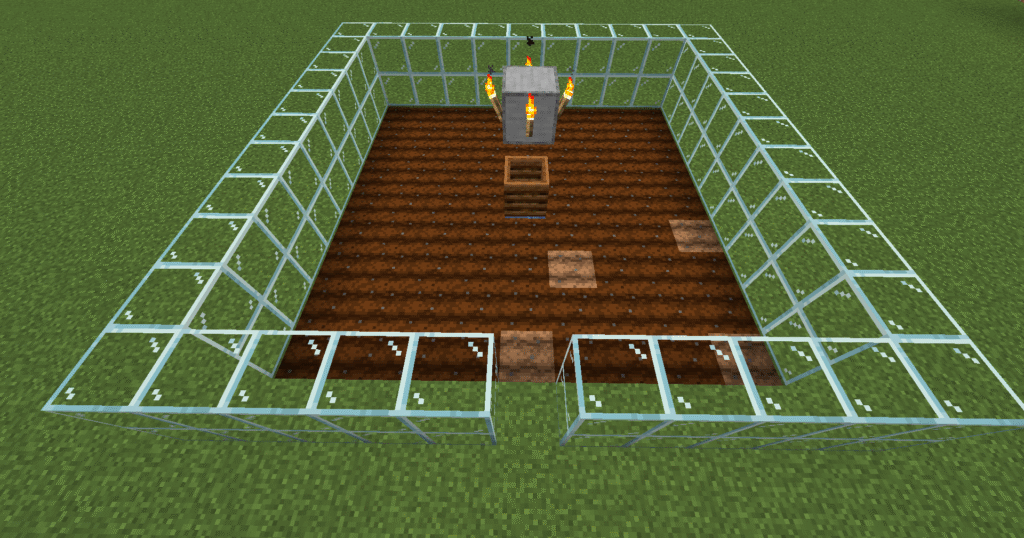
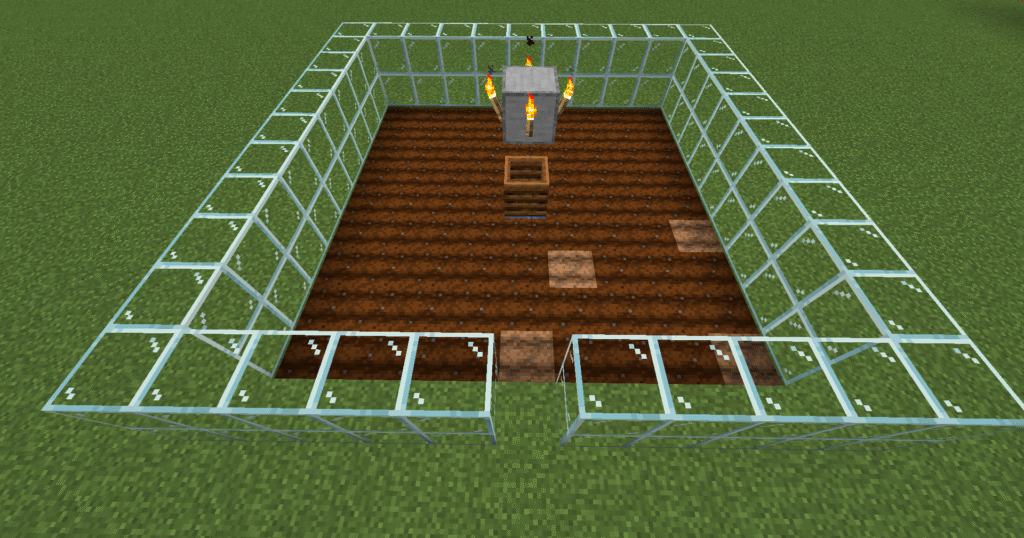
    1. In this section we will build a glass wall 2 blocks high all around the crop growing area.
    2. Leave an opening on one side in the middle.
    3. Next place a composter over the water block and then place a stone block above this with a 1 block gap in between so that the composter can be used.
    4. Place torches on all of the 4 sides of the stone block.
    5. The composter is used so that when your villager has spare seeds they will place these into the composter and then this will turn into bonemeal and the villager will use this to help grow the crops.
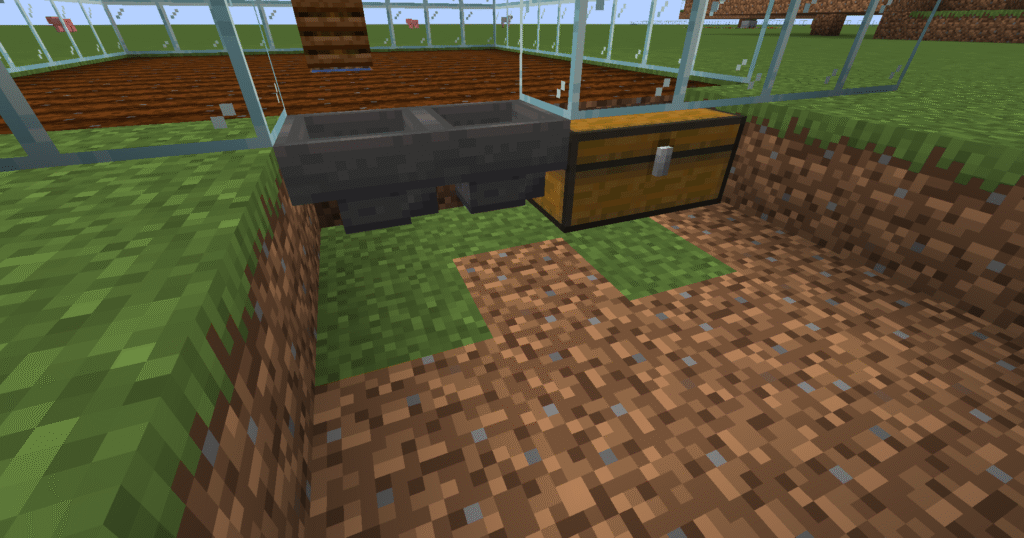
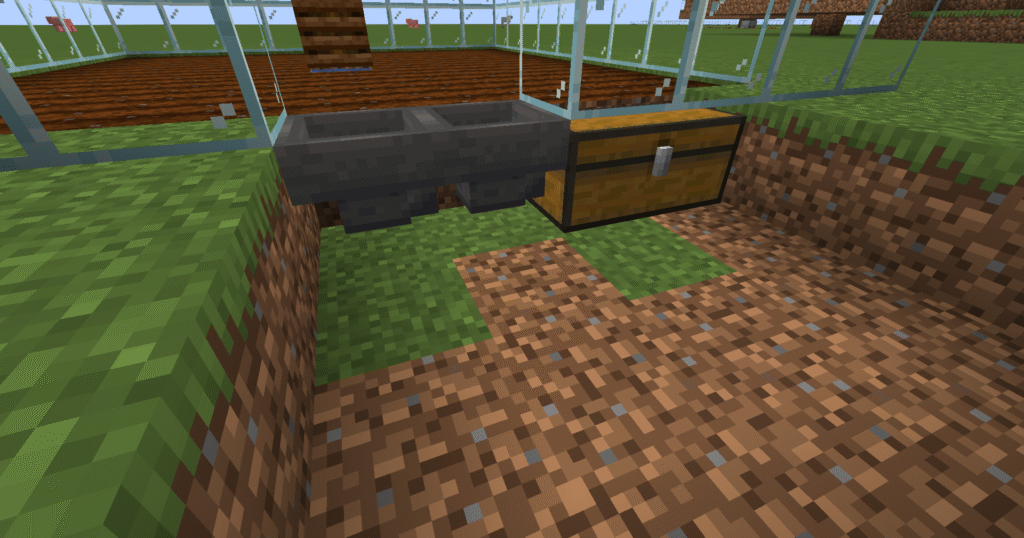
    1. Here we will hollow out a 4 block trough that goes underneath the glass blocks.
    2. So working from the right place your chests down next to each other to make a 1 large chest.
    3. Next place two hoppers that lead into the chest. This is your collection system that will collect your crops. You will need to crouch in order to place the hoppers.
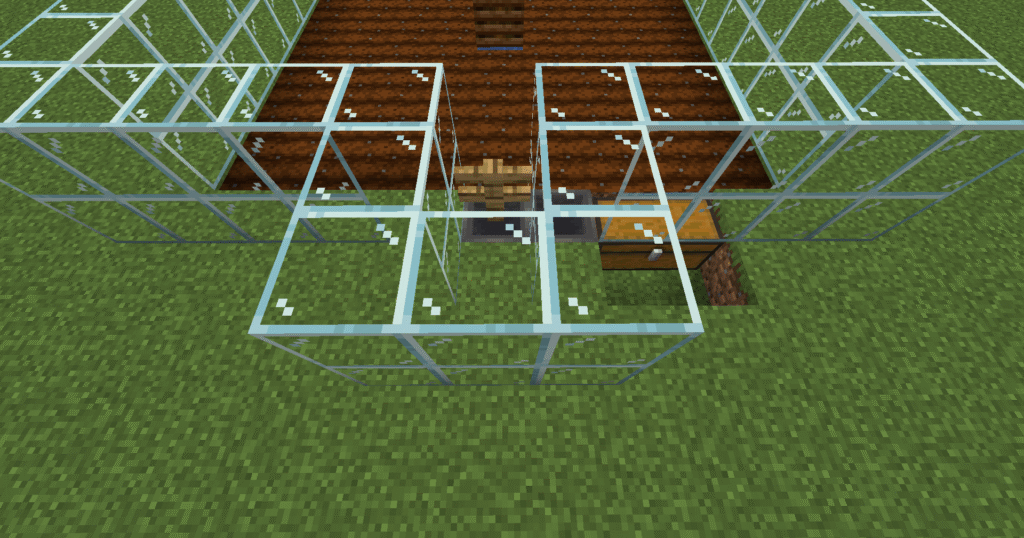
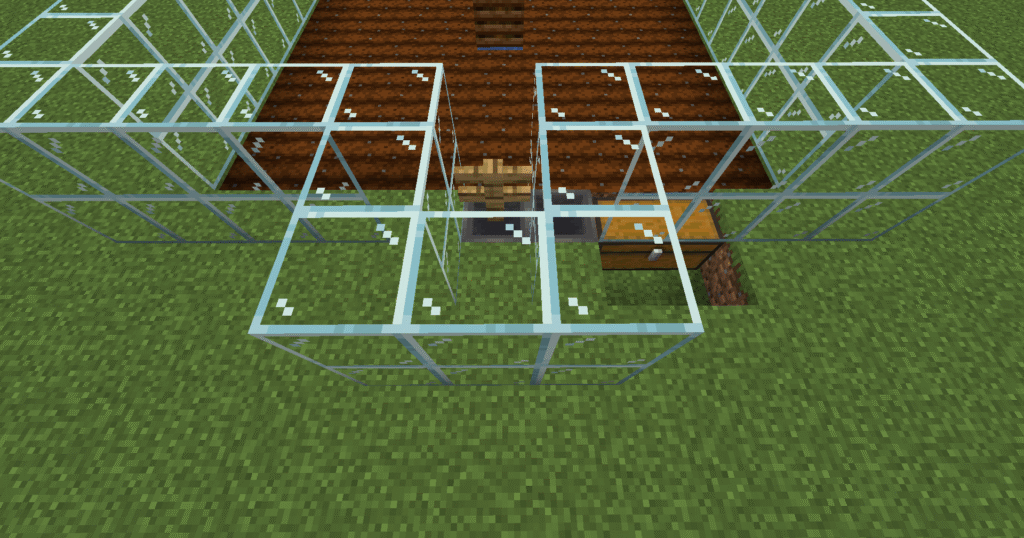
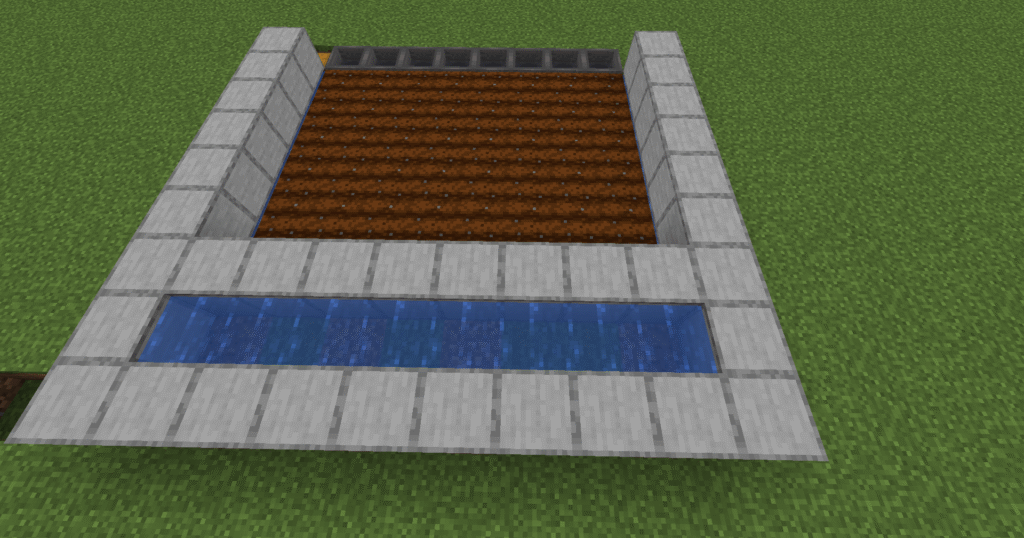
    1. Next you need to fill in the holes that we made but leave two holes in front of the chest so that it can be accessed.
    2. Next build the glass walls out from the other wall by 2 blocks, this should mean that you have a solid grass block behind the hopper that we placed before surrounded by glass blocks 2 high.
    3. On top of this hopper we need to place a fence post, you will need to crouch down when placing the fence post.
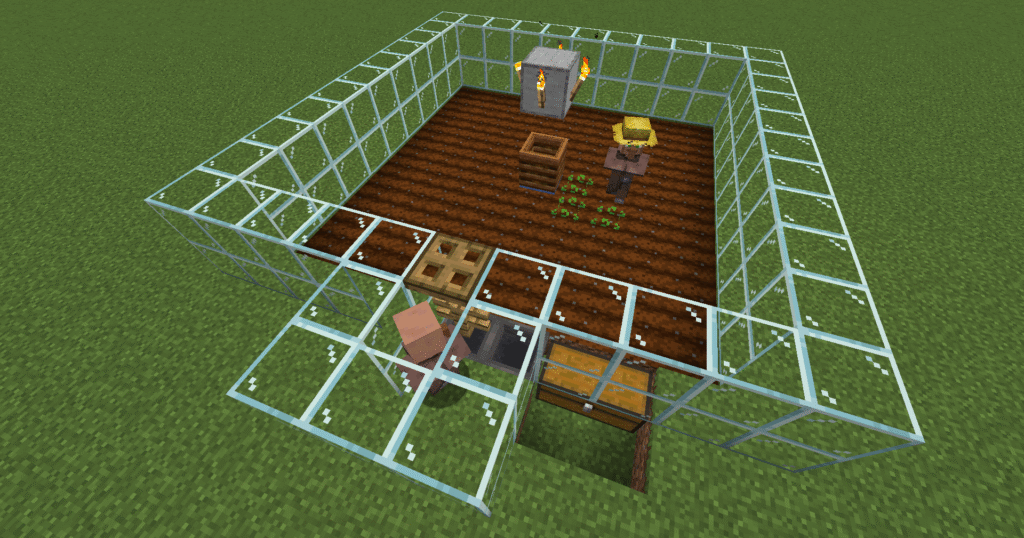
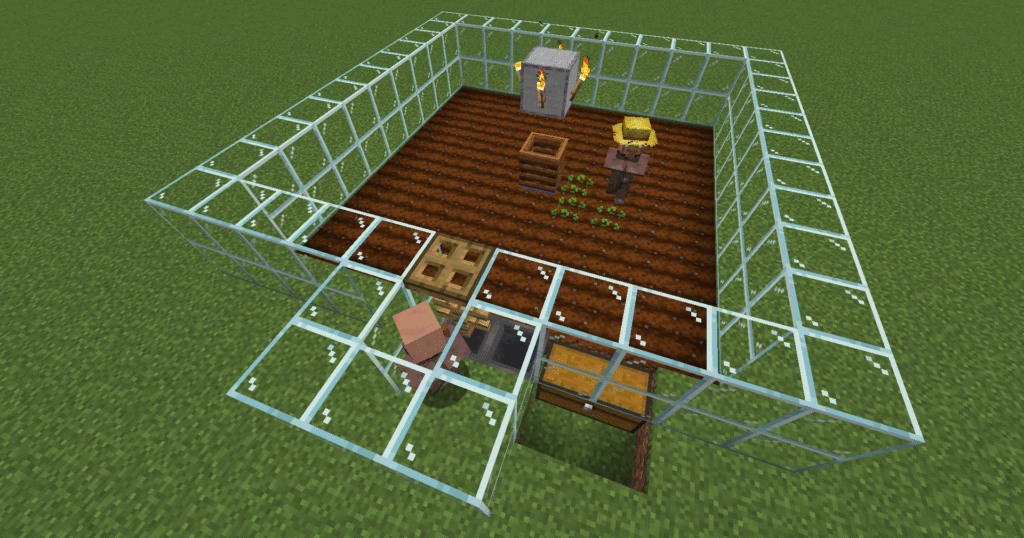
    1. Ok, lets place a trapdoor above the fence post and at the top of the glass block , make sure it is closed.
    2. The next step is to add the villagers. We will first place the villager in the centre of the crop area. He will change into a farmer, you can see this from the yellow hat he is wearing. Ensure that the farmer has seeds to plant.
    3. As soon as he receives seeds he will start to plant them.
    4. Next we will place another villager behind fence post.
    5. This setup will then produce your beetroots with no input from yourself.
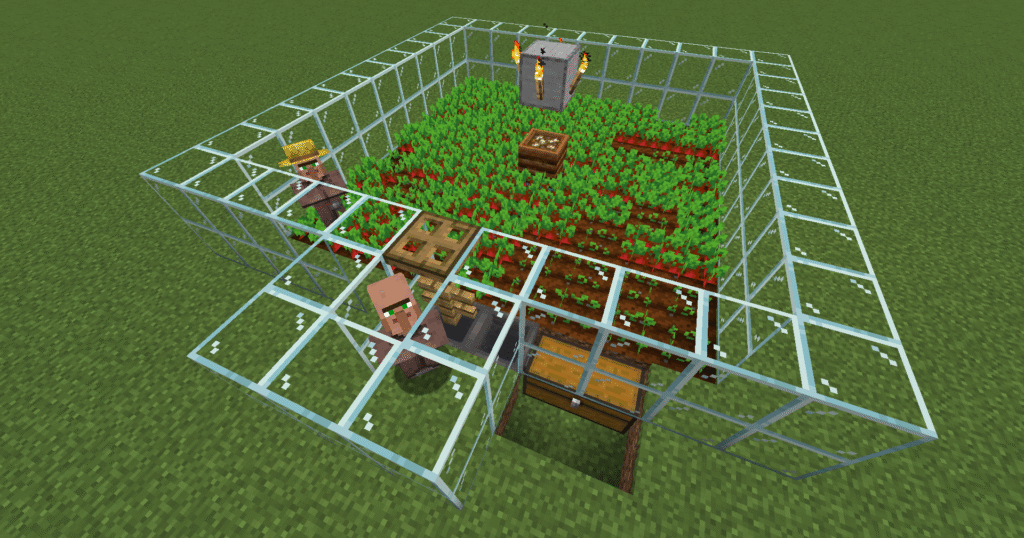
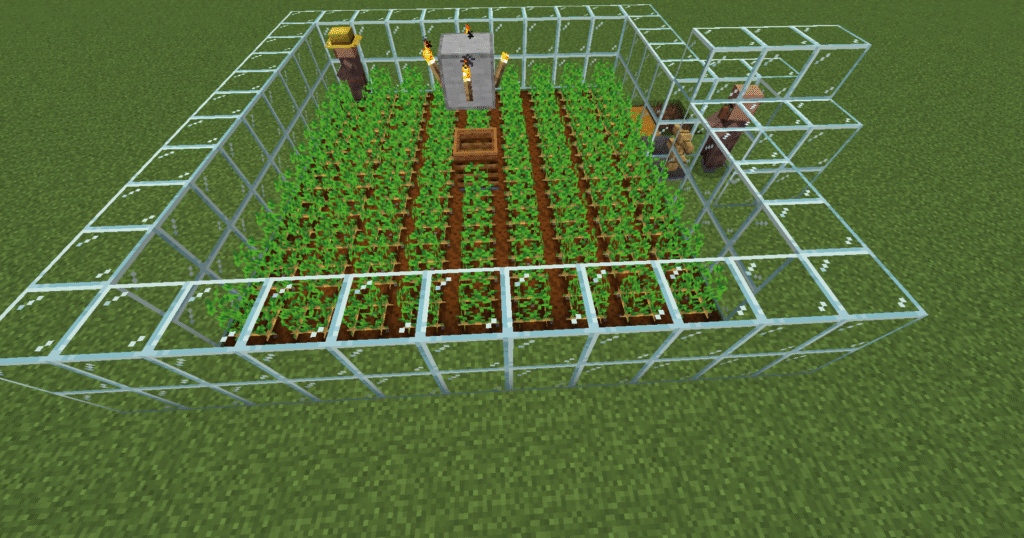
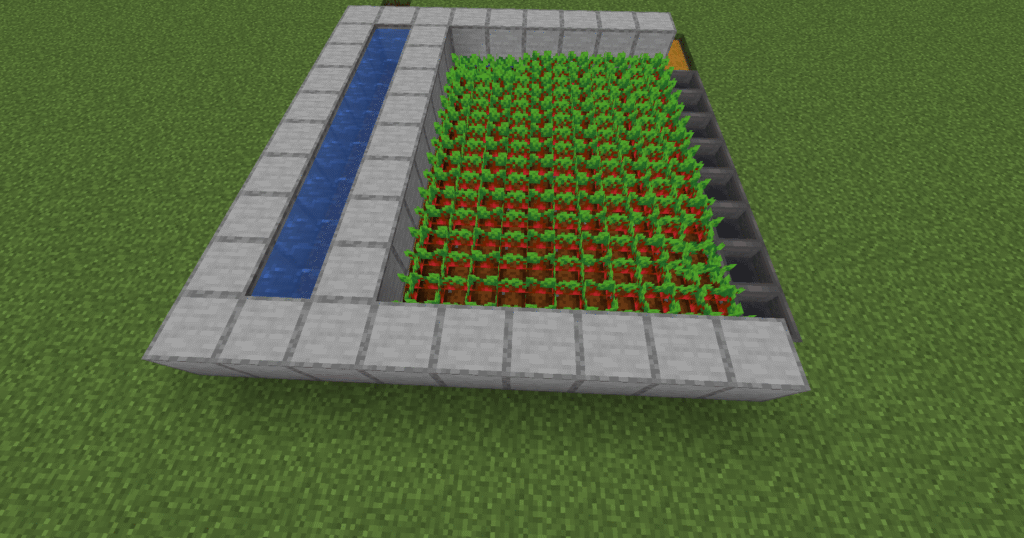
    1. Here is the finished build. If you check your chest you will find the beets that have been harvested and can be used as above in the description.

    What can go wrong – villager not breaking crops.

    • This is normally because your villagers inventory is full. This will mean that your villager can no longer pick up the crops to pass them to the other villager. To resolve this you will need to create another villager collect crops. Also ensure that there is a clear path to the collector villager.
    • The most common reason for this is that mobGriefing is switched off. If mobGriefing is off the villager cannot break crops use /gamerule mobGriefing = true in commands to rectify this.

    What can go wrong – villager not planting or harvesting the crops.

    • This will be because the job block is not positioned properly. Please make sure that the the villager can access the job block and that their profession changes to a farmer who should have a yellow straw hat to show that they are a farmer.

    Additional builds

    • Transport – you can build a transport system so that beetroot can be carried where you want it to go.
    • Sorter – implement a sorter so that beetroot and seeds can be sorted.

    Other suggestions

    • To improve on this build you can use the same principal and link 4 farms together using just 1 villager in the middle of the build to collect the crops from the farmer.
  • Minecraft villager potato farm

    These are the instructions for Minecraft villager potato farm. In this build we will be building a villager potato farm. This villager potato farm is perfect when you don’t want to spend your time planting, growing and harvesting crops. This farm is completely automated with the help of two villagers. Although quite a simple build because of the use of villagers you will need to find a village that is reasonably close to your build.

    This build works by having villagers plant, grow and harvest the potatoes for you. This farm requires two villagers to work. One of the villagers will be placed in the middle of the build and will become a farmer and will plant, grow and harvest the crops. The farmer villager will pass food to the other villager if they can see each other. When the farmer villager passes the potatoes to the villager, the potato will hit the fence post and drop down into the hopper and eventually into the chest for the player to collect. The player does not need to have any interaction except potentially at the start when the player may plant the first lot of crops to get the farm started.

    Potatoes are used in a few ways in Minecraft these include –

    • Food source – you can eat raw potatoes though they only restore a little health. Baking them in a furnace or smoker turns them into baked potatoes which restore more hunger points.
    • farming – potatoes can be farmed.
    • Trading – potatoes can be traded for emeralds.
    • Breeding – if you have pigs feeding them potatoes will make them breed and grow.
    • Composting – potatoes can be placed into a composter to make bonemeal.

    Before being able to farm potatoes you will first need find some potatoes to plant.

    • Villages – potatoes can be found in village farms.
    • Zombie drops – zombies will sometimes drop potatoes.
    • Shipwrecks and chests – you may find potatoes in chests in shipwrecks or inside village houses.
    • Trading – Farmer villagers sometimes trade potatoes for emeralds.

    These are the ingredients and recipes that you will need to make this Minecraft villager potato farm. Please ensure that you have all of the ingredients before you start your build.

    ItemPictureAmount
    HoeHow to craft a hoe1
    PotatoesPotatoes80
    ComposterHow to craft a composter2
    Stone blockStone block1
    TorchHow to craft a torch4
    Glass blockHow to craft a glass block88
    Bucket of waterWater bucket1
    HopperHow to craft a hopper2
    VillagerVillager2
    ChestHow to craft a chest2
    TrapdoorHow to craft a trapdoor1
    FenceHow to craft a fence1

    Hopper – to make a hopper you will first need to make a chest.


    Here we will explain in detail how to build a Minecraft villager potato farm. Please follow the instructions carefully.

    1. In the first stage of this build we need to dig a hole and place the bucket of water into it. This will be the centre of the planting area.
    2. The next step is to hoe 4 blocks out from each of the flat sides of the block as shown in the picture.
    1. The next step is to hoe out between these lines. This should make a 9×9 block square for you to plant your crops.
    2. As you can see from the screenshot the ground is already becoming watered from the water block.
    3. You can see this from the darker blocks of tilled soil.
    1. In this section we will build a glass wall two blocks high all around the crop growing area. Leave an opening on one side in the middle.
    2. Next place a composter over the water block an then place a stone block 1 space above this. There should be a 1 block gap between the composter and the block so that the composter can be accessed.
    3. Place torches on all four sides of the stone block.
    4. The composter is used so that when your villager has spare seeds they will place these into the composter and this will turn into bonemeal which the villager can use to help grow the crops.
    1. Next we will hollow out a 4 block x 4 block trough that goes underneath the glass blocks and the gap you left.
    2. So working from the right, place your chests down next to each other to make a large chest.
    3. Next place 2 hoppers that lead into the chest. This is the collection system for your crops.
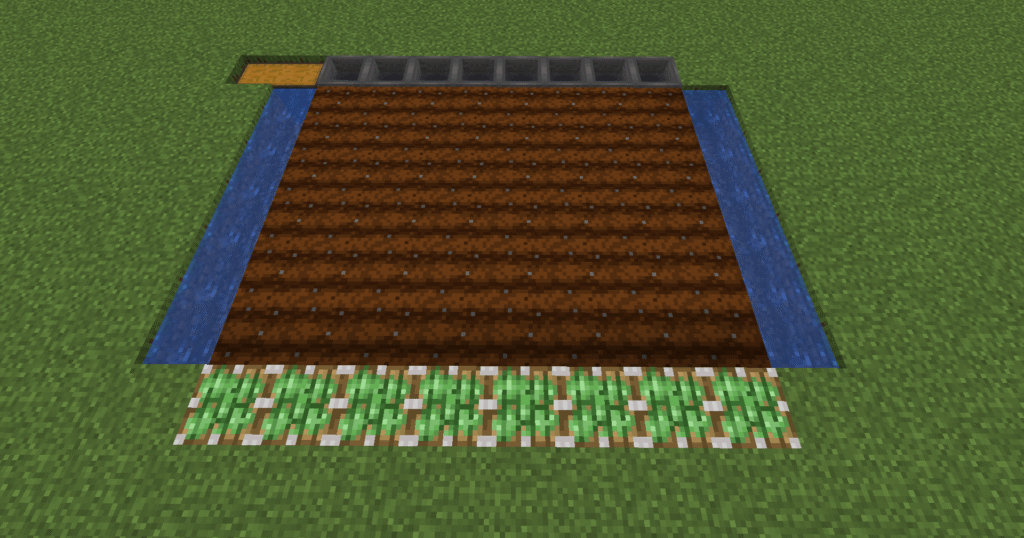
    1. Next you need to fill in the trough that we made but leave 2 blocks in front of the chest so that it can be accessed.
    2. Next build the glass walls out from the wall in a 3 block by 3 block square as shown, this should mean that you have a solid grass block behind one hopper and a glass block on the other hopper that we placed before.
    3. On top of this hopper we need to place a fence, you will need to crouch down when placing the fence.
    1. Ok, lets place a trapdoor above the the fence at the top of the glass block and make sure it is closed.
    2. The next step is to add the villagers.
    3. We will first place the villager in the centre of the crop area. He will change into a farmer, you can see this from the yellow hat he is wearing. Ensure that the farmer has seeds to plant.
    4. As soon as he receives seeds he will start to plant them.
    5. Next we will place the villager behind the fence post on the grass block. This setup will then produce your potatoes with no input from yourself.
    1. Here is the finished build. If you check your chest after a while you will fine the potatoes that have been harvested.

    What can go wrong – villager not picking up crops.

    • This is normally because your villagers inventory is full. This will mean that your villager can no longer pick up the crops to pass them to the other villager. To resolve this you will need to create another villager to collect crops. Also ensure that there is a clear path to the collector villager.


    What can go wrong – villager not breaking crops.

    • The most common reason for this is that mobGriefing is switched off. If mobGriefing is off the villager cannot break crops, use /gamerule mobGriefing = true in commands to rectify this.

    What can go wrong – villager not planting or harvesting crops.

    • This will be because the job blocks are not positioned properly. Please make sure that the the villager can access the job block and that their profession changes, a farmer should have a yellow straw hat to show that they are a farmer.
    How to make the build easier.
    One way to make the build easier is to place minecart track from a villager breeder to this build so that you can get the villagers easier.
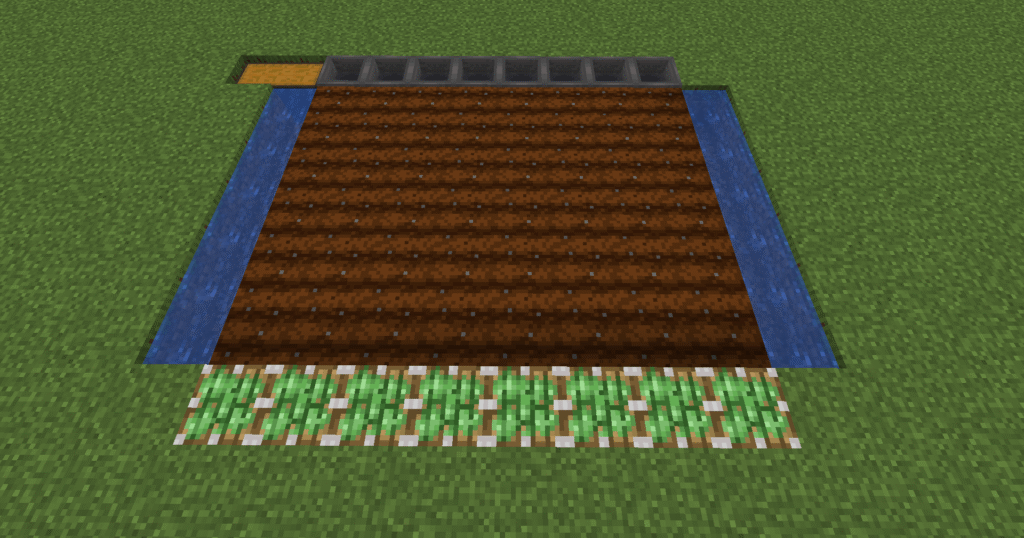

    Additional builds

    • Transport – you can add a transport system so that the potatoes can be taken where you want them to go.
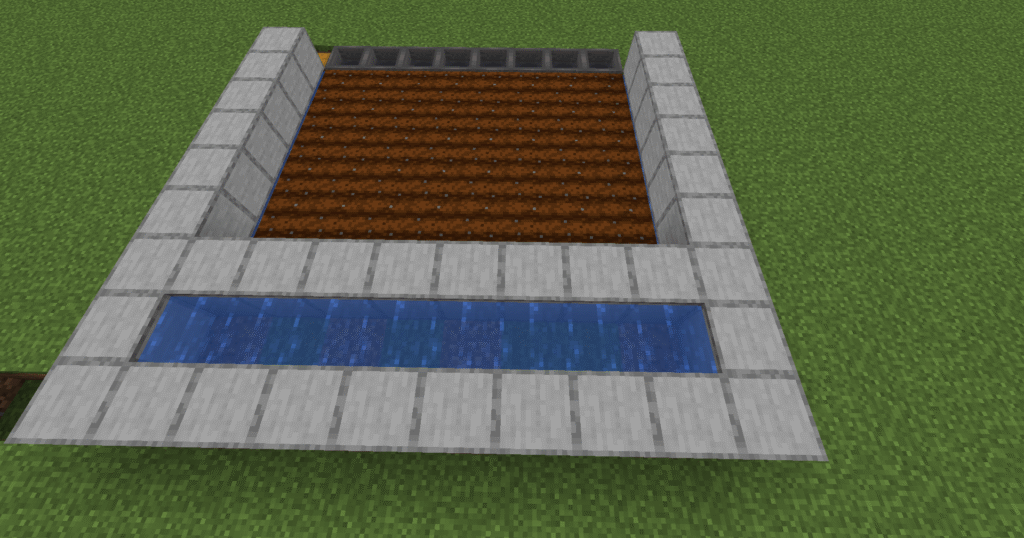
    • Baked potatoes – you can add a hopper to the bottom of the chest leading into a furnace, this will then bake the potatoes.

    Other suggestions for the build – to further improve this build you can actually link 4 farms together so that a single villager in the middle of the build can take the crops for all of the four farms.


  • Minecraft redstone beetroot farm

    These are the instructions for building a Minecraft redstone beetroot farm. This is produced by the crop growing naturally after the player has planted them and then being harvested automatically into a chest. This redstone beetroot farm works in the way that when the player switches a lever this will release water that will wash the beetroot into a row of hoppers and eventually into a chest. This is done by sticky pistons that will raise and retract back down. When the sticky pistons are lowered the water will flow down and wash the beetroot into the hoppers and finally into the chest. The player will have to plant the crops for this build to work. They will also have to release the lever to wash the beetroot into the hoppers and eventually into the chest.

    The produce of this farm is beetroot and it can be used for the following:

    • Food – food can be eaten by the player to restore the hunger bar.
    • Crafting – by using the crafting table 6 beetroots can be crafted into beetroot soup.
    • Breeding – beetroot can be used for breeding and growing pigs.
    • Dye – can be crafted into a dye in the crafting table using 1 beetroot.
    • Composting – beetroot can be placed into a composter to make compost and eventually bonemeal.

    To be able to grow beetroots you will need to get beetroot seeds. Here are the ways you can get the beetroot seeds.

    • Beetroot seeds can be found in a village farm.
    • Dungeon chest.
    • Mineshaft chest.
    • End city chest
    • Trail ruins chest.
    • Woodland mansion chest.
    • Can be got from a wandering trader for one emerald.

    These are the ingredients and recipes that you will need to make this Minecraft redstone beetroot farm. Please ensure that you have all of the ingredients before you start your build.

    ItemPictureAmount
    StoneStone block34
    Bucket of waterWater bucket8
    Repeater8
    Redstone dustRedstone dust10
    ChestHow to craft a chest2
    HoeHow to craft a hoe1
    LeverHow to craft a lever1
    HopperHow to craft a hopper8
    Sticky pistonsHow to craft a sticky piston8
    Beetroot seedsBeetroot seeds48
    • Hopper – to craft a hopper you will first need to craft a chest.
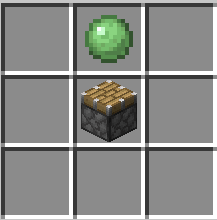
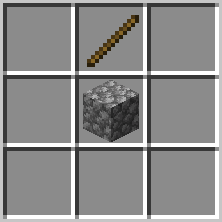
    • Repeater – to make a repeater you will have to craft redstone torches first.
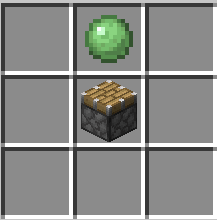
    • Sticky Piston – to craft a sticky piston you will first need to craft a piston.

    Here we will explain in detail how to build this Minecraft redstone beetroot farm Minecraft. Please follow the instructions carefully.

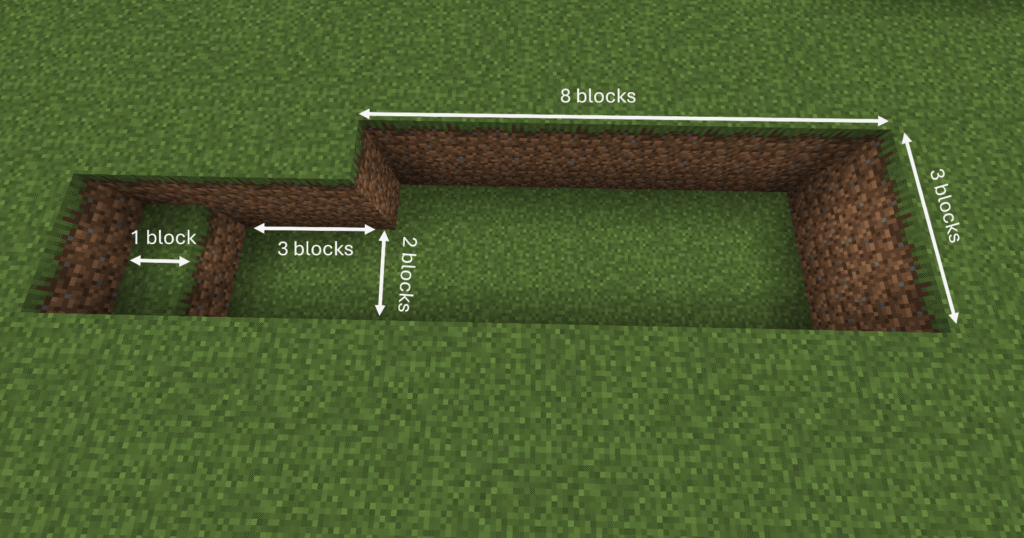
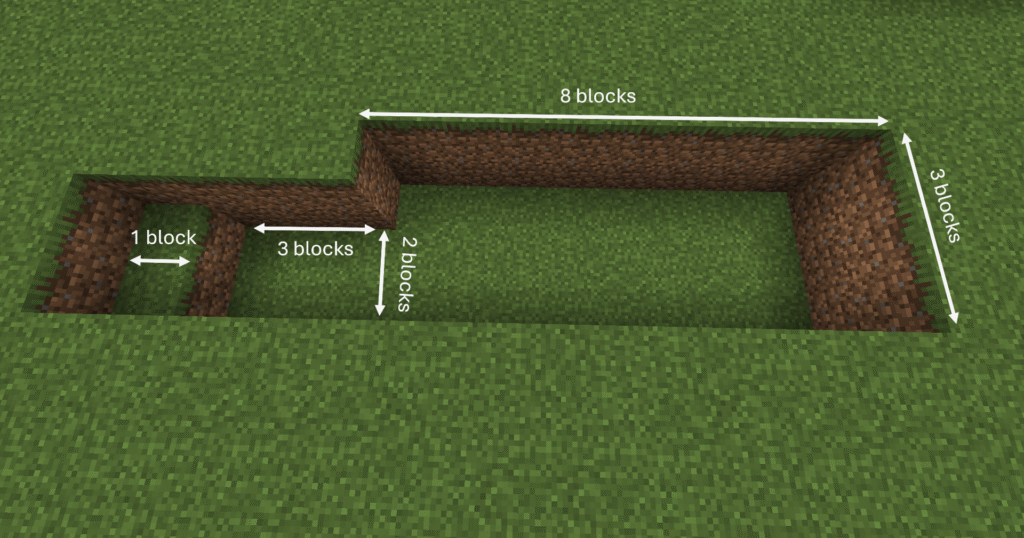
    1. The first stage is to prepare for the redstone section of the build.
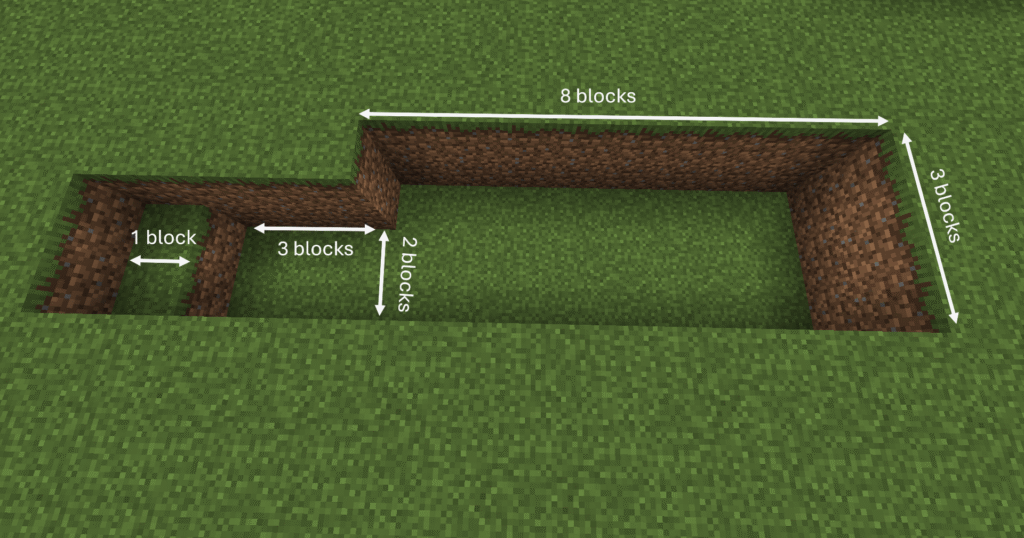
    2. This entails digging 2 blocks down in a 8 blocks by 3 blocks section. Then on the left hand side dig 3 blocks by 2 blocks.
    3. Finally a 1 block down and a 1 block by 2 blocks to enable you to get out of the hole. Dig this on the end of the 3 block by 2 block hole. It should look something like the picture.
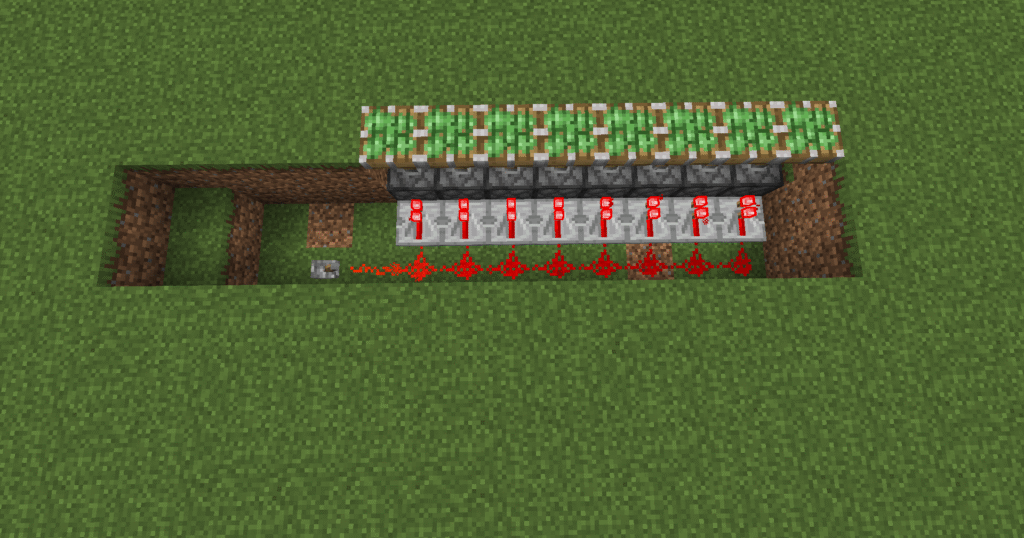
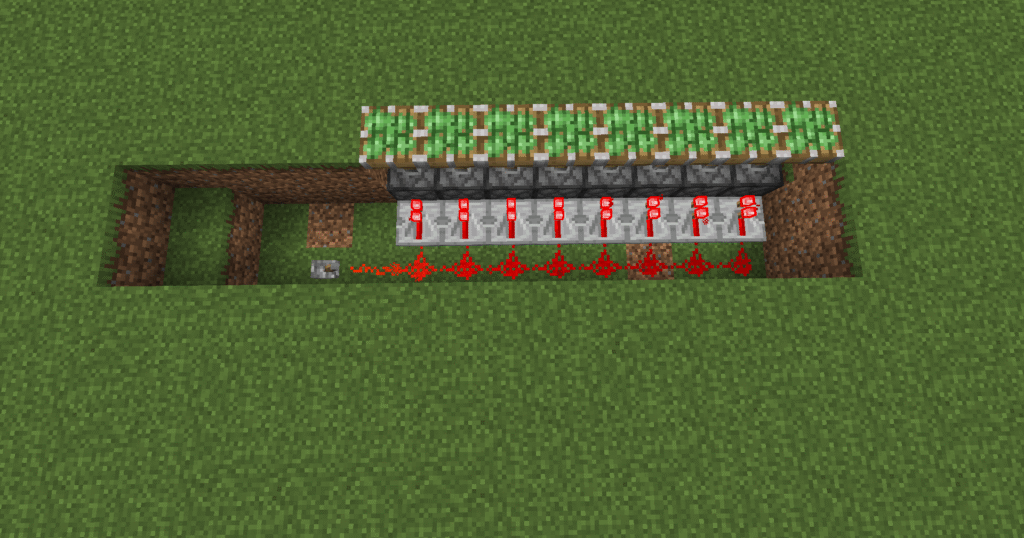
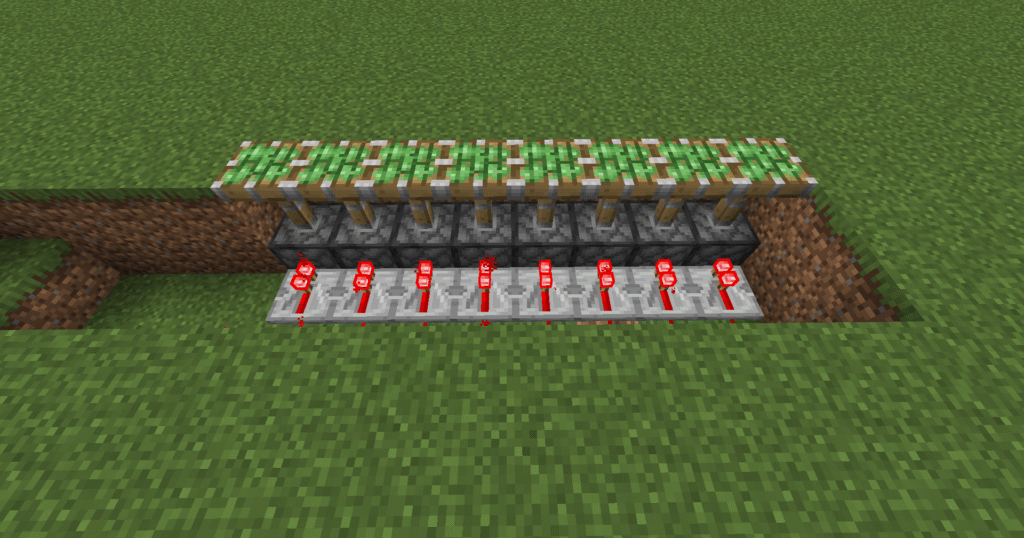
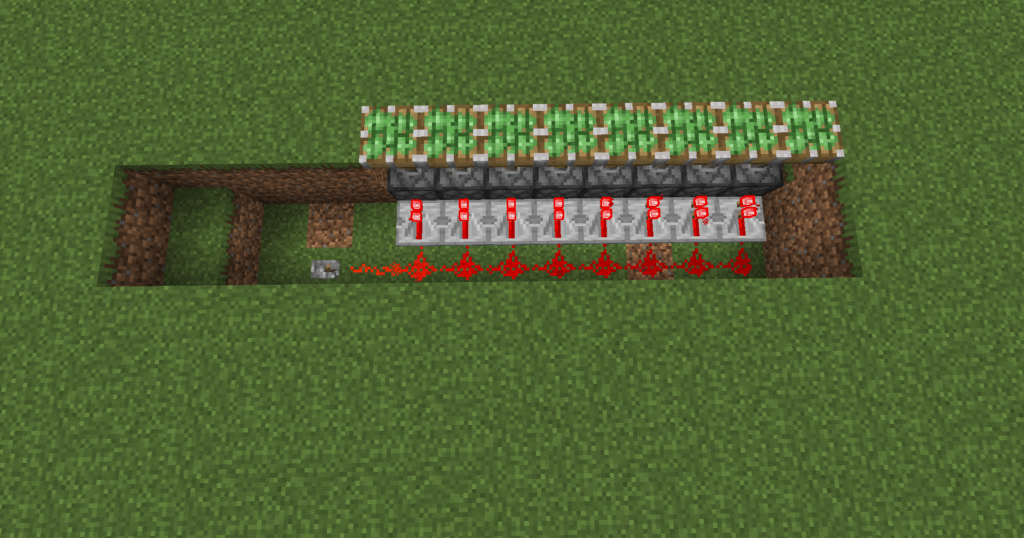
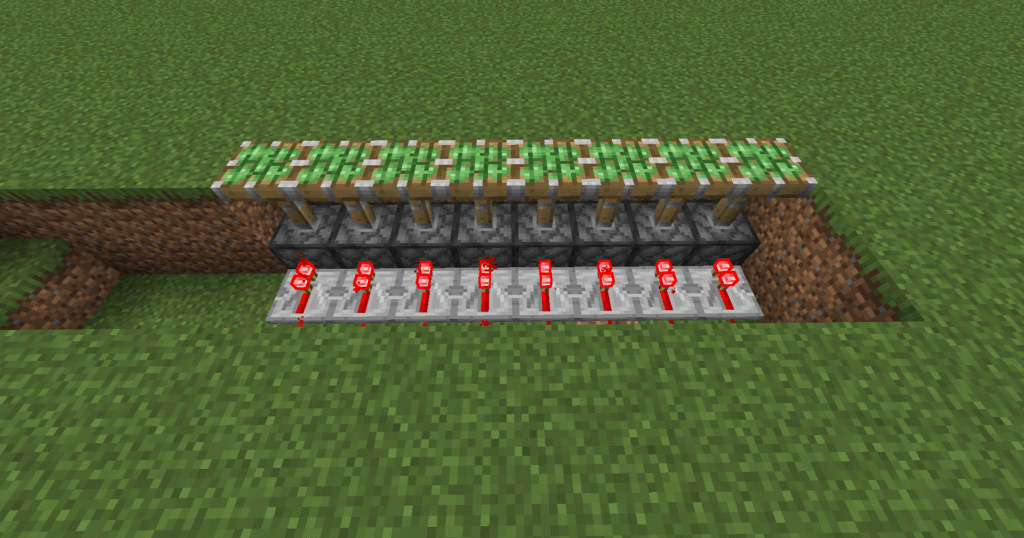
    1. Lets now place down the sticky pistons. Place the sticky pistons in the back section ensuring that they are green side up.
    2. Next run repeaters pointing towards the sticky pistons along the whole length of the sticky pistons.
    3. Then place redstone dust behind the repeaters extending by one block at the end and place down a lever in the next block.
    4. When switching the lever the sticky pistons should come level with the ground.
    1. Lets now switch the lever and ensure that the sticky pistons extend and retract normally.
    2. Ensure that the pistons are extended to move on to the next section. They should be level with the ground.
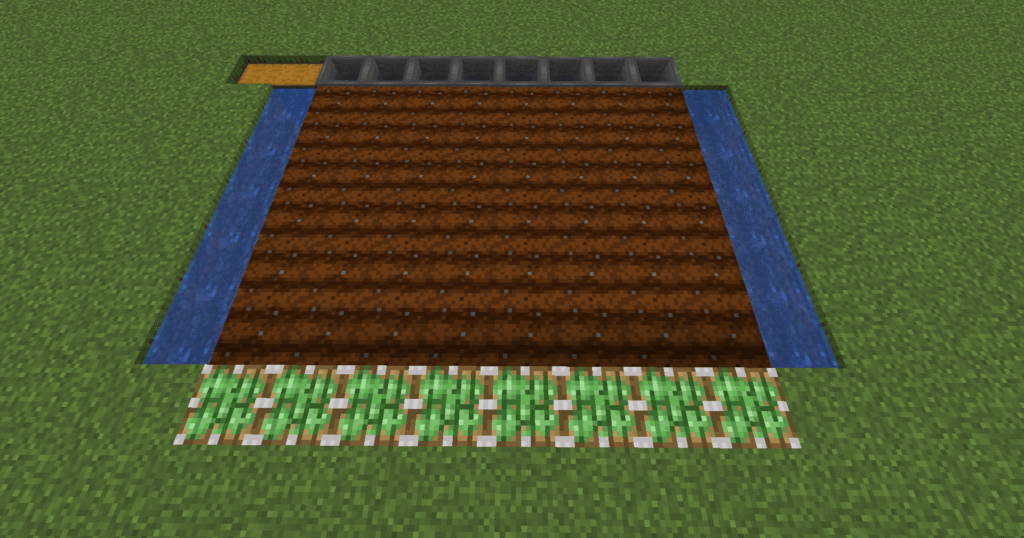
    1. Ok, first up lets hoe a rectangle, from the sticky pistons, hoe 6 blocks down all the way along to make a 8 block by 6 block rectangle.
    2. Dig a 1 block hole down each side of the tilled area.
    3. Next dig a 1 block deep hole along the opposite end to the sticky pistons for 10 blocks (2 blocks longer than the tilled area on one end).
    4. Place your two chests down as shown in the screenshot. Next you need to place your hoppers leading into the chest.
    5. Fill the hole by the side of the tilled area with water ensuring it reaches both ends.
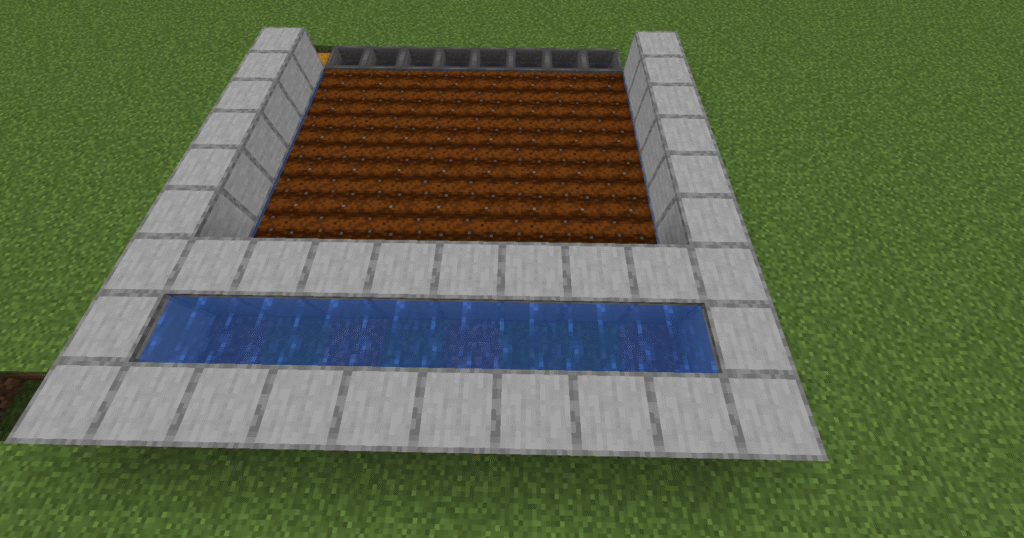
    1. In this section we need to build the stone walls around the build.
    2. From the hoppers place stone blocks over the water and go up 9 blocks.
    3. Next place stone blocks on top of the pistons.
    4. Then place a second row of stone blocks to join the two rows in step 2.
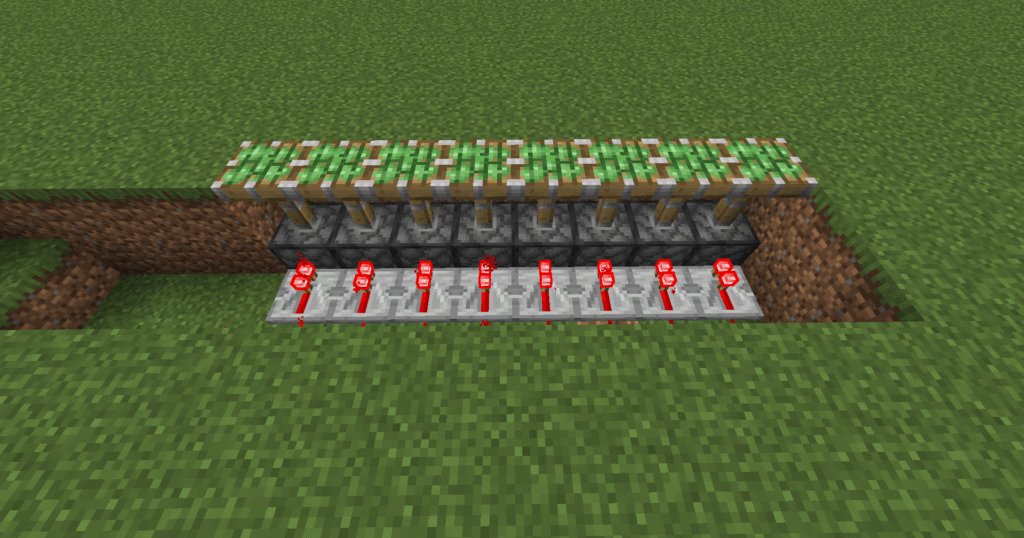
    5. Place a row of stone blocks above the repeaters making a trough.
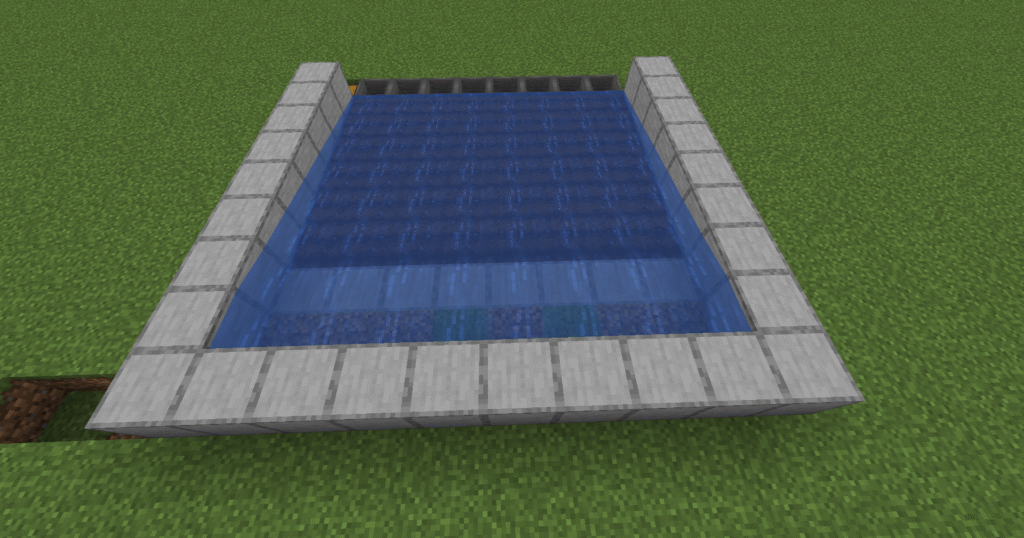
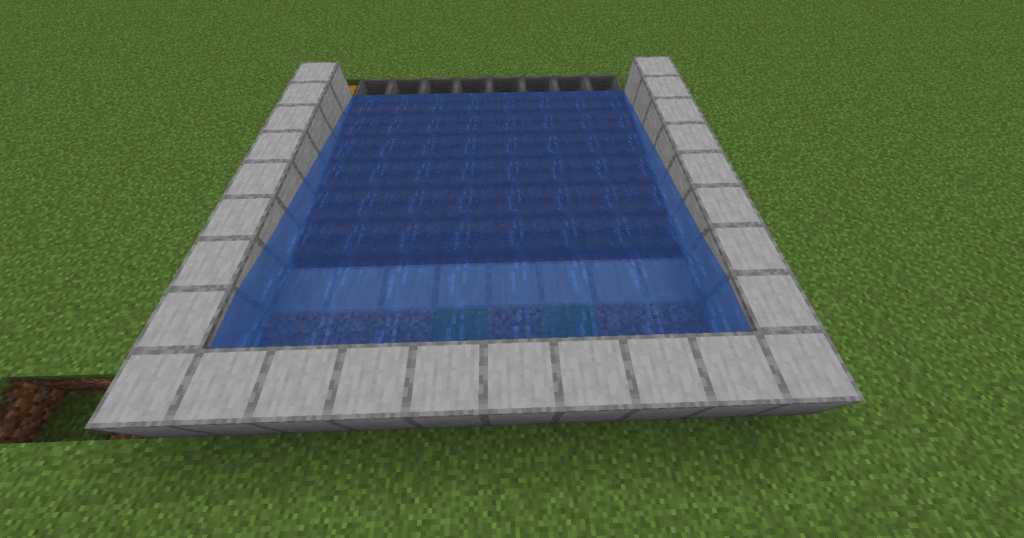
    6. Now lets place buckets of water into that gap.
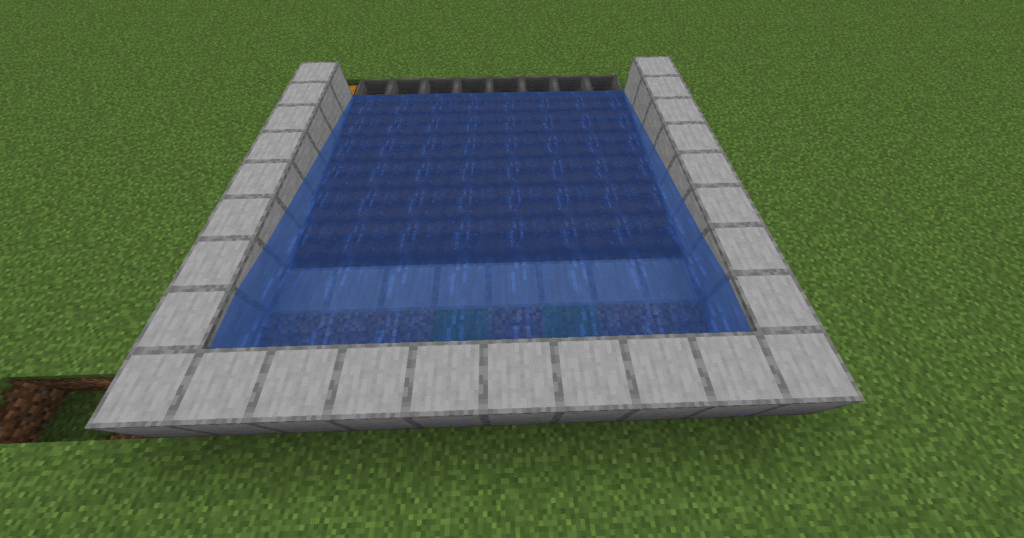
    7. You should now have something that looks like this picture.
    1. Lets now make sure that this works.
    2. If you select the lever that you placed earlier, the front row of blocks should drop down and the water should flow down to the edge of the hoppers.
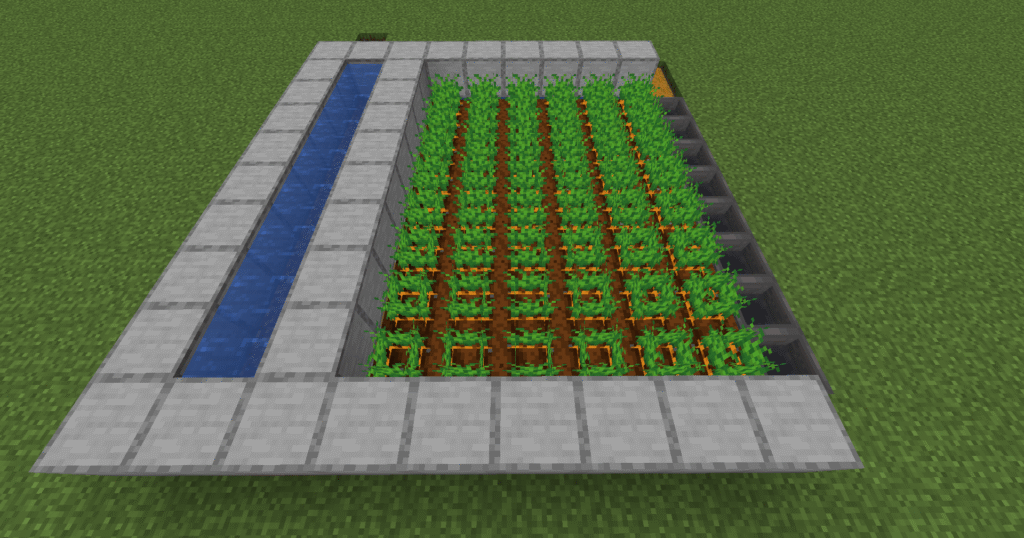
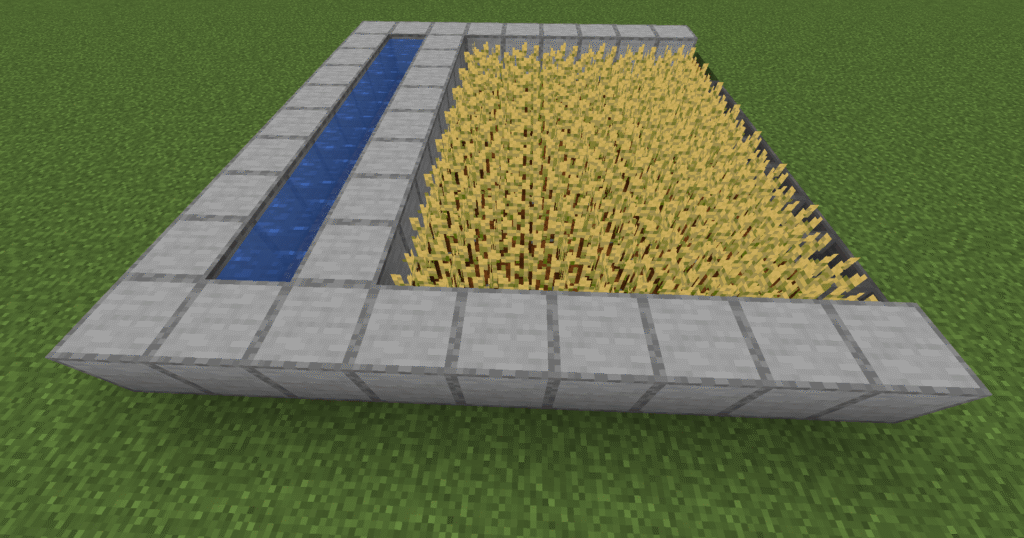
    1. This is final section, now we plant the crops and wait for them grow.
    2. Select the lever and watch the crops flow down into the hoppers and then into the chest.

    What can go wrong – water not reaching the hoppers.

    • Ensure that there are only 6 blocks of beetroot planted. The water will then reach the hoppers.

    What can go wrong – mobs trampling crops.

    • Place fences and a gate around the build.

    Additions to the build

    • Increase cropsThis build can be made wider by adding more pistons and hoppers, it cannot be made longer as the water will only reach this far.

  • Minecraft redstone carrot farm

    These are the instructions for how to build a Minecraft redstone carrot farm. To get carrots to grow in this redstone carrot farm it is essential to plant them near to a water source. This farm works by allowing the crops to grow naturally and then the player will pull a lever and the water will flow down and harvest the carrots. With this build there will only be carrots harvested, unlike wheat where you will have wheat and seeds to collect. The water will push carrots into the hoppers and eventually into a chest for you to collect.

    • Food source – carrots are a food source for the player.
    • Breeding – carrots can be used for breeding pigs, rabbits and villagers.
    • Harvesting – carrots can be planted to grow more carrots. Each carrot drops between 2 and 4 carrots when harvested.
    • Crafting – carrots can be crafted with gold nuggets to create golden carrots, which are used to brew potions of Night Vision. Golden carrots also provide one of the highest saturation levels when eaten.
    • Crafting – carrots are an ingredient in crafting a carrot on a stick, which is used to control pigs when riding them.

    To grow carrots you will first need to obtain carrots. These can be found at the following places.

    • Village farms.
    • Zombies have a chance to drop carrots.
    • Carrots can sometimes be found in shipwreck supply chests.
    • Carrots can also be found in dungeon chests.

    These are the ingredients and recipes that you will need to make this Minecraft redstone carrot farm. Please ensure that you have all of the ingredients before you start your build.

    ItemPictureAmount
    Stone blockStone block34
    Bucket of waterWater bucket8
    RepeaterHow to craft a repeater8
    Redstone dustRedstone dust10
    ChestHow to craft a chest2
    HoeHow to craft a hoe1
    LeverHow to craft a lever1
    HopperHow to craft a hopper8
    Sticky pistonHow to craft a sticky piston8
    CarrotsCarrot48
    • Hopper -in this build you need craft a chest to make it.
    • Sticky Piston – for this build you will need to make a piston first.

    Here we will explain in detail how to build this build a Minecraft redstone carrot farm in Minecraft. Please follow the instructions carefully.

    1. The first stage is to prepare for the redstone section of the build.
    2. This entails digging 2 blocks down in a 8 block x 3 block section. Then on the left hand side dig 3 block x 2 blocks.
    3. Finally a 1 block down and a 1 block x 2 blocks to enable you to get out of the hole. Dig this on the end of the 3 x 2 block hole. It should look something like the picture.
    1. Lets now place down the sticky pistons. Place the sticky pistons in the back section ensuring that they are green side up.
    2. Next run repeaters pointing towards the sticky pistons along the whole length of the sticky pistons.
    3. Then place redstone dust behind the repeaters extending by one block at the end and place down a lever in the next block.
    4. When switching the lever the sticky pistons should come level with the ground.
    1. Lets now switch the lever and ensure that the sticky pistons extend and retract normally.
    2. Ensure that the pistons are extended and are level with the ground before we move on to the next section.
    1. Ok, first up lets hoe a rectangle, from the sticky pistons, hoe 6 blocks all the way along the pistons to make a 6 block x 8 block rectangle.
    2. Dig a 1 block hole down each side of the tilled area.
    3. Next dig a 1 block deep hole along the opposite end to the sticky pistons for 10 blocks (2 blocks longer than the tilled area on one end).
    4. Place your two chests down as shown in the picture. Next you need to place your 8 hoppers leading into the chest, you will need to crouch to place the hoppers .
    5. Fill the hole by the side of the tilled area with water ensuring it reaches both ends.
    1. In this section we need to build the stone walls around the build.
    2. From the hoppers place stone blocks over the water and go up 9 blocks.
    3. Next place a row of stone blocks on top of the pistons.
    4. Then place a second row of stone blocks to join the two rows in step 2.
    5. Place a row of stone blocks above the repeaters making a trough.
    6. Now lets place water into that gap.
    7. You should now have something that looks like this picture.
    1. Lets now make sure that this works.
    2. If you select the lever that you placed earlier, the front row of blocks will drop down and the water will flow down the edge of the hoppers.
    1. This is final section, we plant the crops and wait for them grow.
    2. Select the lever and watch the crops flow down into the hoppers and then into the chest.

    What can go wrong – water flowing into the hoppers.

    • Ensure that there are six blocks for the water to flow over.

    What can go wrong – mobs trampling crops.

    • Build fences and a gate around the build to protect the crops.

    Additions to the build –

    • Increase crops – this build can be made wider by adding more pistons and hoppers, it cannot be made longer as the water will only reach this far.

  • Minecraft redstone wheat farm

    In this build be will be building a Minecraft redstone wheat farm. This redstone wheat farm works by allowing the wheat to grow naturally and then when the player selects the lever the water will flow down washing the wheat into hoppers and eventually in to a chest. When using the redstone wheat farm the player for this build will have to plant the wheat seeds and then pull the lever to harvest the wheat.

    This is what wheat is used for –

    • Food – wheat can be crafted in to loaves of bread, cookies and cakes and used as a food source.
    • Food – wheat is used for feeding cows, sheep, goats and mooshrooms. When holding wheat all of these animals will follow you and you can place them in a pen.
    • Breeding – wheat can be fed to cows, sheep, goats and mooshrooms to encourage breeding.
    • Healing – wheat can heal a horse 1 health or lower its temper by 3% when attempting to tame it. It can also decrease the time it takes for a foal to grow by 20 seconds.
    • Composting – excess wheat can be placed in a composter and made into bonemeal.

    Where can you get wheat seeds from –

    • Breaking tall grass.
    • Can be found in village farms.
    • Loot in certain chests.

    These are the ingredients and recipes that you will need to make a Minecraft redstone wheat farm. Please ensure that you have all of the ingredients before you start your build.

    ItemPictureAmount
    StoneStone block34
    Bucket of waterBucket of water8
    RepeaterHow to craft a repeater8
    Redstone dustRedstone dust10
    ChestHow to craft a chest2
    HoeHow to craft a hoe1
    LeverHow to craft a lever1
    HopperHow to craft a hopper8
    Sticky pistonsHow to craft a sticky piston8
    Wheat seedsWheat seeds48
    • Hopper – for this build you need to craft a chest to make it.
    • Sticky Piston – for this build you will need to make a piston first.

    Here we will explain in detail how to build this Minecraft redstone wheat farm. Please follow the instructions carefully.

    1. The first stage is to prepare for the redstone section of the build.
    2. This entails digging 2 blocks down in a 8 block by 3 block section. Then on the left hand side dig 3 blocks by 2 blocks.
    3. Finally a 1 block down and a 1 block by 2 blocks to enable you to get out of the hole. Dig this on the end of the 3 block by 2 block hole. It should look something like the picture.
    1. Lets now place down the sticky pistons. Place the sticky pistons in the back section ensuring that they are green side up.
    2. Next run repeaters pointing towards the sticky pistons along the whole length of the sticky pistons.
    3. Then place redstone dust behind the repeaters extending by 1 block and place down a lever in the next block. When switching the lever the sticky pistons should come level with the earth as shown in the picture.
    1. Lets now switch the lever and ensure that the sticky pistons extend and retract normally.
    2. Ensure that the pistons are extended so that they are level with the ground and then move on to the next section.
    1. Ok, first up lets hoe a rectangle 6 blocks by 8 blocks, from the sticky pistons.
    2. Dig a 1 block hole down each side of the tilled area as shown in the picture.
    3. Next dig a 1 block deep hole along the opposite end to the sticky pistons for 10 blocks (2 blocks longer than the tilled area on one end).
    4. Place your 2 chests down as shown in the picture. Next you need to place your 8 hoppers all the way along leading into the chest.
    5. Fill the hole by the side of the hoed area with water ensuring it reaches both ends.
    1. In this section we need to build the stone walls around the build.
    2. From the hoppers place stone blocks over the water and go up 9 blocks.
    3. Next place stone blocks on top of the pistons.
    4. Then place a second row of stone blocks to join the two rows in step 2.
    5. Place a row of stone blocks above the repeaters making a trough.
    6. Now lets place water into that gap.
    7. You should now have something that looks like this.
    1. Lets now make sure that this works.
    2. If you select the lever that you placed earlier, the front row of blocks will drop down and the water will flow down to the edge of the hoppers.
    3. Press the lever again and the wall should pop back up.
    1. This is final section, we plant the crops and wait for them grow (this can be speeded up by using bonemeal). Switch the lever and watch the crops flow down into the hoppers and then into the chest.
    2. Once the water has dried up the are can be replanted and the process can start again.

    What can go wrong – water not reaching the hoppers.

    • Ensure that there are only 6 blocks of wheat planted. The water will then reach the hoppers.

    What can go wrong – mobs trampling crops.

    • Place fences and a gate around the build.

    Additions to the build –

    • Increase crops – This build can be made wider by placing more pistons and hoppers, it cannot be made longer as the water will only reach this far.

  • Minecraft beetroot farm

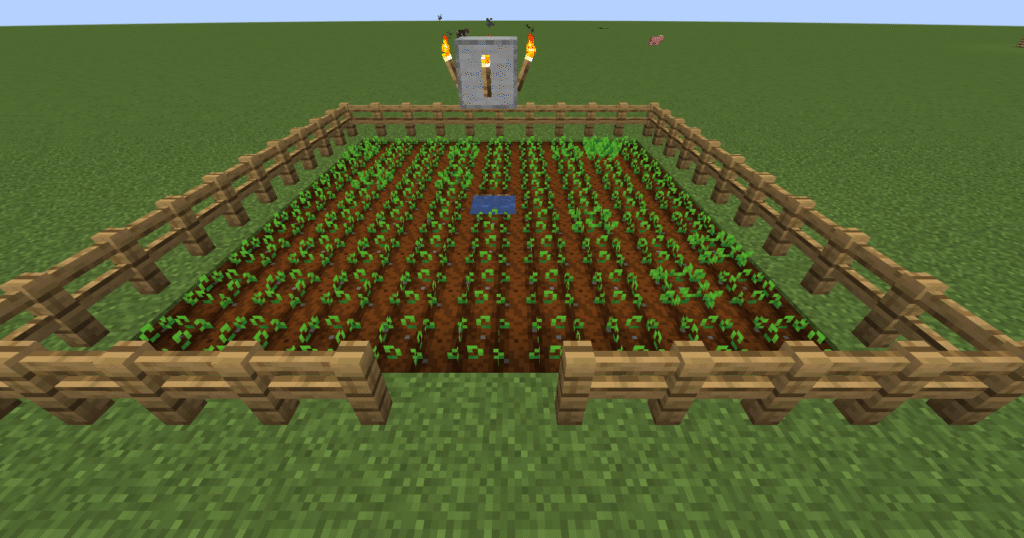
    These are the instructions to build a Minecraft beetroot farm. To grow beetroot it is first essential that you find water. Water will keep the area that you plant your beetroot seeds in to moist and will enable your beetroot to grow faster than if it is on dry ground. Remember to light the area in which the beetroot seeds are planted so that they can grow at night time as well as in the day.

    • Food – food can be eaten by the player to restore the hunger saturation.
    • Crafting – by using the crafting table 6 beetroots can be crafted into beetroot soup.
    • Breeding – beetroot can be used for breeding pigs.
    • Dye – can be crafted into a dye in the crafting table using 1 beetroot.
    • Composting – beetroot can be placed into a composter to make compost.

    To be able to grow beetroots you will need to get beetroot seeds. Here are the ways you can get the beetroot seeds.

    • Beetroot seeds can be got by harvesting from a village.
    • Dungeon chest.
    • Mineshaft chest.
    • End city chest
    • Trail ruins chest.
    • Woodland mansion chest.
    • Can be got from a wandering trader for one emerald.

    Beetroot can be used as a food source for the player. it can be eaten raw and will restore one hunger point and 1.2 saturation. Beetroot can also be crafted into soup using 6 beetroots and 1 bowl. This will restore 6 hunger point and 7.2 saturation. Beetroot soup cannot be stacked so this limits inventory efficiency. Beetroots can be used to breed pigs and will also follow a player carrying beetroots. When feeding to villagers it will take 12 beetroots for the villagers to become willing to breed. When trading beetroot a farmer villager may trade 15 beetroots for 1 emerald. When using for composting their is a 65% chance to raise the level by 1. Beetroot will also produce red dye.


    These are the ingredients and recipes that you will need to build this Minecraft beetroot farm. Please ensure that you have all of the ingredients before you start your build.

    ItemPictureAmount
    Water bucketWater bucket1
    Beetroot seedsBeetroot seeds80
    HoeHow to craft a hoe1
    FenceHow to craft a fence39
    GateHow to craft a gate1
    TorchHow to craft a torch4
    StoneStone block1

    Here we will explain in detail how to build this build a Minecraft beetroot farm in Minecraft. Please follow the instructions carefully.

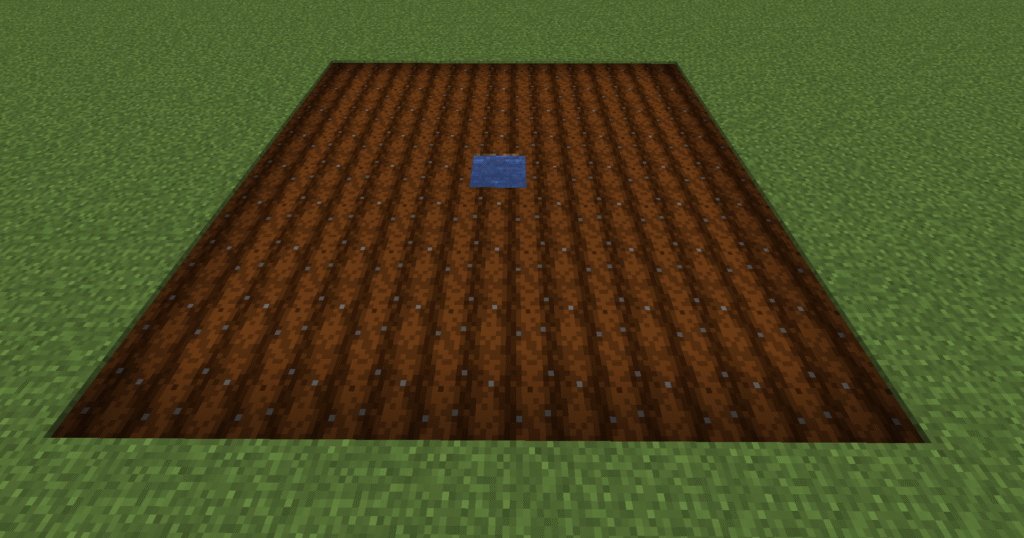
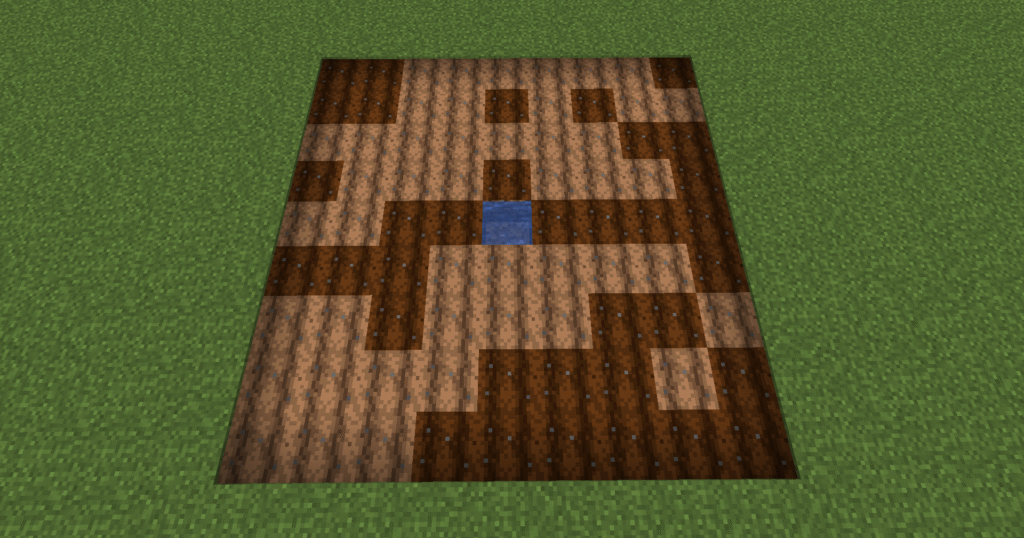
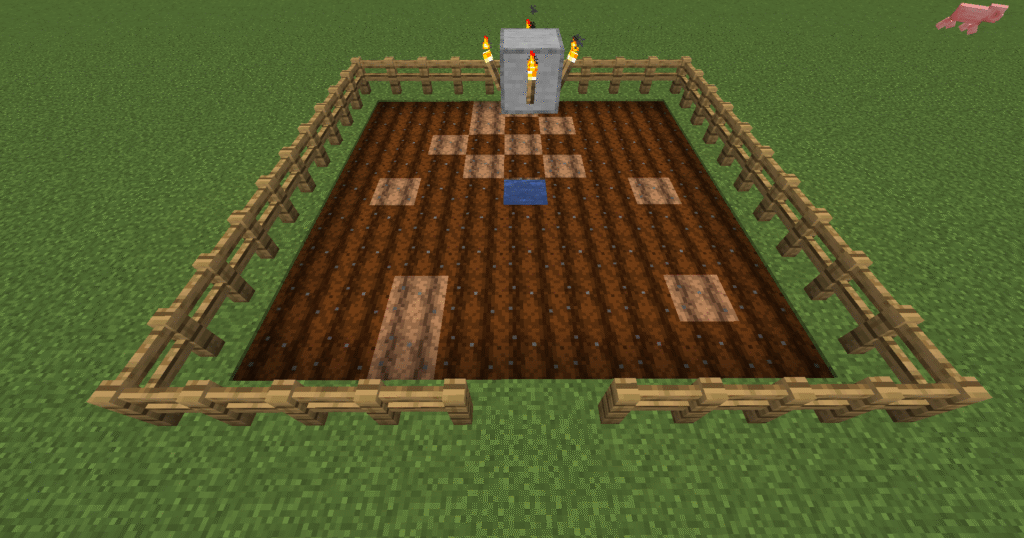
    1. To start this build first you need to first dig a 1 block hole in the centre of the build and place the water bucket in to it.
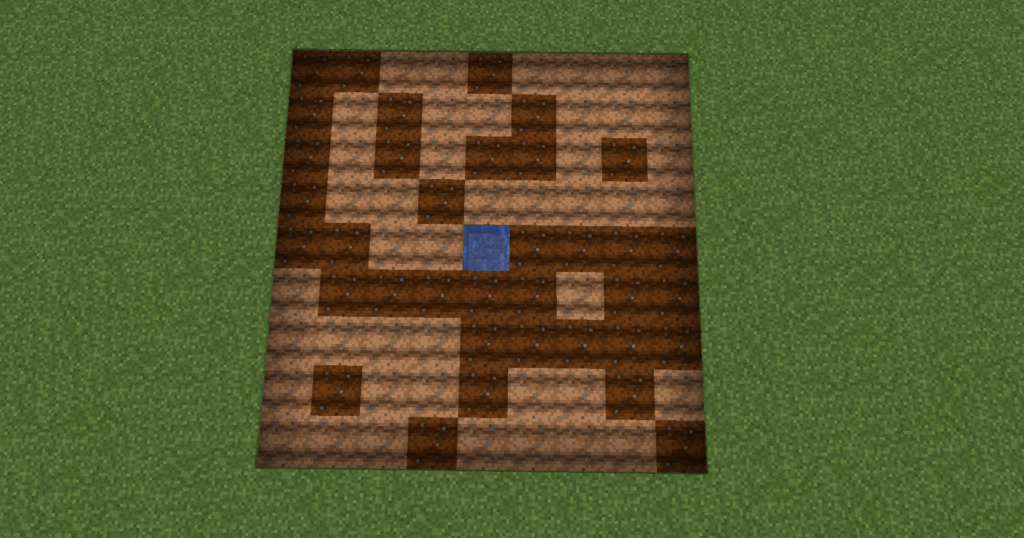
    2. Next hoe 4 blocks out from the sides of the water block and then hoe the area to make a square like in the screenshot shown.
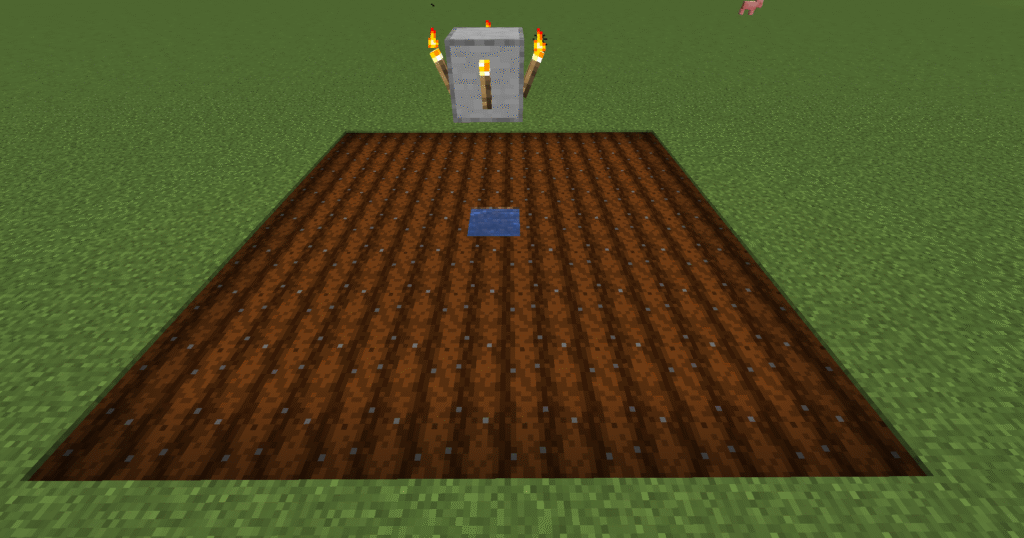
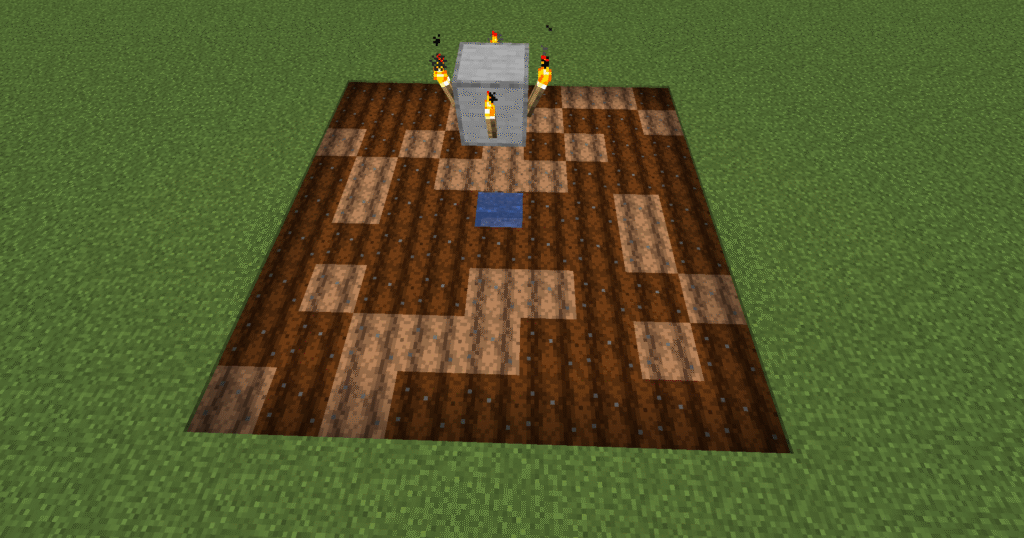
    1. In the next step place a solid block 3 blocks above the water block and place torches on the flat sides of the block.
    2. This will ensure that the crops grow during the night as well as during the day.
    3. This will also prevent mobs from spawning on the crops.
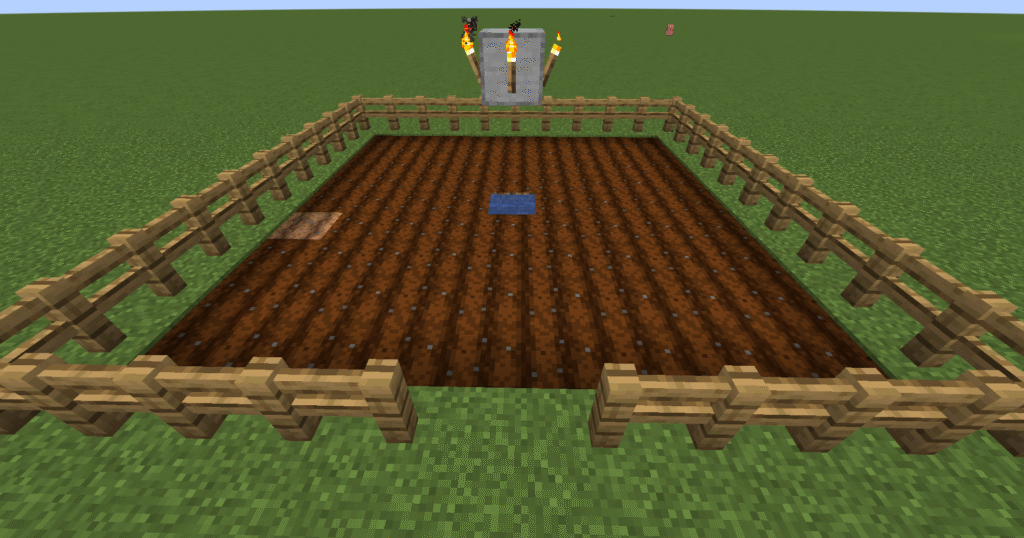
    1. Next lets place fences around the tilled square that we created earlier, leaving a gap for a gate.
    2. This will stop mobs from trampling over our crops.
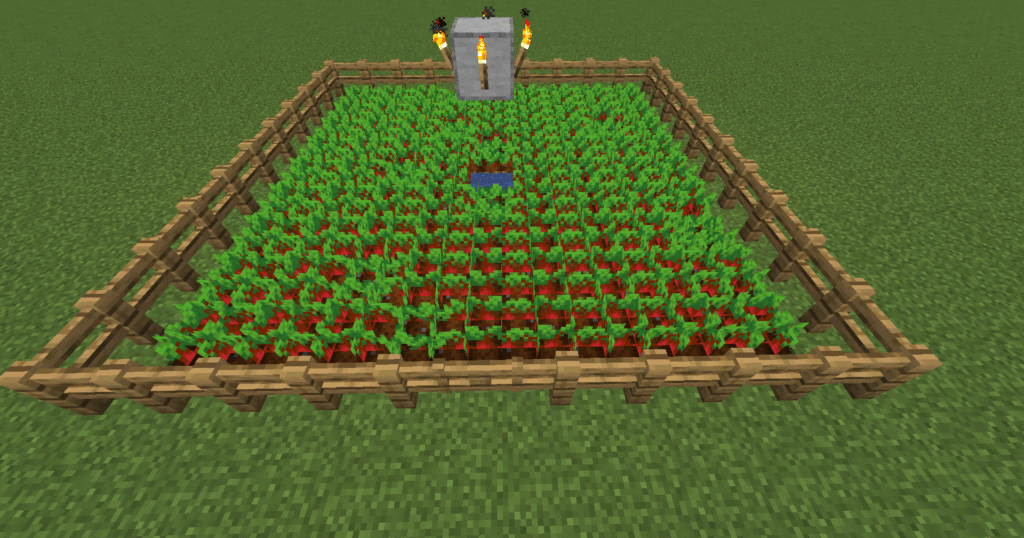
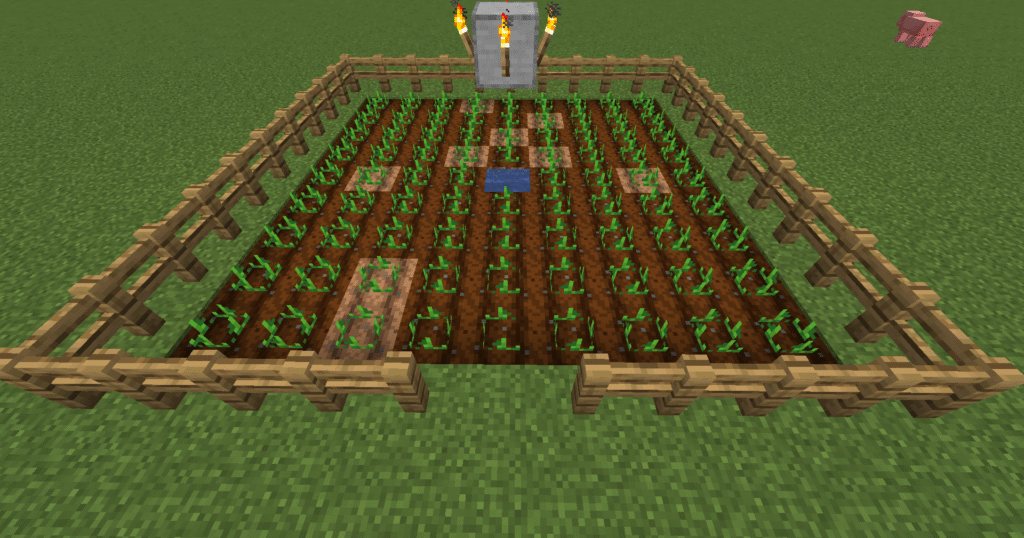
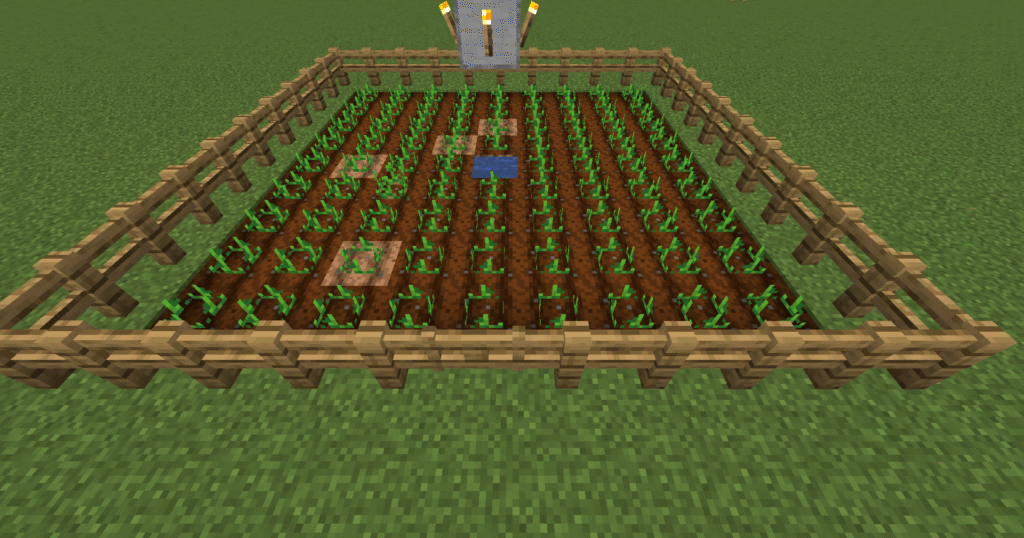
    1. In the next stage we will plant the crops that we are going to grow, in this case beetroot.
    1. The final step is to place the gate in the block that we left earlier and wait for the crops to grow.

    What can go wrong – crops getting trampled.

    • Ensure that there is a fence built around the crops with a gate and ensure the gate is closed.


    How to make this build easier – place 3 blocks in the middle above the water, this will enable you to place the torches on the highest block. You can then destroy the other two.


  • Minecraft potato farm

    These are the instructions on how to build a Minecraft potato farm. This farm produces the potatoes naturally, the only additions that assist in the growing is the the water block that is placed in the middle of the build along with the torches placed on the block in the centre. The player will have to plant and harvest the crops manually.

    The product here is potatoes. Here is a breakdown of what potatoes are used for.

    • Food – potatoes are great food source that can be eaten raw or can be placed in a furnace to make baked potatoes.
    • Breeding – potatoes can be used for breeding pigs and villagers. A villager will need 12 potatoes to become willing to breed.
    • Farming – to get more potatoes you can have a farm that will produce more potatoes.
    • Composting – can also be used for Composting to make bonemeal.

    To grow potatoes you first need to find potatoes to plant.

    • Villages – one of the best places to get potatoes is from a village.
    • Zombies, husks and zombie villager – all have a chance to drop a potato.
    • Chests – you can find potatoes in chests located in pillager outposts and shipwrecks.
    • Trading – farmer villagers sometimes offer potatoes in exchange for emeralds.

    Potatoes can also become poisonous. The poisonous potato can be eaten but it is risky. The poisonous potato will restore 2 hunger points and 1.2 saturation. It does risk a 60% chance of poison two that will last for 5 seconds. This will drain 4 health points. The poisonous potato has limitations in that cannot be planted, baked or composted.


    These are the ingredients and recipes that you will need to build this Minecraft potato farm. Please ensure that you have all of the ingredients before you start your build.

    ItemPictureAmount
    Water bucketWater bucket1
    PotatoesPotato80
    HoeHow to craft a hoe1
    FenceHow to craft a fence39
    GateHow to craft a gate1
    TorchHow to craft a torch4
    StoneStone block1

    Here we will explain in detail how to build a Minecraft potato farm in Minecraft. Please follow the instructions carefully.

    • To start this build first you need to dig a 1 block hole in the centre of the build and place the water bucket in to it.
    • Next hoe 4 blocks out from the sides of the water block and then fill in to make a square like in the screenshot shown.
    • In the next step place a solid block 3 blocks above the water block and place torches on the flat sides of the block.
    • This will ensure that the crops grow during the night as well as during the day.
    • This will also prevent mobs from spawning on the crops.
    • Next lets place fences around the square that we created earlier, leaving a gap for a gate.
    • This will stop mobs from trampling over our crops.
    • The next part of this build is to plant the potatoes.
    • The final stage is to place a gate where we left a space before so that you can easily access your crops to harvest and plant more.

    What can go wrong – crops getting trampled by mobs.

    • Ensure that the gates are kept closed and that there no gaps in the fences.

    How to make this build easier – place 3 blocks in the middle above the water, this will enable you to place the torches on the highest block. You can then destroy the other two.


  • Minecraft carrot farm

    These are the instruction for building a Minecraft carrot farm. This is a very simple build and it would be ideally be built at the start of the game. The carrots are grown naturally the only addition that makes them grow faster is the addition of torch’s and a water block which will enable the crops to be in the light and watered at all times. This is a player orientated farm and the player will have to plant, grow and harvest the crops.

    The product of this farm is carrots here’s a breakdown of what carrots can do.

    • Food – carrots are a food source for the player.
    • Breeding – carrots can be used for breeding pigs, rabbits an d villagers.
    • Growing – carrots can be planted to grow more carrots. Each carrot drops between 2 and 4 carrots when harvested.
    • Crafting – carrots can be crafted with gold nuggets to create golden carrots, which are used to brew potions of Night Vision. Golden carrots also provide one of the highest saturation levels when eaten.
    • Ingredients – carrots are an ingredient in crafting a carrot on a stick, which is used to control pigs when riding them.

    To grow carrots you will first need to obtain carrots. These can be found at the following places.

    • Village farms – players can harvest from village farms.
    • Zombies – have a chance to drop carrots.
    • Shipwreck supply chests – will sometimes contain carrots.
    • Dungeon chests – will sometimes contain them.

    These are the ingredients and recipes that you will need to make this Minecraft carrot farm. Please ensure that you have all of the ingredients before you start your build.

    ItemPictureAmount
    Water bucketsWater bucket1
    Carrotscarrot80
    HoeHow to craft a hoe1
    FenceHow to craft a fence39
    GateHow to craft a gate1
    TorchHow to craft a torch4
    StoneStone block1

    Here we will explain in detail how to build this build a Minecraft carrot farm in Minecraft. Please follow the instructions carefully.

    1. The first stage of this build is to dig a 1 block hole and then fill it with water.
    2. This will ensure that your farm is permanently watered.
    1. In the next stage we create the section where the carrots will be planted.
    2. To complete this section you need to hoe the ground 4 blocks out from the flat of the water block in all directions.
    3. Then hoe the gaps to create a 9 block x 9 block square.
    1. Ok, so lets now place some fences around this patch.
    2. This will ensure that no mobs can enter this area and damage your carrots.
    3. Remember to leave a 1 block gap in the fence.
    1. Ok, lets light this up.
    2. We need to put a stone block (any block will do) above the water block, leaving a gap between the water and the block.
    3. Place a torch on each side of the block. The reason for this is two-fold, the one reason is that the area where the carrots are will be lit permanently meaning that the carrots will grow in the night as well as in the day.
    4. The next reason is that it will stop mobs spawning in the area.
    1. In this stage of the build we plant the carrots and then watch them grow.
    1. The final stage, we need to place the gate in the gap that we left earlier. The carrot farm is now completed.

    What can go wrong – trampled crops

    • The only thing that can go wrong with this build is if you do not enclose the crops properly and mobs walk onto them and crush them


    How to make the build easier

    • To make this easier to build if you place down three blocks over the water and then destroy two of those so that you have the block to place the torches onto.

  • Minecraft wheat farm

    This is a simple Minecraft wheat farm to produce wheat but that will have to be done completely by the player. To get wheat to grow at its quickest, it is essential to plant them near to a water source. Once you have located a water source (or made a water source), you will need to hoe out from the water source then you can plant the crops. Also for best results ensure that there is a light source close by as this will mean that the crops can also grow at night as well as in the day. This can be just a couple of simple torches.

    To make this farm we will plant seeds manually and let them grow naturally. We will also have to harvest the wheat ourselves once it is fully grown.

    Wheat can be used for the following things:

    1. Food – wheat is used for cows, sheep, goats and mooshrooms. When holding wheat in your hand all of these animals will follow you and you can place them in a pen as a source of continuous food and for breeding.
    2. Breeding – wheat can be fed to cows, sheep, goats and mooshrooms to encourage breeding.
    3. Healing – wheat can heal a horse 1 health or lower its temper by 3% when attempting to tame it. It can also decrease the time it takes for a foal to grow by 20 seconds.

    To make wheat we first need to get wheat seeds. These are got from breaking long grass which will drop the seeds. They can sometimes be found in chests in villages or from harvesting wheat in a village farm. Always replant a village farm in case you need to raid it again.


    These are the ingredients and recipes that you will need to make this Minecraft wheat farm. Please ensure that you have all of the ingredients before you start your build.

    ItemPictureAmount
    Water bucketWater bucket1
    Wheat seedsWheat seeds80
    HoeHow to craft a hoe1
    FenceHow to craft a fence39
    GateHow to craft a gate1
    TorchHow to craft a torch4
    StoneStone block1

    Here we will explain in detail how to build this Minecraft wheat farm. Please follow the instructions carefully.

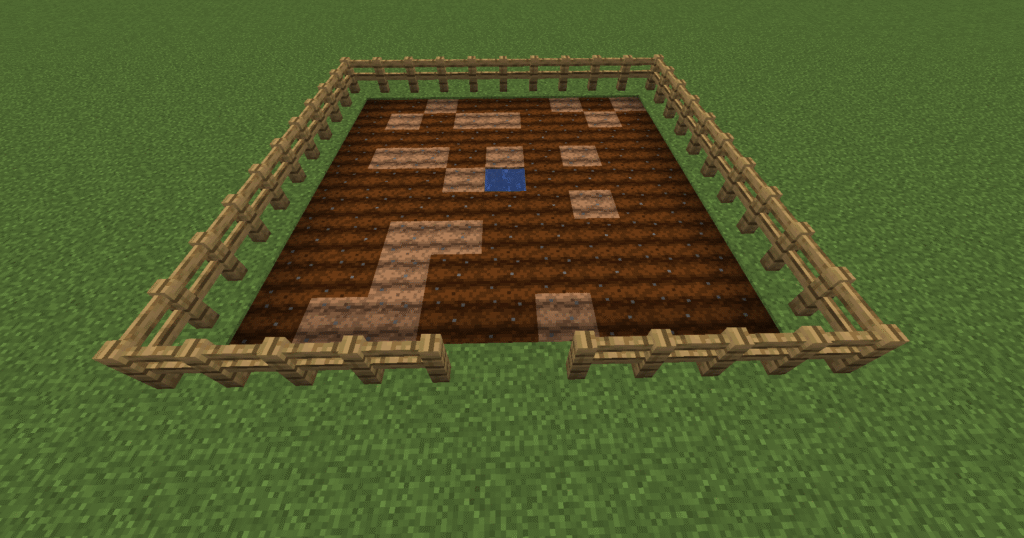
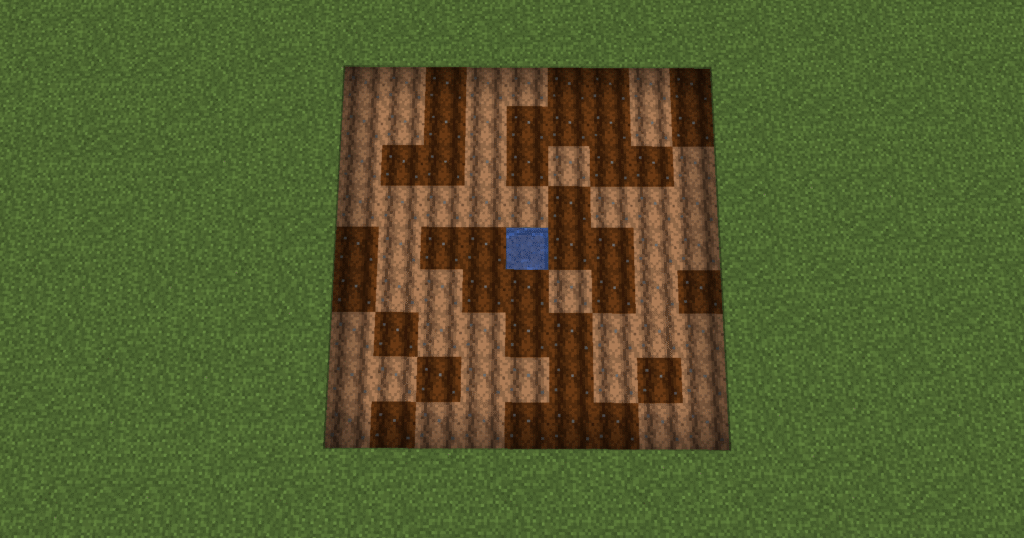
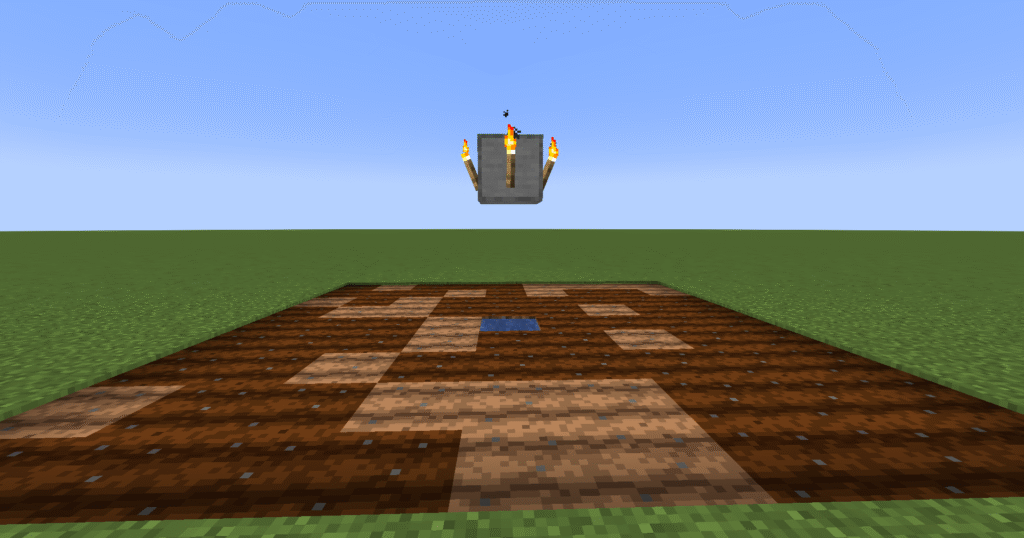
    1. The first step of this build is to dig a 1 block hole and place a bucket of water into it.
    2. From the sides of this block take your hoe and hoe 4 blocks out and then continue to fill out to create a square.
    3. It should look like the picture, the different colour blocks show where the water is already reaching.
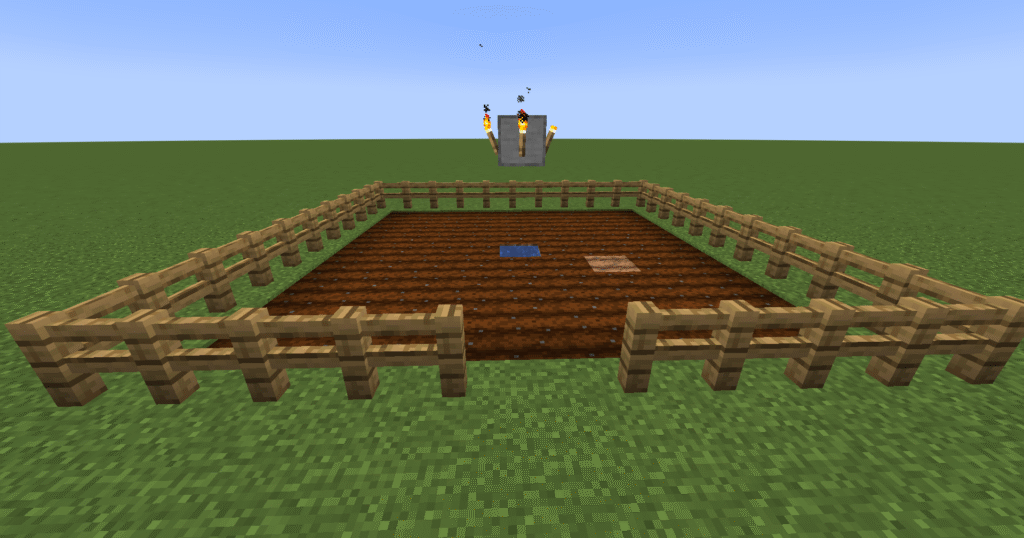
    1. Here we need to place a block of any description (I’ve used a stone block) 2 blocks above the water block and place torches on each of the four flat sides.
    2. This is for 2 reasons, the first one is that it will stop mobs spawning on our new farm layout.
    3. The second reason is that it will enable the crops to continue to grow at night.
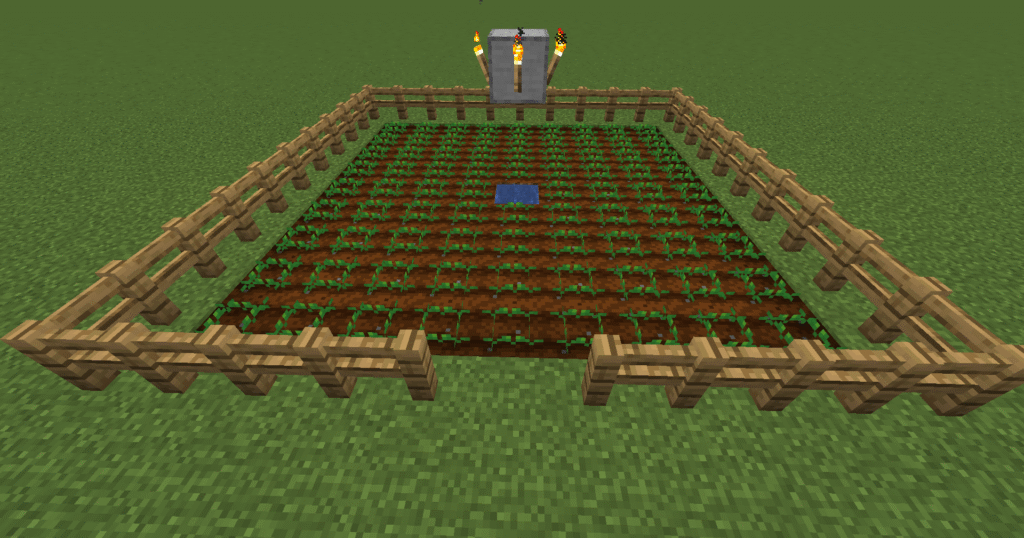
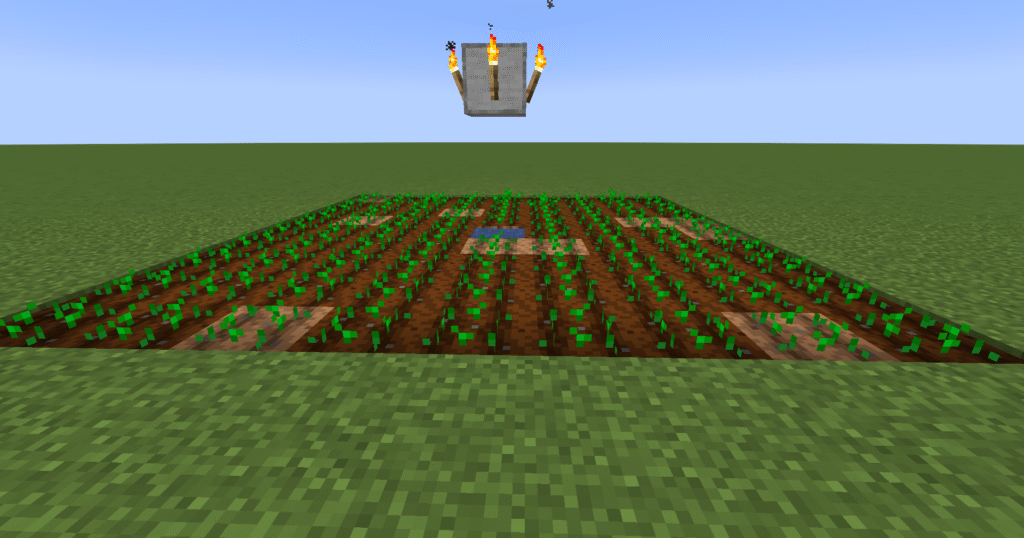
    1. Then we need to plant the crops.
    2. Crops can grow on their own or you can use bonemeal on them to make them grow faster.
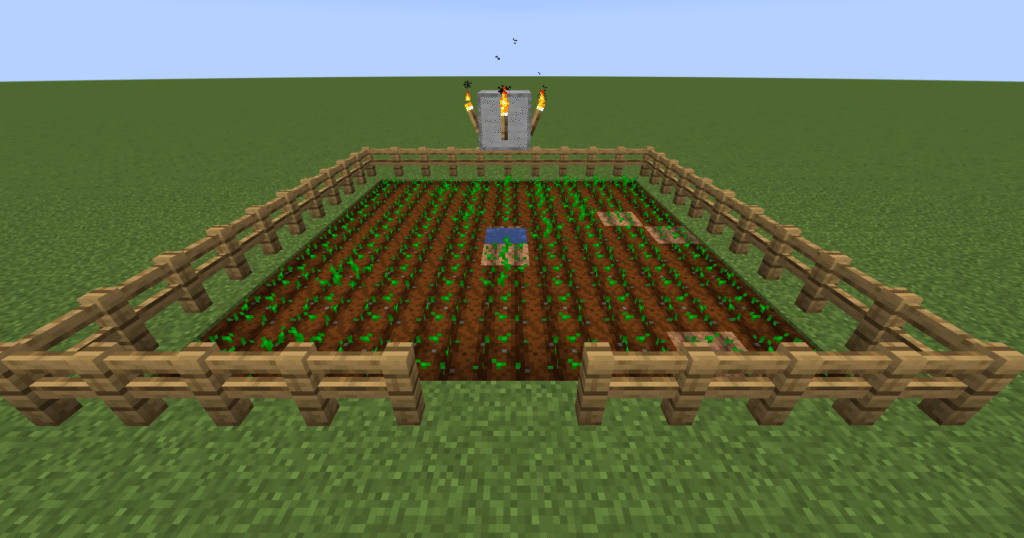
    1. The next step is to place fences all around the farm. Please ensure to leave one block free for a gate.
    2. The fences will mean that mobs cannot just wander around your wheat and destroy it. You don’t want to come to harvest your crops and find half of them missing or your water leaking everywhere.
    1. Next place a gate on the block that we left free earlier. This will enable you to be able to get in and harvest and replant your crops easily.
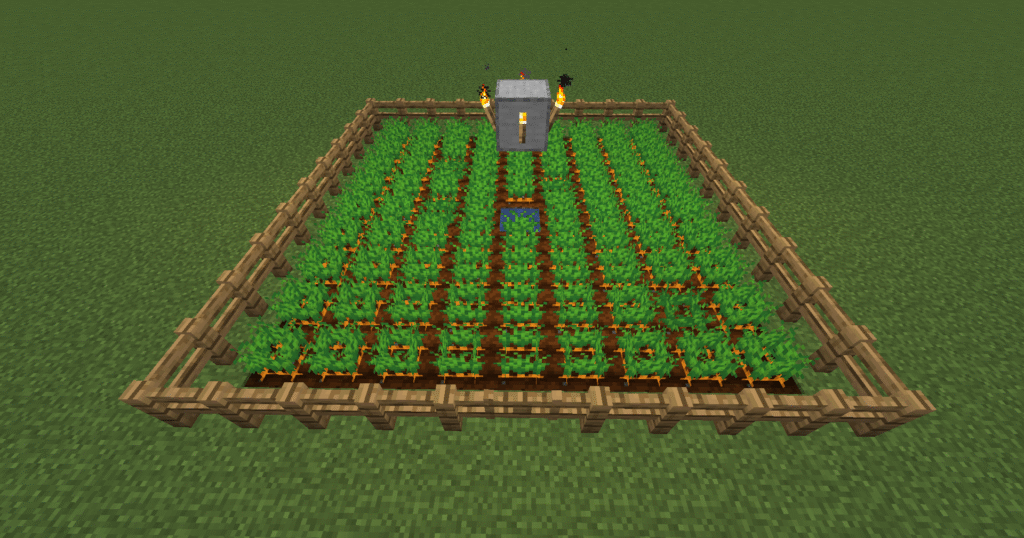
    1. Here is the finished build ready to be harvested. You will be able to harvest wheat yourself.
    2. You will also receive more seeds enabling you to replant.

    What can go wrong – crops getting trampled.

    • Ensure that there is a fence built around the crops with a gate and ensure you close the gate whenever you enter or leave.
    • Ensure the light source is adequate to stop mobs spawning inside your farm.


    How to make this build easier – place 3 blocks in the middle above the water, this will enable you to place the torches on the highest block. You can then destroy the other two.

    How to make this build easier – If you place a composter close by and place any extra seed into it you will eventually receive bonemeal which can be used to make your wheat grow quicker.